Burek
Detailed recipe for burek, delicious Balkan phyllo dough pie with a filling. (Specifically, this is the typical Bosnian burek stuffed with meat and potatoes.) You can use this phyllo dough recipe for any type of burek (pie or pita).
Equipment
- Working space (A table, island, or a space that's at least 3x3 feet (1m x 1m), with room to walk around it.)
- 100% Cotton tablecloth (Larger than your working space, to protect it, used only for dough making. Clean and ironed.)
- Rolling Pin (Long and thin if you plan to use it exclusively, or a regular baking pin if you want to use your hands more.)
- Saran wrap (Plastic or cling wrap.)
- 3-4 Kitchen towels (Clean and fresh.)
- 2 Round pans sized approximately 10-inches and 15-inches in diameter (or 27cm and 38cm). (Rectangular pans are fine too. Play around with sizes.)
- An apron
- Baking pans (Preferably a round one that's about 13-15 inches (34-38cm) in diameter, plus a rectangular one.)
Ingredients
Dough (Jufka):
- 21-22 ounces all-purpose flour, plus more for dusting regular white flour works best, use a brand new bag
- 1-1.5 teaspoons salt
- 3 tablespoons sunflower or vegetable oil or coconut oil (fluid), or butter (melted)
- 12.5-13.5 ounces warm water approximation, it may be a little more
- more oil few ounces for greasing the dough throughout
Filling (stuffing):
- 18 ounces ground beef or finely diced beef
- 20-22 ounces Russet or yellow potatoes peeled, diced or grated (juice squeezed), weighed after dicing
- 1 yellow onion medium, grated or minced
- 1 teaspoon salt
- 1 teaspoon pepper
- 1 tablespoon vegetable or sunflower oil or coconut oil (fluid)
- 1-2 ounces warm water
Topping:
- 3 tablespoons butter or oil
- 2 cups water
Instructions
Preparation
- Wash your hands and arms up to the elbows. Take off all hand jewelry (rings, bracelets, watches, etc.), and tie up your hair. Finally, get your apron on.
Kneading phyllo dough
- In a large mixing bowl combine flour, salt, and oil. Start working the flour into dough by adding a little bit of water at a time, and kneading the ingredients. Keep adding water slowly while you fold, press, knead, push and punch the mixture (just as if you were making bread or pizza) for about 2-3 minutes. It’s best if the dough is a little wetter to the touch (stickier), at first. This is achieved by adding more water into the flour at first. (Avoid making a dough ball, and then adding more water to soften it.) Once you form a cohesive, messy, wetter, dough ball with your ingredients, wash and dry your hands.
- Now continue to knead the dough ball vigorously, with all your strength, for an additional 8-10 minutes, even 15 minutes if you can. (Time it if you must!) You can knead it in the bowl, or on a working space dusted with flour. As you work it, the dough will firm up but stay smoother overall. If it’s too sticky, dust small amounts of flour back in as you knead, until you reach the right consistency.
- The ease of the remaining process depends on how well you do this first part. Well kneaded dough ball will be smooth, elastic, and have the consistency of an earlobe.
Resting the dough the first time
- Once you achieve the right consistency, dab the dough ball with oil generously, on all sides. Cover in saran wrap, and then with a kitchen towel. Leave it to rest for at least 60 minutes in a relatively warm space.
Stuffing preparation
- In a large bowl, combine the filling ingredients. Mix well with your hand until integrated. Divide the stuffing into 3 parts, one for each dough ball (the big dough ball gets divided in the next step). You can leave it in the same bowl, or in separate ones.
Dividing and resting the dough again
- Uncover and transfer the dough ball onto your working space. Cut it into three equal parts. (You can weigh them if you wish.) Lightly dust them with flour and knead each for 2-3 minutes. Shape each part into a smaller dough ball, and place it on a tray.
- Dab the balls with oil generously. Again, cover each first with saran wrap, then with a kitchen towel. Finally, leave them to rest for at least 15 minutes.
Rolling out and resting the dough the third time
- Uncover the first dough ball. Transfer it to the working space lightly dusted with flour. Punch it gently to flatten it a bit. Then take the rolling pin and roll it out until it's about 10-12 inches (25 cm) in diameter. Repeat this with the other two balls.
- You can leave the flattened dough balls on the working space or place each on a separate tray. Dab each with oil on both sides. Once more, cover with saran wrap and then a kitchen towel. Let them rest for the final 15 minutes in a warm space.
Choosing a stretching method
- This is the time to choose whether you'll stretch the dough with the long rolling pin (as demonstrated in the video below), or the short rolling pin and your hands (as demonstrated in photographs in the article). If stretching with the rolling pin, you'll need the super thin, long rod type of rolling pin called oklagija. A regular short, fat, rolling pin will not work for this method.
Method 1 - stretching the dough with hands
- Dust your working space generously. Gently lift the first flattened dough ball. Let it hang for a few seconds so that it weighs itself down and stretches. Do this for all sides by moving the dough with your fingers like a steering wheel. Now transfer it to your working space and dab it with 1-2 tablespoons of oil (or butter). (If the dough has rested well, it will immediately stretch a lot.)
- Take a hold of the dough on the left and right edges. Spread your arms gently, stretching the dough further in the process. Then do the same on the top and bottom sides. You'll now have a big circular dough shape that's thinner on the inside and a little thicker on the outside edges. You can lightly lift it, and wave the dough in a motion similar to draping the tablecloth over the table to stretch it further. Now continue to stretch it with your hands.
- Move your hands (knuckle side up) under the dough gently, and continue stretching it by pulling it toward yourself. Pull in slow movements, and walk around the table (and the dough), pulling it on all sides a little bit at a time. Stretch the dough little by little, by walking in circles several times. It should be equally thin everywhere by the time you're done. The middle of the phyllo and the sides should be equally stretched.
- Continue to stretch until the dough is of the thinness of cigarette paper. Additionally, if at some additional point(s) during stretching you feel the dough needs more oil, dab it in again, 2-3 tablespoons at a time. Finally, as you're spreading the dough, shape it into a large rectangle or a circle.
- Try to avoid rips and holes as much as you can. If they do happen, work around them, or try to patch them by lightly pinching them together. (If the dough keeps ripping in a big way, read the article. You may have to start over!)
- Note: if the dough has rested enough and you kneaded it well in the first steps, it's possible it will stretch even several inches beyond the table.
Method 2 - stretching the dough with the oklagija rolling pin
- Transfer one flattened dough ball onto the working space and roll it out with oklagija until it's (approximately) the thickness of a couple of stacked pennies, and the size of a huge pizza. Lightly dab with 2-3 teaspoons of oil (or melted butter), and drape over the middle of the rolling pin. To do this, dust the rolling pin with flour and position it in the middle of your dough (as if you were measuring its diameter). Then drape one side of the dough over the rolling pin, and lift everything up. The dough should hang equally on both sides.
- Let the dough weigh itself down on the rolling pin for several seconds. Now turn the dough around 45 degrees and let it weigh itself down on this side as well. Then, slowly and carefully start stretching the dough even further with the tops of your hands (knuckles), as far as it will go. Work ends and the middle equally, and move towards where the phyllo is thicker, so you can thin it out.
- Try to avoid rips and holes as much as you can. If they do happen, work around them, or try to patch them by lightly pinching them together. (If the dough keeps ripping in a big way, read the article. You may have to start over!)
- Gently transfer the dough to your working area and continue stretching it out as much as it'll go. The dough should now be coming close to the thinness of cigarette paper and the size of a super large circle (or an ellipse). If at some point(s) during stretching the dough needs more oil (or butter), dab it in again, 2-3 tablespoons at a time. (The dough needs to be well-oiled, but not "swimming" in oil at all times.) Finally, shape the dough into either an approximation of a rectangle or a circle (look at the stuffing methods).
- Note: if the dough has rested enough and you kneaded it well in the first steps, it's possible it will stretch even several inches beyond the table.
Handling dough edges (ends)
- As the dough edges are thicker than the rest of the dough you'll have to take care of this. One way to get rid of the ends is cutting them off with a knife. Only cut about 1 inch or 2 cm all around the dough. (Discard the ends, or combine them with the next dough ball.)
- Another option is to stretch the ends. Lift the ends as you walk around the dough, and stretch them carefully, with your fingers.
- If the dough has stretched over your table and is hanging, you can gently rip the dough ends, being careful not to rip too much dough with it.
Choosing a stuffing method
- While there are many ways to stuff a burek, the most commonly used ones are what we call the rectangle, and the circle. (This is our wording.) The rectangle involves filling up two sides across from each other, and then lifting the tablecloth to let the dough with the filling roll inside. It is easier, but the burek is thicker, and slightly less tasty this way.
- The circle method involves stuffing dough ends all around, and rolling the filling inside as you, again, walk around the dough in a circle. The phyllo ends up being even thinner and tastier. It takes a little more effort, but it's worth it.
Method 1 - stuffing burek phyllo dough the easier way (the rectangle)
- Dab the dough with 2-3 tablespoons of oil.
- Get the filling and set it nearby. Grab batches of this filling with your hands and line the edge of one long side of the rectangle with the filling, about 2 inches (2-3 cm) away from the dough's end. Stuff it evenly. (The filling should be the thickness of about 3-4 fingers.) You should use ⅓ of the filling for this side. Now, starting at the end of any of these two rectangle sides lift the end of the dough and cover the filling completely.
- At this point, slightly lift the tablecloth, and the dough will roll with the stuffing inside. (Give it a little assistance with your hands, if needed.) Once it reaches ⅓ of the way, go to the other side and repeat. You should have two rolls of dough with a dough rectangle in between them.
- Cut the dough rectangle in the middle and stuff and roll it with the remaining stuffing. You'll end up with three long stuffed dough pieces. (Some like to have the two rectangle ends meet, but we find it's too much dough. That's why we cut out that rectangle in the middle and stuff it.)
- Now form the stuffed dough into the shape of choice. (See below!)
Method 2 - stuffing burek phyllo dough the tastier way (the circle)
- Dab the dough with 2-3 tablespoons of oil.
- Get the filling and set it nearby. Now grab batches of this filling with your hands and walk around the dough lining the dough ends with the filling. Stuff it evenly, about 2 inches/ 3cm (or more if the dough is hanging off the table) away from the dough edges. (The filling should be the thickness of about 2-3 fingers.) Starting at any point, lift the end of the dough and cover the filling completely. Do this for the entire dough circle, covering all the filling.
- Start rolling the filling and the dough together. Essentially, you're rolling the dough with the filling toward the middle of the circle for a few inches and then pulling it back toward yourself carefully. (For best results use the same method as before, pulling with the tops of your hands.) Do this at the same pace all around the circle, so that all areas are equally stuffed and rolled. (What you don't want is to roll one side completely, and the other one not having enough dough so the filling is exposed.)
- After a few rounds of rolling the entire dough, it will tear in the middle, or it will have several rips and tears. Keep on rolling the dough until most of the middle is torn. (Alternatively, you can cut it with a knife.) When you decide that all the circle's ends have had about the same amount of dough you can cut the remaining middle dough part out. (You can stuff this part, discard it, or roll it in on a thinner end of your burek.) You should now be left with a large hula hoop-shaped dough stuffed with filling.
- Now form the stuffed dough into the shape of choice. Start by making a cut anywhere. (See below!)
Shaping burek phyllo dough (spiral, rounds, or columns)
- Preheat oven to 450°F (220°C).
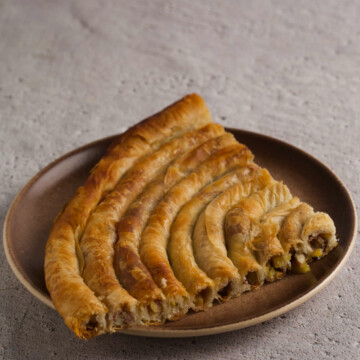
- Shapes most often used for burek are a big spiral, small spirals or rounds, and columns. You can also do a combo.
- Spiral: generously grease a round baking pan. Starting in the middle, circle the burek around itself until you fill the pan up. (If you have more burek left over, make small rounds and bake them in a different pan.) Dab it with oil on top, then bake.
- Rounds: instead of making one large spiral, make a small one (we call these "zvrk" or rounds), and cut it. Proceed to make rounds until you use up all the stuffed dough. Transfer to a generously greased pan and dab the burek with oil on top evenly.
- Columns: generously grease a rectangular pan, and using the stuffed dough, line the pan up and down, as if you're drawing parallel lines out of one big line. Dab the burek with oil on top evenly.
Repeat the previous steps for the remaining 2 dough balls
Baking burek
- If wanting to play it safe, lower the temperature to 400°F (200°C) and bake the burek for 30-40 minutes. (Turn the pan 180° about halfway through baking.) If it starts to blush too much on top, cover the burek with baking paper for the remainder of the baking.
- If you prefer a burek that's more "blushed," continue baking at 450°F (220°C) for 10-15 minutes, then lower the temperature to 400°F (200°C) for the remainder of the baking. (You can turn the pan about 180° at this point.) If it starts to blush too much, cover the burek with baking paper for the remainder of the baking.
- As each oven is different, always rely on your experience. If it's blushing too much, cover the burek with parchment paper and lower the temp. If it's not baking fast enough, up the temperature.
Adding the topping
- A few minutes before the burek is done baking, in a small pot heat up butter and water together. (Butter should melt in hot/ boiling water!) Once the burek is finished, sprinkle it very generously with the water and butter mixture. Then, cover it with a kitchen cloth, and leave it to rest for about 20 minutes.
Serving, storing, reheating, freezing
- See notes for detailed information.
Video
Notes
- Recipe Notes:
- Video:
- Burek Volume Information:
- Stuffing and Stretching:
- Can I divide or double the ingredients?
- Nutrition Information:
- Ingredients:
- Tops of fingers or hands?
- Tear-Free Phyllo Dough Tips:
- Knead for at least 10 minutes;
- Let the dough rest in between steps
- Use a brand new bag of flour each time;
- Add water slowly as you knead/ make dough 'wetter;'
- Stretch with the top of your hands; and
- Free hands of jewelry, watches, long nails, etc.
- Handling Rips and Tears:
- Serving/ Storing/ Reheating/ Freezing:
Tried this recipe?Let us know how it was!