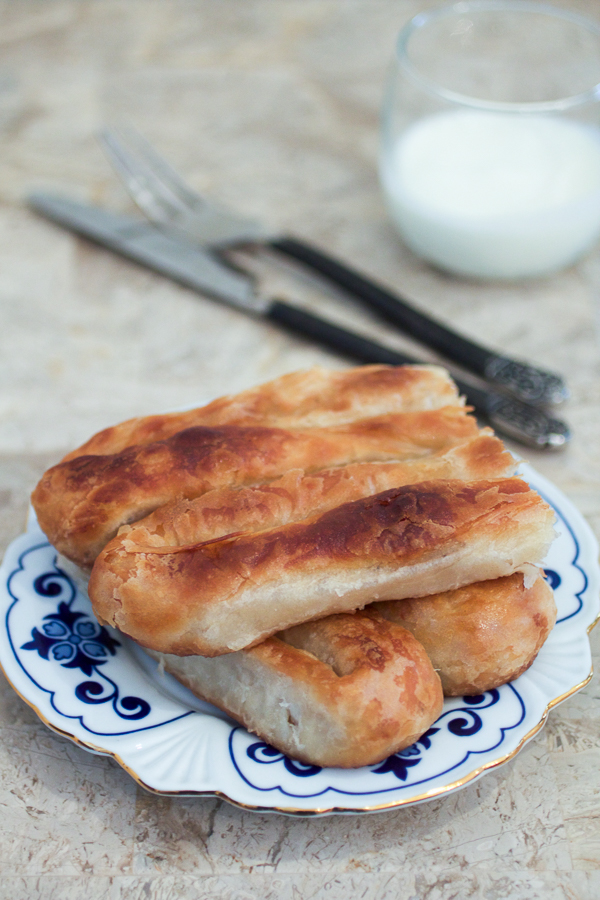
Today we learn how to make phyllo (jufka), and a Balkan potato pie (pita krompiruša) from scratch. Balkan pies are baked pastries with a filling, similar to empanadas, rolls, and pasties.
To fully take advantage of this recipe, and learn how to make homemade, flaky, phyllo dough called jufka, read the entire article before attempting to do it!
First, a quick refresher on pita. It’s pronounced “pea-tah” with a heavy ‘t,’ and is not related to pita bread.
So what is it then? Pita is a widespread traditional Balkan delicacy. It’s a baked pastry, usually not sweet, made out of phyllo dough that’s been stuffed with an uncooked filling and then baked together. The filling is usually made out of veggies, cheese, meat, or a combination.
Meat pita, and meat pita only, is called burek. Other pitas are named after the filling: spinach pie is zeljanica as “zelje” is a word for the greens, while potato pie is called krompiruša as krompir means a potato, etc.
You’ve kind of encountered pita before. Most cuisines have their own versions of similar stuffed pastries. Empanadas. Veggie rolls. Pasties. Calzones. That’s not to say they’re same, but the process is comparable: you stuff the dough and bake it.
A few recipes ago, I gave you an easy way to make pita with phyllo dough from the store. Today we’ll make our own phyllo, also known as jufka (pronounciation: you-oof-kah) in the Balkans.
Jufka does require some practice, but it’s not nearly as difficult as it looks. And it looks impressive! But really, it’s similar to making pizza. The difference is you’ll continue to roll the dough out until it is paper-thin.
What you’ll need to make phyllo dough (jufka) for pita:
- A New Cotton Tablecloth. This tablecloth is to be used while making the dough only. It’ll protect your working space whether it's a kitchen counter, or a table. And it'll make it much easier to roll and stretch the dough. After you're done making jufka, shake the tablecloth outside to get all the flour out, wash and dry it, and store it for the next time. (Note: As you can see on the photos I did not use one here. Big mistake! I was visiting family, and didn’t have one handy and I had already started to work the dough.)
- A Rolling Pin. Balkan cuisine dough making requires a rolling pin called oklagija. It’s looks like a thin, long, wooden curtain rod. If you can’t find one, improvise. New broom handle could work. Sticks too. If you don’t like improvising, you can use a regular rolling pin. Just remember, in this case you’ll have to work more with your hands as the thicker rolling pin will roll the dough out only so far.
- Some Working Space. If you don’t have a kitchen island, or a larger kitchen counter you’ll have to make jufka on a table of some sort. This is when the table cloth (#1) will come in handy in protecting your furniture. Make sure your table is at least 3ft by 4ft or so, and that you have space to move around it.
- Good Flour. The biggest problem people encounter when making jufka dough is that it rips and/ or refuses to roll out. There are three remedies for this. First: always start pita with a fresh bag of dough. I use Gold Medal (no affiliation) and it almost always works well. Second: do a dough test by making a small ball with flour and warm water and stretching it out. If it stretches easily like a piece of gum, you’re good to go. If it keeps ripping, you’ll be better off to try a different batch of flour. Third: once you are done making the dough, dab it with oil and let rest for 30-60 min before you roll it out. (The first and third remedies are very important.)
Additional tips to make phyllo dough (jufka) for pita:
- Remove Jewelry. Take off your rings, watches and bracelets before making phyllo. It’s also better if you have short nails. If your nails are long make sure you’re using your knuckles and tops of hands rather than your fingers while stretching the dough out.
- Have Patience. My first pita ended up in trash. Second too. Yours may as well. But if you keep at it, you’ll be happy you did. Pita is delicious. It’s one of the most comforting foods you’ll ever eat. And making jufka dough from scratch is a skill you’ll be glad to have. It’s like learning to drive a manual transmission car first. Once you get the stick down, driving an automatic is a joke. So after learning how to make phyllo dough, the next time someone offers to make you a bread in a machine, you’ll just chuckle. Making phyllo from scratch will fortify your dough expertise. Also, don’t fret if it takes you three hours to make it the first time. You’ll get faster each time you do it.
- Have Store Phyllo Handy. There is no shame having a box or two of store phyllo in case you fail making dough, but still want pita. You’ll do better next time. This isn’t a competition. I’d rather you eat pita made from store dough than not eat it at all.
Does this sound like too much work? There's always ground beef and potato moussaka!
How To Make Homemade Phyllo (Jufka) And A Potato Pie
Ingredients
- DOUGH
- 2 pounds all-purpose flour plus more
- 1 teaspoon salt any type
- FILLING
- 4-5 large Russet or yellow potatoes
- 1 large yellow onion
- ½ teaspoon salt
- ½ teaspoon pepper
- Oil
Instructions
- Read the article above first. Cover your working space with a tablecloth and dust your hands with flour.
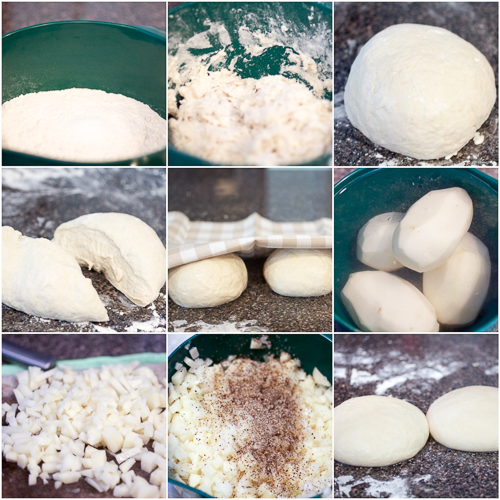
- Combine flour and salt in a mixing bowl. Slowly add approximately 2 cups of warm water and start working the flour. Fold, press, knead, push and punch the mixture. (Just as if you were making bread, or pizza.) Do this vigorously for 7-10 minutes until your dough is elastic, and feels somewhere between dry and sticky to touch. If it’s too sticky add a little more flour to make it less so. If it’s dry add a little more water. When you’re finished kneading, the dough should have a consistency of an earlobe.
- Transfer the dough to your working space. Cut it in half, and knead each ball separately for a couple of more minutes. Dab both with oil, cover with a kitchen towel, and leave to rest for 30-60 minutes.
- Peel and (finely) dice the potatoes. Keep them in cold water to prevent browning. When you’re ready to add the onion, squeeze the diced potatoes, and transfer to a dry bowl. Mince or grate the onion. Combine the onion and potatoes, add salt, pepper and two tablespoons of oil. Mix well.
- Dust your working space generously with flour. Take one dough ball and knead it again for a minute or two. Follow A or B directions depending on the type of a rolling pin you have.
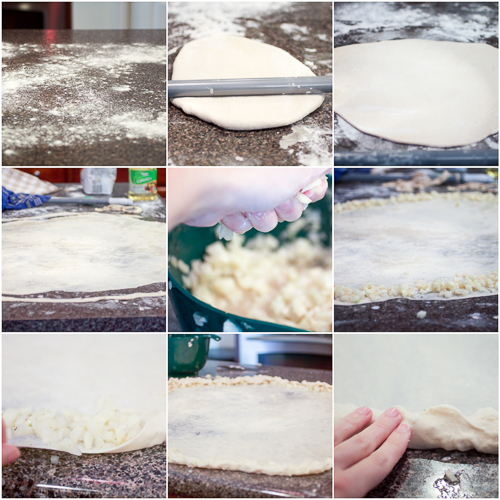
- (A) If you have a thin rolling pin, aka oklagija, you’ll be able to roll the dough out quite a lot before working it with your hands. Roll the dough out on the working space until it’s the thickness of one or two stacked pennies, and the size of a large hula hoop.
- (B) A regular, thick rolling pin will get the dough down only to the size of an extra large pizza. Once you roll the dough out as much as it will stretch, dab with oil lightly, and drape it over the pin. Lift the pin up, and let the dough weigh itself down. After it’s stretched out as much as it will under its own weight, turn the dough 45 degrees on the pin so it stretches on the other side as well. Patch up any rips by pinching the dough together. Now comes the challenging part. With the tops of your hands carefully take the dough off the pin and drape over one arm. Continue stretching the dough by pulling the dough ends with the top of the opposite hand. The pull is a slow, light and patient motion outward. If the small rips occur, patch them up and continue. Continue this all around until the dough is about the thickness of one or two pennies stacked together, and the size of a large hula hoop. Transfer onto your working space.
- (From here directions are the same for A and B) Dab the dough with oil lightly and continue stretching the dough out with your hands a little bit more. Do that by slowly lifting the dough ends and then pulling the dough toward yourself. Again, try to avoid rips, but if they happen, just patch them up the best you can. As you are stretching it out, walk around the working space so the dough is even on all sides.
- Cut one inch of dough ends with a knife. Discard. Grab batches of stuffing with your hands, squeeze the juice out, and start lining the remaining dough ends generously. Make sure to only use half of the stuffing as you have another dough ball to go.
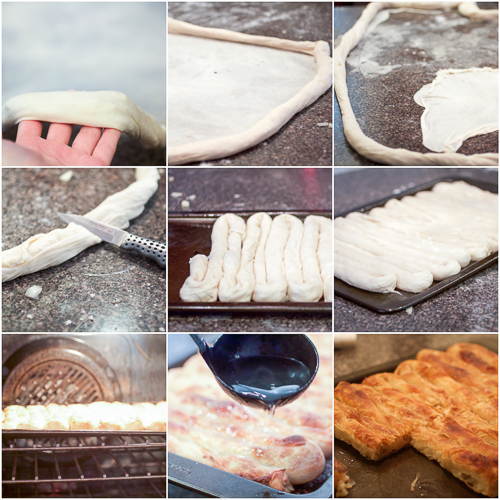
- Wrap the dough around the stuffing by slowly lifting the dough ends and covering the stuffing with it. Make sure to wrap stuffing evenly on all sides by walking around the dough as you are doing it. After covering the stuffing with dough ends, roll everything inward toward the center of the phyllo circle for 2-3 revolutions on all sides. Then lift each part of the dough wrapped around the stuffing, and pull back toward yourself. Your pita will now look like a big hose surrounding a thin film of dough inside. Roll, lift, and bring the dough plus stuffing back a few times. The dough inside the circle will start ripping up. This is fine as all your stuffing is fully rolled in the dough “hose.” Cut the remaining dough from the center, and discard with the dough ends.
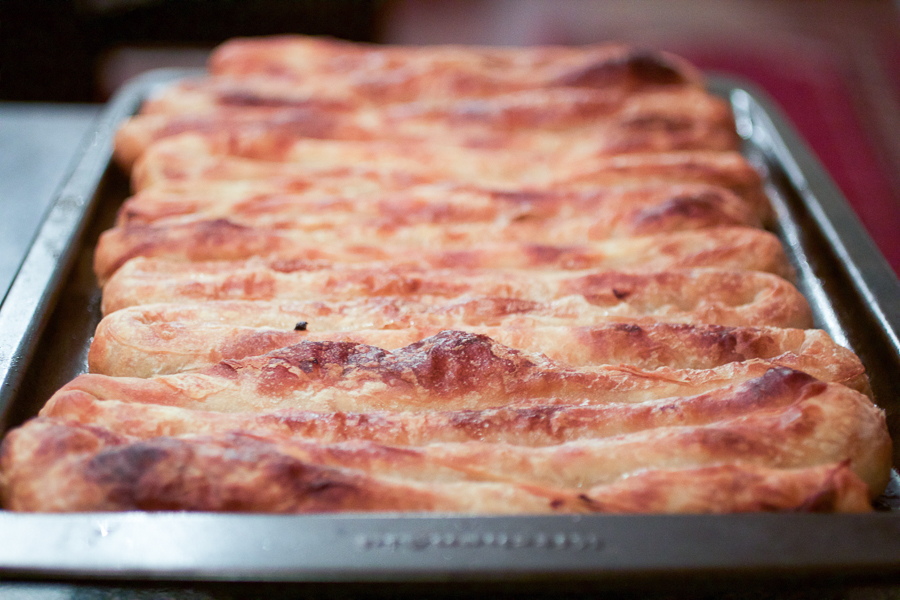
- Cut the dough “hose” in one place, and start lining it into an oiled pan like tight coils. Dab oil on top of pita.
- Preheat oven to 460F. Repeat steps 5 through 11 for the remaining dough ball.
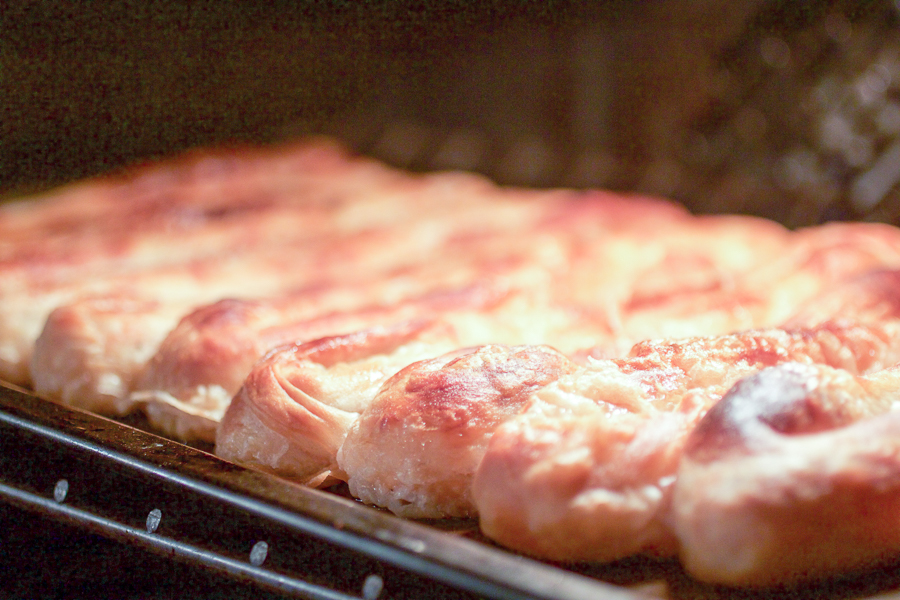
- Place pan on medium rack and bake pita for 20 minutes until golden on top. Lower heat to 375F, and bake an additional 10 minutes. If at any point pita gets too brown on top, cover with foil and bake an additional few more minutes. Turn the oven off.
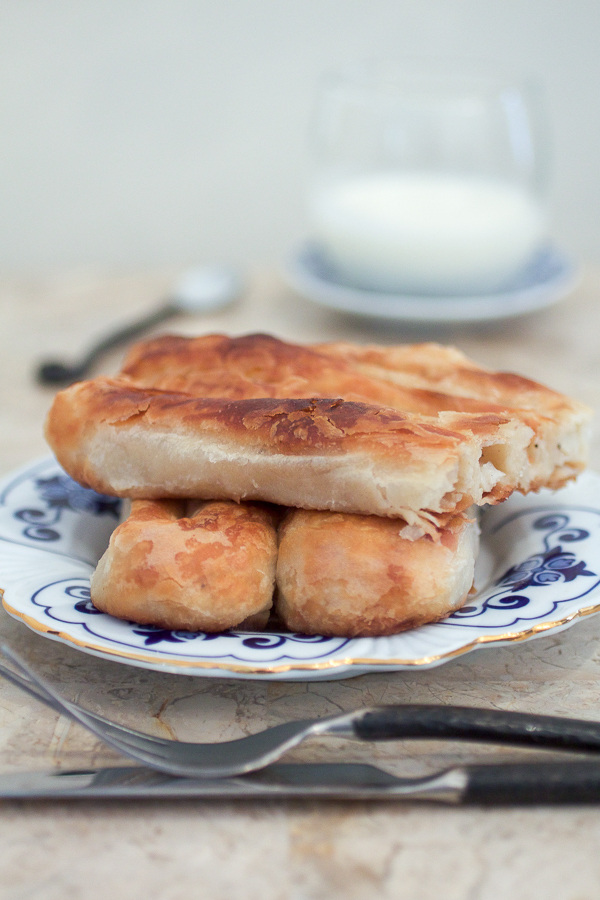
- Boil one cup of water with 4-5 tablespoons of oil. Sprinkle generously over pita. Return to turned off but warm oven for a couple more minutes. Wait a little bit to cool down, cut through the middle, then eat.
Notes
Do not store this pita too long (not that you’ll be able to, I promise) as potatoes don’t store well.
Some people reuse the dough that’s been cut off. I find it’s overworked so I discard it. Avoid working the with fingers and nails to prevent rips.
Nikola says
Lelelele that looks just like my baba's used to; we're all scrambling in our Montenegrin family to replicate the way her jufka/kora was. THe only bad thing about a grandmother's cooking is that there is never any recipe for it!
Aida says
Grandmas are excellent at hiding recipes... or forgetting to include (the most important) ingredient. 🙂 Good luck with jufka/kora, and let me know how it turned out!
Mirsad says
This looks amazing! I was just thinking I wish I'd asked my mum to show me how to make pita. I'll definitely give this a go.
Aida says
Good luck Mirsad! Let me know how it turns out. 🙂
Filip says
Moracu probat da narpavim jufku po taj recept. Pravio sam pitu zeljanicu sa kupojlenom Phyllo ali nije to to.
Filip
Québec, Canada
Aida says
Javite kako vam ispadne! 🙂
Andrea says
After living in Sarajevo for a year, I've been missing pita so much! I can't believe how well it turned out! Thank you so much for the recipe!
Aida says
Andrea comments like yours light up my day! Glad the recipe was able to take you back, and hope you enjoyed your time in Sa. xo
Ann Kovacic says
Awesome!!!
Just a tip for those that use a regular rolling pin. I use a regular rolling pin and not the broomstick type,
once you do the initial roll out you can keep rolling it out by starting from the middle and rolling outwards in all directions to get it to the hola hoop size without stretching it out over your arms - which sounds messy. Great description of how to stretch it out in the air by using the top part of your hands/fists and the soft underside of your finger tips while on the tabletop by gently pulling from the centre outwards. You can roll it up by lifting the table cloth it will roll up guickly and easily.
The cut off dough can be put in a plastic bag and in the fridge to rest overnight...and you can use it the next day.
Aida says
Hi Ann!
Great tips - they'll definitely help some of the readers.
You can use the table cloth lifting method as well for sure. For some pitas I do too.
Thanks for stopping by!