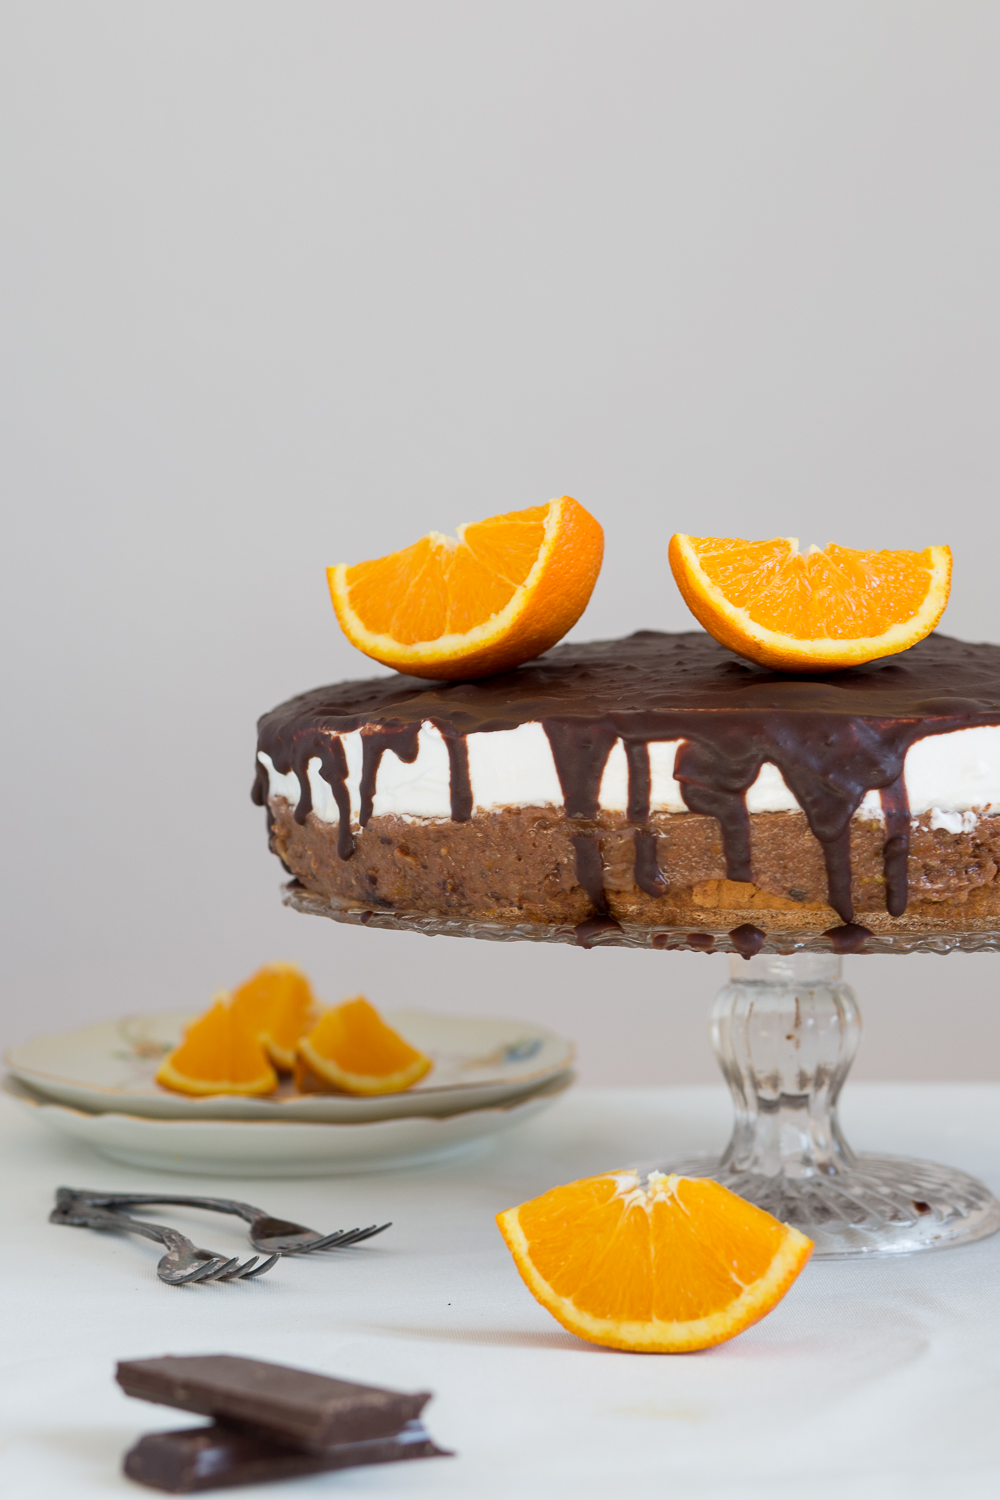
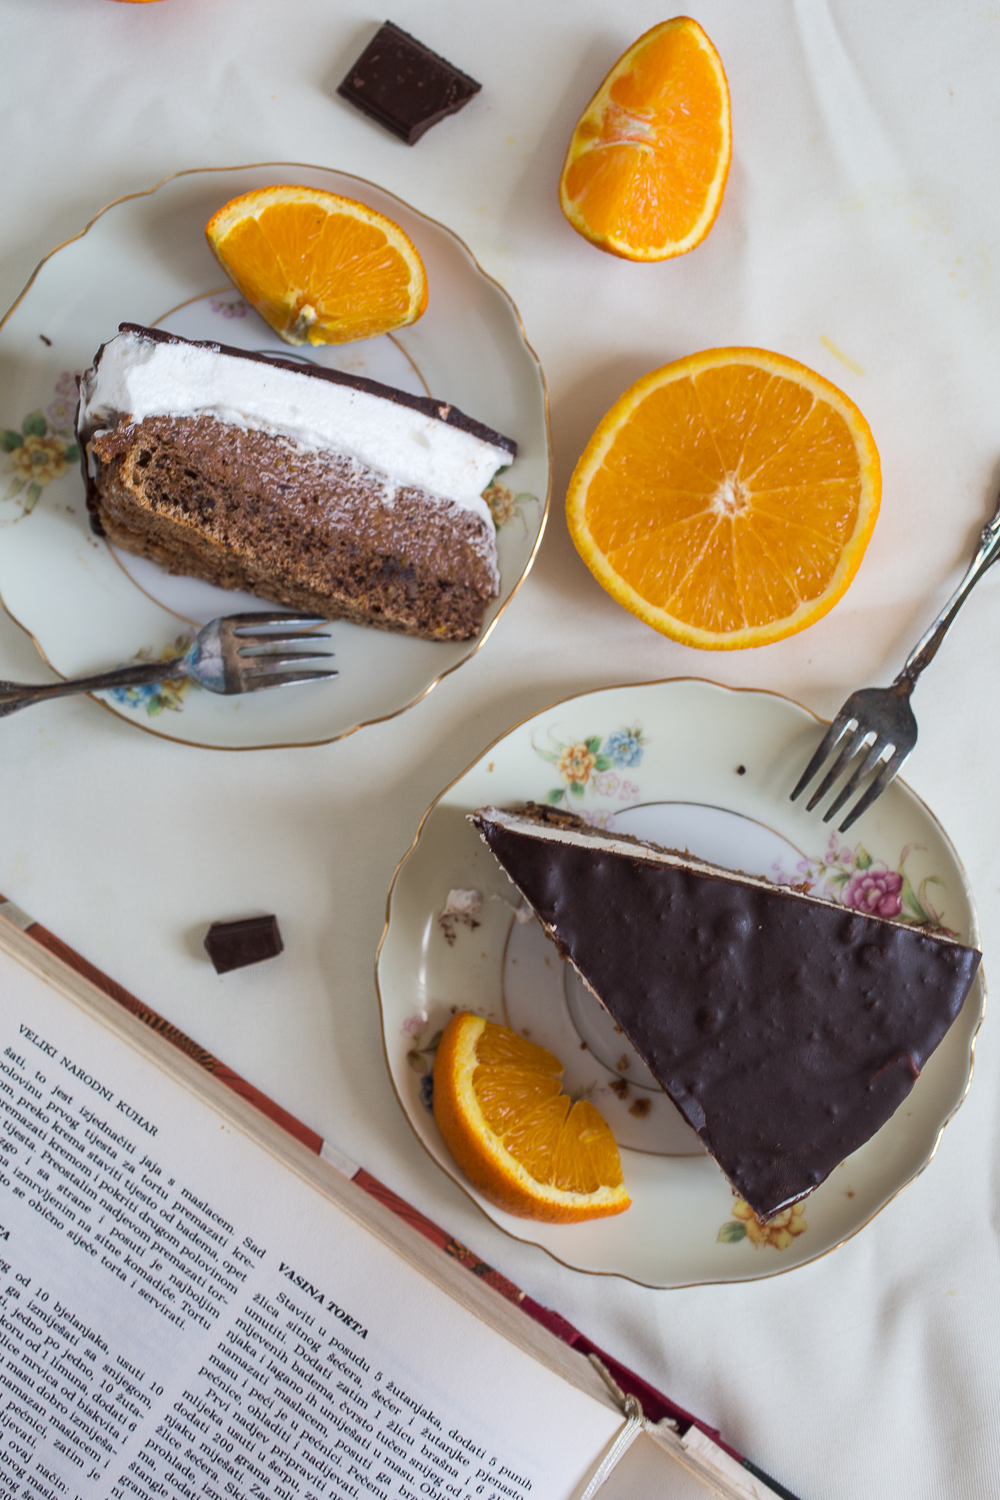
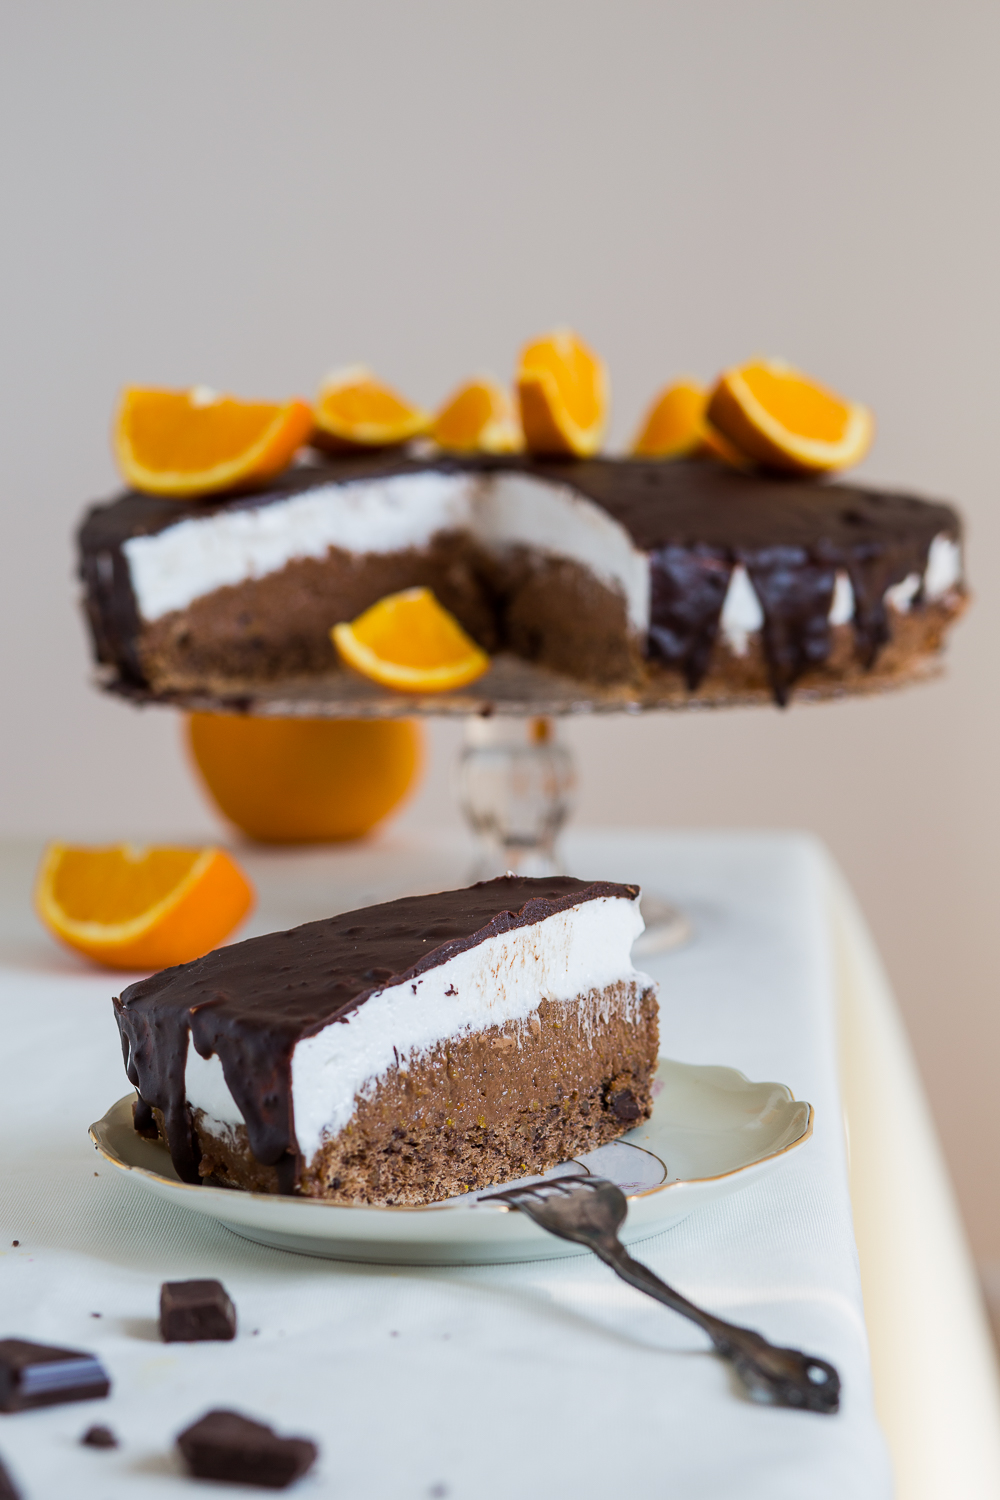
Dark chocolate orange cake with meringue and ganache, also known as Vaso’s cake or Vaso’s torte (Vasina torta) is the best Serbian traditional cake. The cake boasts three layers: a nut-based crust, a chocolate and orange topping, and a topping made entirely out of meringue. Shall we?

Jump to:
Quick Background
Most desserts in the Balkan region are old-fashioned. They require ingredients that were once pricey. (Think eggs, walnuts, butter, et al.)
A lot was at stake, so people judged desserts on their quality. And quality meant rich, filling, and aesthetically pleasing... all at once.
Today’s dark chocolate orange cake with meringue and ganache is no exception. The cake - also called Vaso’s cake or Vaso’s torte (Vasina torta)- is flawless!
I can almost guarantee that it'll become a regular on your Holiday dessert table!
(Btw, a torte is a just type of cake with a few layers. Please note that the terms torte and cake are used interchangeably in the text.)
Why You'll Love This Cake
- If the pairing of dark chocolate, meringue, and an infusion of freshly squeezed orange juice sounds like a dream come true to you, then we've got your dream dessert right here!
- Who doesn't love a fantastic dessert inspired by a real love story? (You can read about Vaso and Jelena below!)
- This orange chocolate cake is a high-quality classic dessert made by the perfect union of citrus and chocolate flavors glazed with a chocolate ganache. The result? A rich and moist slice you won't be able to stop eating.
- Having three thick, colorful layers PLUS a ganache topping, this chocolate orange cake is so beautiful it's as if it came straight out of Alice in Wonderland illustrations.
- After making this chocolate orange cake (which with a little bit of effort and our precise, step-by-step instructions will be super doable!) you will NEVER be intimidated by another dessert again.
Expert Tips For Chocolate Orange Cake Layers
Layer 1:
What's unusual about this chocolate orange cake is that there is only one cake (crust) layer. (Most cakes have on average 2-3 crust parts for layering.) This layer is made with eggs (separately mixed), ground walnuts, sugar, and grated baking chocolate. It's very similar to the cakes we've done before.
Layer 2:
The foundation of this second layer is the sugar syrup and walnuts, eggs, and chocolate. But it's the freshly squeezed orange juice mixed with orange zest (which helps turn the flavor citrus-y), that gives this cake that wow factor.
Layer 3:
Classic Italian meringue forms the third layer of our chocolate orange cake. You may remember that what makes this meringue different is the addition of sugar syrup to egg whites whipped into soft peaks.
If meringue scares you I found a website with great tutorials for every kind of meringue you can imagine. I find it helpful to think about it this way: at its most basic, meringue is just egg whites, a pinch of salt, and a mixer.
Layer 4:
Most people use a portion of the meringue to plaster cake sides with a nice snowy finish. But my source, Jelena, insists this chocolate orange cake was best when the fourth and final layer was made entirely of dark chocolate, for the Jaffa effect.
(Jaffa is a type of cookie biscuit topped with (artificial) oranges and chocolate.) Chocolate is poured on top of the cake and left to drizzle on the sides, leaving a perfect window into layers one, two, and three. It's pure magic!
Other Tips
Get a Baking Buddy! Even if you are an experienced baker, give yourself at least three hours the first time you make this orange chocolate cake. (No worries, the layers don't take an hour each. It's just that there are waiting periods in between.)
Don't Skip the Wait! The first cake layer needs some time to cool off after baking. Parallel to that, it's best if you leave the orange layer in the fridge for 30-45 minutes. You'll have an easier time spreading it over the cake layer after it's toughened. Also, these two should really integrate in the fridge together for at least an hour or two before you make the meringue.
Practice Restraint! I found this chocolate orange cake tastes best a couple of days after you make it. If unable to wait that long (who has the time?), at least promise me you'll give it a solid "sleepover" in the fridge. You must!

Love Story Behind Vaso's Cake
We can't know for sure how much of this story is fiction and how much isn't, but I'd like to think it's all a true story. I’ve picked up the pieces via several online sources, so forgive me if I don’t get all the details right.
At the beginning of the 20th century there lived (in a small Serbian town of Paraćin), a handsome man named Vaso Čokrljan. A longtime bachelor, Vaso's marital status was for many years the main topic of town gossip.
What a surprise it was to everyone to hear that at the tender age of 41 Vaso finally married! The lucky lady in question was Jelena, who'd later describe Vaso as gentlest and kindest of husbands.
When Jelena was pregnant with their child, local doctors informed them she probably wouldn’t survive giving birth. Vaso was devastated.
Sparing no expense he traveled to Vienna with Jelena so she could see the best specialists. Both Jelena and their baby girl survived.
After recovering in Vienna, they returned to Paraćin. To celebrate their triumphant return, Vaso’s mother-in-law organized a huge celebration. She made many regional delicacies, but the main attraction became a special cake she created in honor of her son-in-law.
This three-layered cake boasted the best region had to offer (different types of nuts, meringue, and eggs), and was paired together with a citrus orange flavor. These ingredients (oranges especially), were expensive and difficult to procure, so this wasn’t a cake just anyone could whip up.
And that's how we got today’s chocolate orange cake.
Inspiration
I drew inspiration from two sources for today's Vaso's Torte:
1. The Big National Cookbook: A classic Yugoslavian cookbook, "The Big National Cookbook" (Veliki narodni kuhar) is a great collection of Yugoslav recipes. I own the 6th edition published in 1984, as a collaboration between National book, Belgrade (Narodna knjiga Beograd) and Youth book, Ljubljana (Mladinska knjiga, Ljubljana). The recipe for Vasina Torta is on page 398.
2. Jelena from Food for Thought: Jelena is a Belgrade food blogger (she's not Vaso's Jelena!), and her website is called Food for Thought. Unfortunately, she seems to have stopped blogging circa 2015. Her posts are translated into English, so you can browse her recipe index. Phenomenal food! (Jelena, if you read this post at some point thank you for your blog, for your detailed and patient way of responding, and for the treasure of knowledge you shared!)

More Chocolate Recipes
- No Bake Walnut Pralines aka Bajadera
- Mama’s Chocolate and Walnut Cake
- Walnut Marzipan Squares
- Choco Hazelnut Cake
- Balkan No Bake Wafer Cake
Would You Do Me a Favor?
If you make today's Chocolate Orange Cake with Ganache and Meringue and like it, please consider leaving a ⭐️⭐️⭐️⭐️⭐️ (5-star) rating. This will help others find the recipe more easily!
You can also leave a comment, I read EVERY one! Finally, if IG is more your thing, consider tagging us @balkanlunchbox.
Prijatno and bon appetit!

Chocolate Orange Cake (Vasina Torta)
Ingredients
- Layer 1 Cake Crust Batter
- 5 egg yolks
- 5 tablespoons regular sugar
- 1 tablespoon white flour
- 1.5-2 ounces ground walnuts
- 1.5 ounces grated baking or dark chocolate
- 5 egg whites
- Pinch of salt
- 1-2 tablespoons melted butter
- Layer 2 Orange Infused Topping
- 4-4.5 ounces milk
- 4-4.5 ounces regular sugar
- 7 ounces ground walnuts
- 2 ounces grated baking or dark chocolate
- 2-3 tablespoons milk
- 7-10 tablespoons juice from one fresh orange
- Grated zest of 1 orange
- Optional 1-2 tablespoons rum or Grand marnier
- 4 egg yolks
- 4 tablespoons regular sugar
- 5.5 ounces butter room temperature
- Layer 3 Italian Meringue
- 5 ounces water
- 8.5 ounces sugar
- 4 egg whites
- Pinch of salt
- Optional & Highly Recommended Layer 4 Chocolate Glaze (Ganache)
- 5.5 ounces baking or dark chocolate
- 2 tablespoons oil
- 3-4 tablespoons milk
- 3 tablespoons butter
Instructions
Layer 1 (Cake) Crust Batter
- Heat oven to 395°F (200°C).
- In a large mixing bowl start mixing yolks with a hand mixer while adding the sugar to the bowl one tablespoon at a time. Mix 5-6 minutes on high, or until yolks turn light yellow and easily separate from bowl walls.
- With a wooden spatula add flour, walnuts and chocolate to egg yolks. Stir everything until well integrated.
- In a separate large mixing bowl beat egg whites and a pinch of salt with a hand mixer. Start by mixing on low for one minute, then finish off with 2-3 minutes on high or until firm peaks form.
- With a wooden spatula add egg yolk mixture to egg whites. Mix in slowly but thoroughly so that at the end the batter feels light and airy.
- Take a 9-10 inch (24cm) adjustable cake ring (pan) and line the bottom with parchment paper. Using a baking brush paint the ring walls and bottom generously with butter.
- Pour batter into cake ring and shake lightly until batter is evenly distributed. Lower temperature to 355°F (180°C) and bake for 20 to 30 minutes. Use a toothpick to check for doneness.
- Cool the cake off completely. Using a knife gently separate cake from ring walls. Open the ring and transfer the cake (crust face down) onto plate you’ll be serving it on. Carefully remove parchment paper from the cake.
Layer 2 Orange Infused Topping
- In a small pot combine milk and sugar and bring to a boil on high. Lower the temperature and stir frequently until sugar dissolves in milk.
- Melt chocolate with 2-3 tablespoons of milk on low at the same time. Stir frequently to prevent burning.
- In a large mixing bowl cover walnuts evenly with sugar and milk. After walnuts absorb the liquid completely add melted chocolate, orange juice and zest. (If using, add rum or Grand marnier now also.) Mix well until integrated. Let cool.
- Meanwhile make a bain marie (heated bath) by placing a pot filled with water one third of the way on the stove. Bring water to a boil, then lower temperature just enough to keep it at a slow boil.
- (Parallel to water warming up) In a large metal mixing bowl (that can partially fit into the pot from the step above) start mixing yolks with a hand mixer while adding the sugar to the bowl one tablespoon at a time. Mix 3-4 minutes on high, then transfer the bowl into the pot. (There should be a little bit of space between the water and the bottom of the bowl, but the bowl should prohibit the steam from leaving the pot.) Keep stirring egg yolks quickly and continuously with a plastic spatula around 5 minutes. Remove egg yolks from steam heat and let cool.
- In a large mixing bowl mix butter until soft with a hand mixer. Add egg yolks and continue mixing. Finally add the remaining mixture (walnuts, etc.) and mix a few more minutes until the layer is well integrated and airy (light) at the same time. Transfer to fridge for 45 minutes to 1 hour.
- Combining layers 1 and 2: Place a (clean) cake ring (just the side portion) about half way up the cake crust and close it. Evenly distribute layer 2 on top of the cake crust. Use a knife if necessary. Transfer back to fridge leaving the cake ring on.
Layer 3 Italian Meringue
- In a small pot bring water and sugar to a boil. Bring temperature to low and stir occasionally. Cook for 20-30 minutes, or until the syrup is of a consistency of thin honey.
- About 5 minutes before syrup is finished in a large mixing bowl beat egg whites and a pinch of salt with a hand mixer. Start by mixing on low for one minute, then finish off with 2-3 minutes on high or until firm peaks form.
- (Please note if you are wary of bacteria (salmonella) you can do this step using a bain marie like you did for layer 2 egg yolks. Fill a pot one third with water and bring to a boil on high. Water should be boiling by the time you’re ready to beat egg whites, or about 5 minutes before the syrup is done. The rest is the same by adding the syrup in while mixing on steam.)
- Continue beating egg whites while lightly pouring the syrup into the bowl. You are now mixing until stiff peaks form. Syrup should be trickling in for about 5 minutes to give you enough time to mix it in. After you’ve mixed all the syrup turn the mixer off, and flip the bowl around. If the meringue stays in the bowl you’re finished. If it moves mix a little longer.
- Combining layers 1 and 2 with layer 3. Take the cake out of the fridge and remove the cake ring. Wash and dry it, then place back on the cake (about half-way up) and close again. Pour meringue on top and evenly distribute as the third layer. As you’re distributing push lightly to avoid air being trapped inside. Return back to the fridge.
(Optional & Highly Recommended) Layer 4 Chocolate Glaze (Ganache)
- After the meringue layer has completely cooled down, melt all glaze ingredients on low. Stir frequently to avoid burning. If it looks too thick, add a little more milk. (Meringue has to be completely, 100% cool.)
- Transfer to a strong plastic bag, cutting off a very small tip on one end. Pour chocolate first on meringue edges so that chocolate drips down the sides of all of the cake’s layers for a beautiful visual effect. Pour remaining chocolate on top and use a dull edge of a long knife to even it out.
- Return to the fridge. Leave overnight at the very least. (Best if you can wait an entire day before you eat it.)
- The cake lasts up to 7 days in the fridge.
Notes
Take eggs out of the fridge 1-2 hours ahead so they’re at room temperature once you start baking. It’s good to have more eggs on hand than you expect you’ll need, accidents happen. Separate egg yolks from egg whites as precisely as you can. If some egg white ends up in egg yolk section it’s no big deal, however if you get any yolks in egg whites remove them as much as possible. Otherwise you’re better off using new egg whites. Wash your mixer rotating parts and cake ring (pan) after each use as you’ll use them for several steps and they need to be completely clean for each. Toothipick test: stab the cake several times in different places with a toothpick. If it comes out clean, the cake is done. Otherwise, if the toothpick has crumbs on it, bake a few minutes longer then repeat the test. To prevent burning, place parchment paper on top of the cake. Layer 2 The volume of fresh orange juice will depends on how much you like orange and dark chocolate flavor combo. Bain marie is a method by which you’re cooking ingredients on steam heat. This method is excellent for killing bacteria while still allowing ingredients to keep a smooth consistency. Keep stirring egg yolks quickly and swiftly otherwise they have a potential to overcook and become an omelette. All the “fancy” equipment you’ll need for a water bath are a pot for boiling the water and a mixing bowl (preferably a metal one) whose bottom partially fits into the pot. Fill the pot one third of the way with water and bring to a boil. Place the mixing bowl inside so the least amount of steam escapes. Some people allow the bottom of the mixing bowl to hit the water, while others don’t. I’ve tried both ways and prefer the method where there is a little bit of a distance. Layer 3 Please note I don’t use bain marie for egg whites, but this is my choice. Egg whites are generally not a good growing ground for salmonella, plus I’ve never had a problem with it before. However, I understand you may want to protect yourself in the slightest possibility of contamination. I get you. In this case, create a bain marie the same way as you did for layer 2 egg whites. Be careful and steady the bowl in the pot (wear a mitten or use a kitchen towel to protect your fingers) while beating egg whites. When you start adding in sugar syrup you’ll have to either turn off mixer several times while you add it in, or use the hand that was steadying the pan and bowl to add the syrup in. Do it slowly and you’ll be ok. Layer 4 In absence of a strong plastic bag (it has to be strong, lest it falls apart), use a small dish with a pour spout for pouring chocolate. By the way anything will work, from džezva (Balkan coffee dish) to a sauce bowl. Some only use baking chocolate and heavy cream (50-50) to make the glaze. Whatever you decide, test it ahead for consistency. Cake For best taste leave the cake in the fridge overnight. It’s even better if you can hold off 24 hours before eating it. The cake lasts up to 7 days in the fridge. As per Jelena, when cutting it run your knife under hot water first.

Edita Geary says
Thank you for posting such a detailed recipe! I grew up in Bosnia and my mom used to make Vasina torta for my and my brother’s birthday every year and it was always something I looked forward to. It’s very elaborate and time consuming but when you’re making it for a special occasion it’s a labor of love and you get to enjoy the yummy fruits of that labor.
Aida says
Edita,
It makes me happy when I hear that one of the recipes has enticed nice memories. Food has a way of doing that. Hope you can continue tradition in your own home. You are right, it is an elaborate cake, but as you said, very worth it.
Thanks for stopping by!