Looking for the best ajvar recipe? You're in luck! Today we're spilling ALL the secrets for this amazing Balkan "vegetable caviar" made with sweet red peppers and eggplant. (We're talking generations' worth of tips and techniques.) Shall we?

Jump to:
Read This First
This ajvar recipe is detailed. For best results, read all of it.
Making ajvar requires effort and love. The method is simple. But the process is lenghty.
So, this isn't an "easy ajvar" recipe. There is no easy ajvar, fast ajvar, or ajvar made in small quantities. (We're looking at you NYT!)
Before running out to buy peppers, think about whether you can set aside 2 days, and get 2-3 people to help you. As an example, you'd roast vegetables on Friday afternoon, and do the rest on Saturday.
It sounds effortless, right? By now you're probably thinking about whether you can swing this ajvar recipe by yourself, in one day.
Sure you can.
If you start early. If you have all the ingredients and equipment ready. If you have ZERO other obligations. And if everything goes according to plan.
But we don't want you to hate your life!
Keeping that in mind, it's perfectly OK to decide that making ajvar isn't for you! There are many easy recipes here you can do instead.
We didn't scare you off? Fantastic! You're in for a treat of a lifetime.
Get your team ready, and let's go!
For you, we're sharing our family ajvar recipe, and revealing secrets collected over generations. We've done extensive research too, so expect tips and techniques from folks all over ex-Yugoslavia, who have made ajvar more times than you can count!
Without false modesty, here on Balkan Lunch Box we've got
- the best,
- the tastiest,
- the original,
- the traditional, and
- the most detailed
ajvar recipe in English on the internet!
So if you'll take this journey with us, we've got you covered!
Background
Come September, Balkan homes are filled with the aroma of freshly made ajvar. Traditionally, ajvar was a part of zimnica, (food prepped for the winter; preserves and fermented foods et al.), but today it's consumed all year long.
What is ajvar?
Pronounced "aye-vahr" (from Turkish havyar, or caviar), the closest we can come to defining ajvar is as a spread made with roasted red peppers and eggplants, plus a couple of other ingredients.
It's hard to categorize it! Ajvar is considered a spread, relish, garnish, meza, condiment, sauce, paste, dressing, dip, preserve, chutney, and/ or salsa.
- In color, ajvar ranges from orange to deep red. (However, in stores today you can even find green and white variations.) Bright orange types usually indicate the pepper-only ajvar.
- Ajvar's taste ranges from mildly sweet to hot. It's deep, filling, rich, creamy, peppery, and appetite-inducing... all at the same time. Once you try it, you're hooked for life!
- There are several ajvar-related dishes, such as pindjur with tomatoes, and lutenica, a hot version of ajvar. As with everything, variations abound.
- Both North Macedonians and Serbians claim to be ajvar originators. Meanwhile, there is gossip (not sure about its legitimacy) that Slovenians tried to trademark it, but failed.
Regardless, ajvar has been made in almost every Balkan country for generations now.
Ingredient and Preparation Variations
(Below are ajvar recipe generalizations. Details vary from region to region.)
The main ajvar ingredient is the sweet red pepper.
The absolute best peppers for ajvar come from North Serbia and Macedonia. This is the reason pepper-only ajvar was considered the only "true ajvar recipe" for a long time.
However, today people have moved away from this line of thinking. Most make ajvar based on their taste preferences. Adding eggplants to peppers seems to be a favorite choice.
While ajvar ingredients can vary, ajvar preparation steps are something everyone agrees on. The ingredients must be both: roasted AND cooked.
- Skip the roasting and you get thin, bright orange ajvar, full of vegetable skin pieces and orange liquid. It tastes crude and unfinished.
- Skip the cooking, roast the veggies instead, and you get wonderful roasted vegetables. Tasty? Yes. Ajvar? No!
(A quick note: there is another type of "baked ajvar" or pečeni ajvar, where cooking is skipped and ajvar is instead baked, but that's a recipe for another day.)
Balkan Lunch Box Ajvar
Today's ajvar recipe includes both eggplant and peppers that are roasted and then cooked.
Why is our ajvar recipe with eggplants?
It simply tastes better!
The eggplant seamlessly combines with the pepper to bring a deeper, softer dimension to this dish. It results in ajvar with a sweeter taste and smoother consistency.
Our family's been making it the same way for generations, and it's one of the recipes we're most proud of on this blog.
Equipment
Stove:
- The best choice is an old-school wood stove. (In the Balkans there is a specific kind called smederevac). Vegetables roasted on a wood stove are next-level good.
Unfortunately, most of us don't have one. So the next best thing is a regular stove with an oven and electric ranges. Some recipes call for roasting and cooking ajvar in the oven, however, we prefer to do the cooking on the stovetop for more control.
Stoves with gas-powered ranges, although infinitely better for cooking most things, are harder to control where ajvar is concerned.
However, if a gas stove is all you have to work with, that's fine. You'll cook ajvar for a shorter period of time, and stir it even more. You must, under all circumstances, make sure it doesn't burn.
❤️ Oven tip: cover your oven rack and the oven bottom with foil. This way you are protecting your oven AND roasting vegetables on two levels.
The grill isn't your best option for ajvar vegetable roasting. Veggies from the grill usually end up charred and crunchy. And while charring is to be expected, ajvar vegetables need to be completely soft after the roast. (If you're a grill pro and can make it work, report back with tips!)
Large Cooking Pot:
- Look for a large (wide) bottom stockpot. (Think 16-Quart or 20-Quart.) It's better if the pot is wide and short than tall and long. You want a lot of space in the pot so you can stir the ajvar comfortably.
Alternatively, use two smaller pots and divide the ingredients between them. Not ideal, but we did it for the shoot in the preparation photos.
Jars:
- You'll need approximately 5-7, 28-ounce (or 750-gram) jars. Mason jars work great due to their wide brim. However, any glass jar with a wide brim and a lid will work. You'll just have to adjust the sizes to your ajvar volume. You want a wide brim because it'll be easier to push the air out later.
(Wanna know a secret? We've never once counted the jars and volumes before cooking ajvar. Instead, we keep a random collection of recycled jars of all shapes and sizes. As long as they have a wide brim and a lid, they're good to go!)
❤️ Tip: if you plan to give some of your ajvar away as a present, look for smaller jars. They make the best present! That's if you are OK with parting with the ajvar you sweated for two days to make. 😁
Vintage Meat (Sausage) Grinder:
- An old-school meat grinder is a perfect tool to grind your vegetables before cooking ajvar. Alternatively, use a food processor, but DO NOT over-process. The ingredient thickness should be the same as if you were using a meat grinder. (Think thickness of chunky salsa, not hummus!)
❤️ A tip no one else will tell you: the best ajvar taste comes from vegetables finely chopped by hand with a sharp knife. The process to make ajvar being as long as it is, most people don't even think about cutting the veggies by hand. If you're adventurous enough and have the time, go for it!
(Optional) Gloves:
- Although by no means necessary if you're keeping your hands clean (as we know you are), they'll help your fingers not turn red while peeling your peppers.
(Optional) Mittens:
- It's also good to have mittens to hold the jars when you are pouring the ajvar inside. An alternative, but not the best choice is to use kitchen tongs or jar lifters. (Admittedly, we often forget this step, so we burn our fingers a little.)
Ingredients
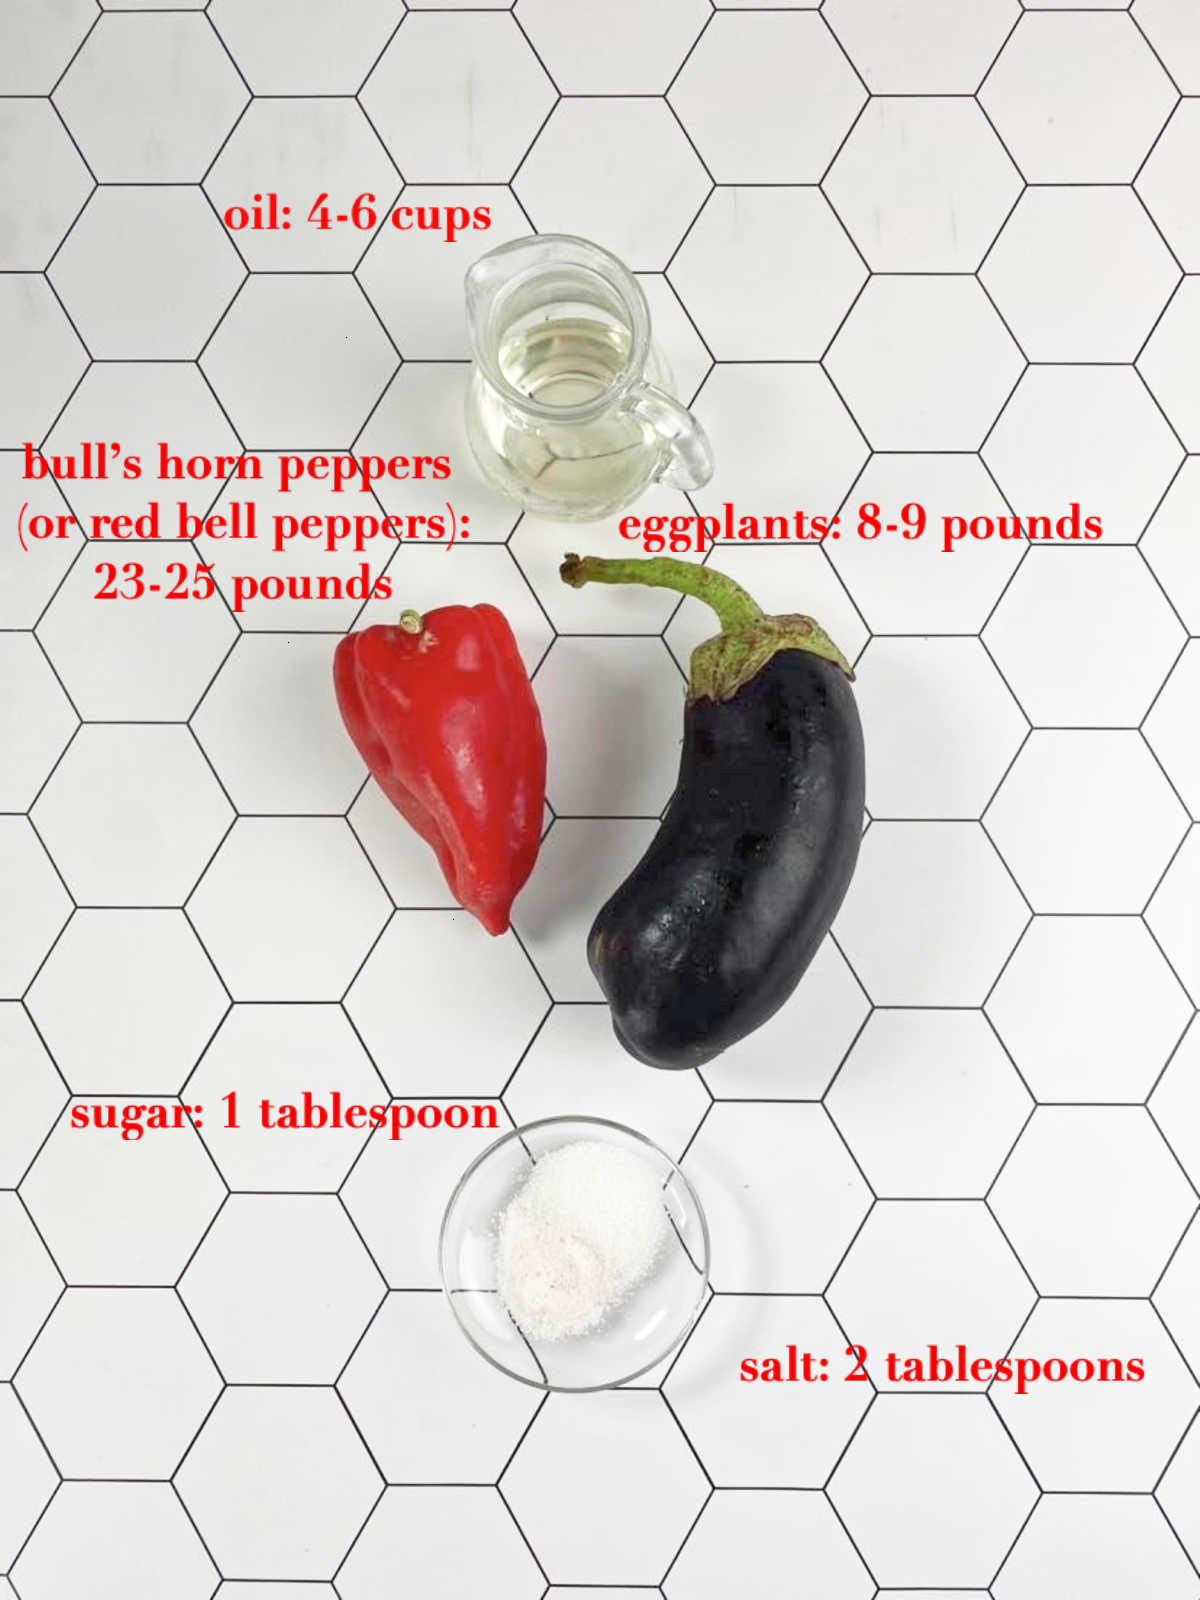
We've split the ingredients for our ajvar recipe into two categories. The main ingredients are absolutely necessary. Optional ingredients are examples of what else is or can be used, and are as such, optional.
Main Ajvar Ingredients:
- Red Peppers: ajvar peppers need to be "meaty," on the sweeter side, with low water content. These peppers are easier to peel, and their liquid evaporates quicker.
The best are the bull's horn peppers (aka red bull's horn peppers). (Don't make the mistake of buying hot cow horn peppers. These are super spicy peppers!)
Bull's horn pepers are long, sweet, red peppers resembling a horn. They go by roga in the Balkans. (There you'll also find similar peppers perfect for ajvar like: kurtovka or kurtovska kapija, makedonka, dukat, and slonovo uvo.)
Alternatively, red bell peppers will do, even though they're somewhat high in water content. They need to be ripe and red. (Absolutely no green or yellow bell peppers!)
- Eggplant: old-school purple eggplants are best. Don't substitute.
- Oil: vegetable and/or sunflower oil work best. Don't use olive oil for ajvar, it'll ruin it.
- Salt: table, kosher, Himalayan, or sea salt all work.
- Sugar: regular or brown sugar all work well. Don't use sugar substitutes.
Optional Ajvar Ingredients:
- Vinegar: some add vinegar to the cooking ajvar for a more sour taste. We prefer our ajvar on a sweeter side and wouldn't recommend it.
- Chili peppers: you can add a couple of chilies for some spice in your ajvar. For less spice, add them whole during cooking, then take them out before jarring. For more spice, roast and cook them together with the other ingredients.
- Garlic: some people add garlic to their ajvar. To us, garlic is like a dear friend you don't invite over for every occasion. Garlic has a tendency to overpower the ajvar, but even worse it makes it last a shorter period of time. If you must consume garlic with your ajvar, mince it and add it to your ajvar once you serve it.
- Lately, people have been experimenting with specialty ajvar. Some have been adding truffles, et al. We haven't tried this yet. If you have/ do, leave a comment!
Instructions
There are several steps to making this ajvar recipe.
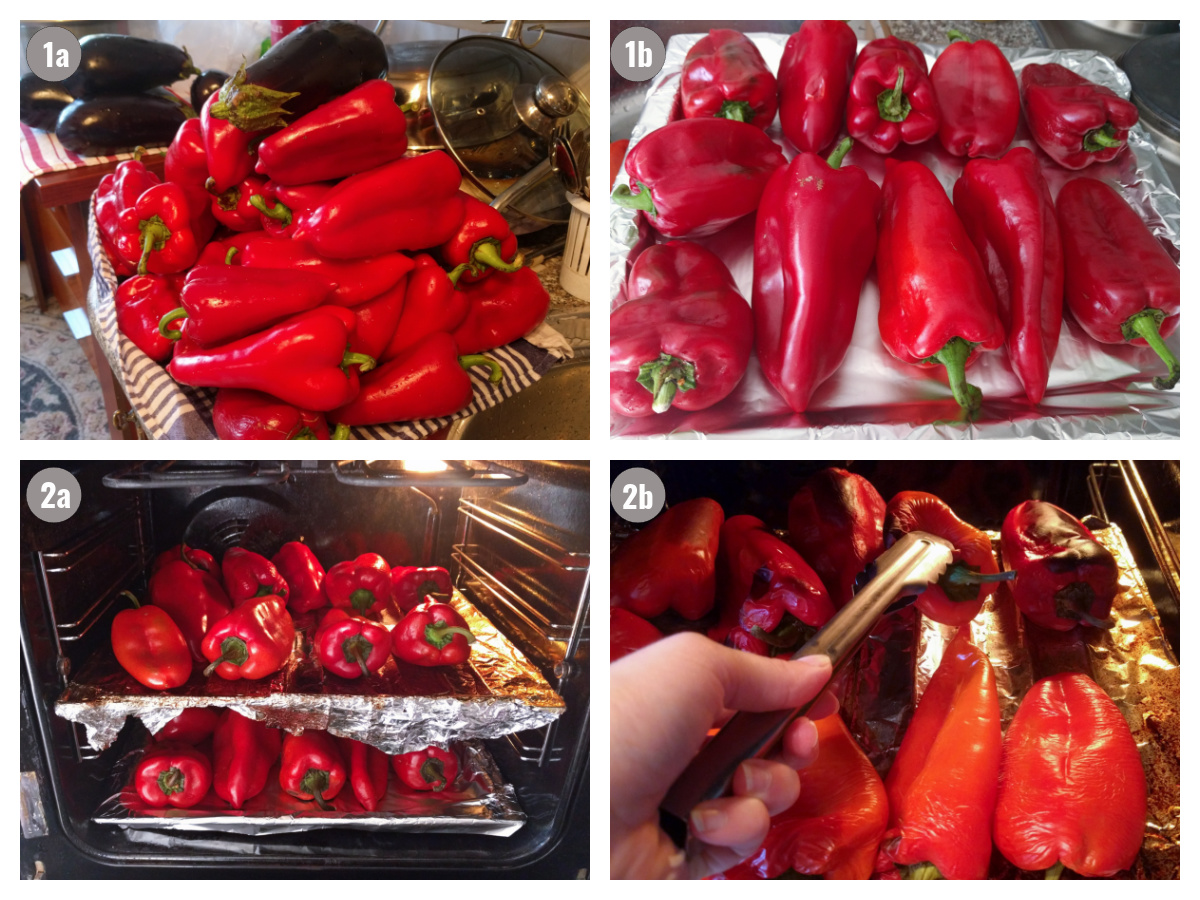
1. Prep your oven with foil. Wash peppers and eggplant thoroughly. Pat dry. (Some remove the stem and seeds right away. We do it later.)
2. Roast peppers and eggplant on all sides, in batches.
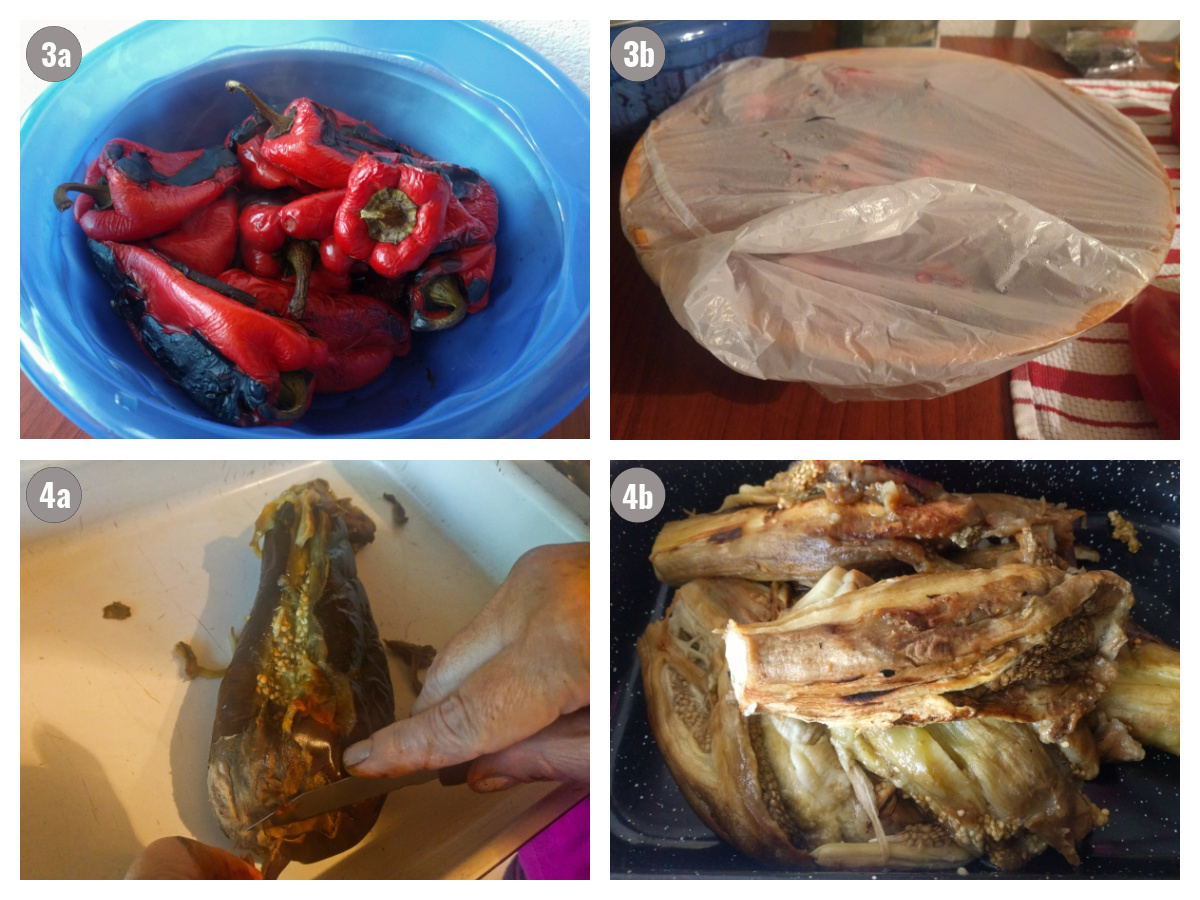
3. Place roasted vegetables in bowls and cover each bowl with a plastic bag. Seal really well. Leave overnight.
4. Peel the eggplant but leave the seeds in. Transfer to a deep container.
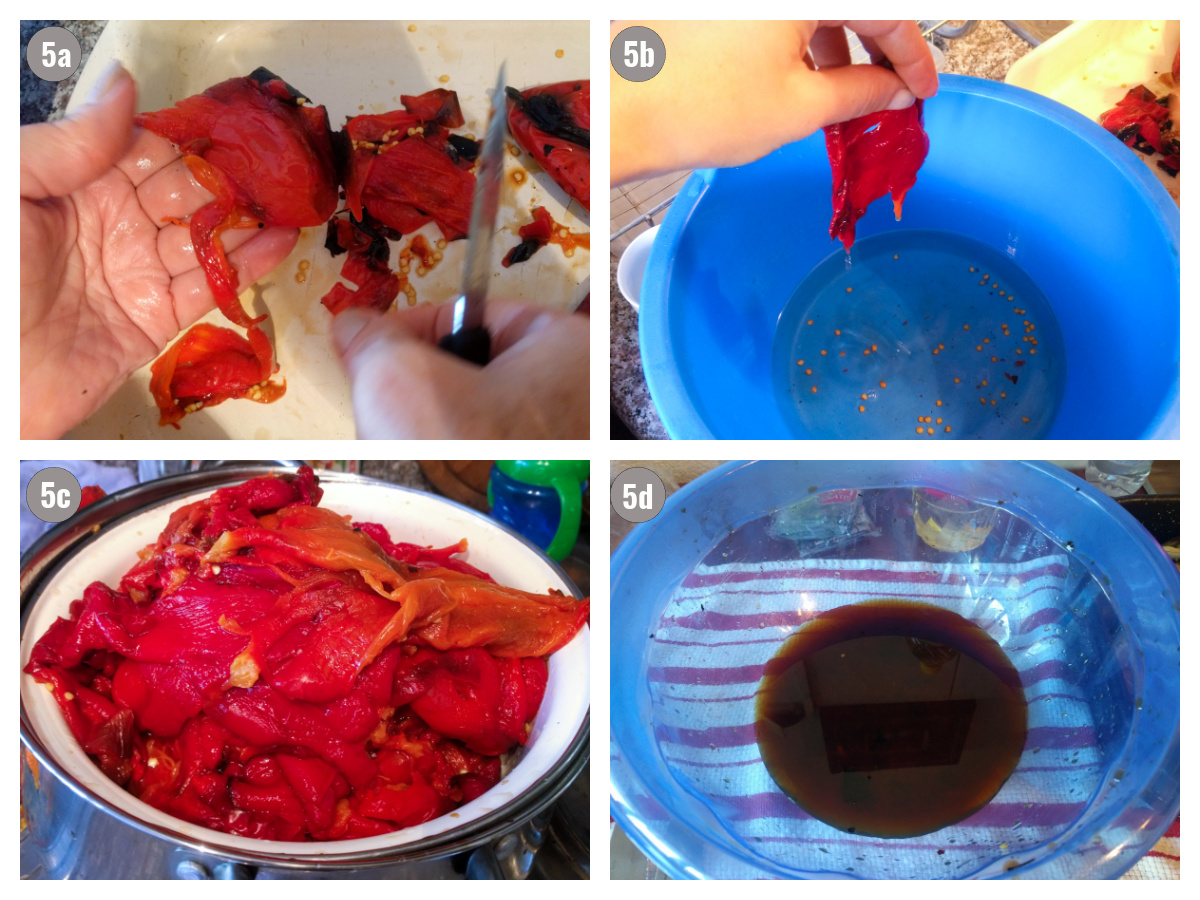
5. Peel the peppers. Remove stem. Dip in water quickly to remove seeds. Transfer to a deep container.
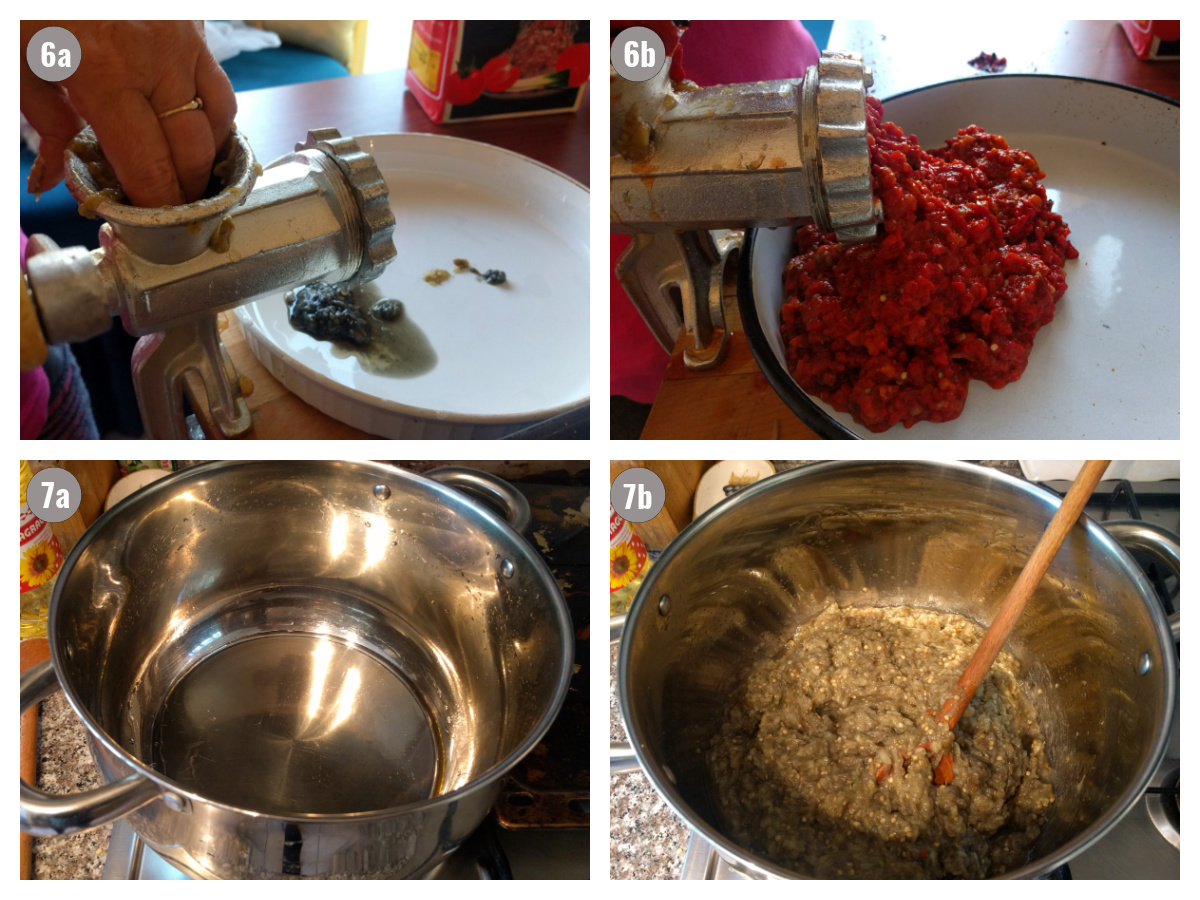
6. Grind the vegetables in a meat grinder, a food processor, or chop them manually. (Set the liquids that were in containers aside.) Keep ground eggplant and peppers separate.
7. Fill your cooking pot with oil the thickness of a finger. Heat it up. Add eggplant and eggplant liquid to the pot. Stir and cook it for 20 minutes.
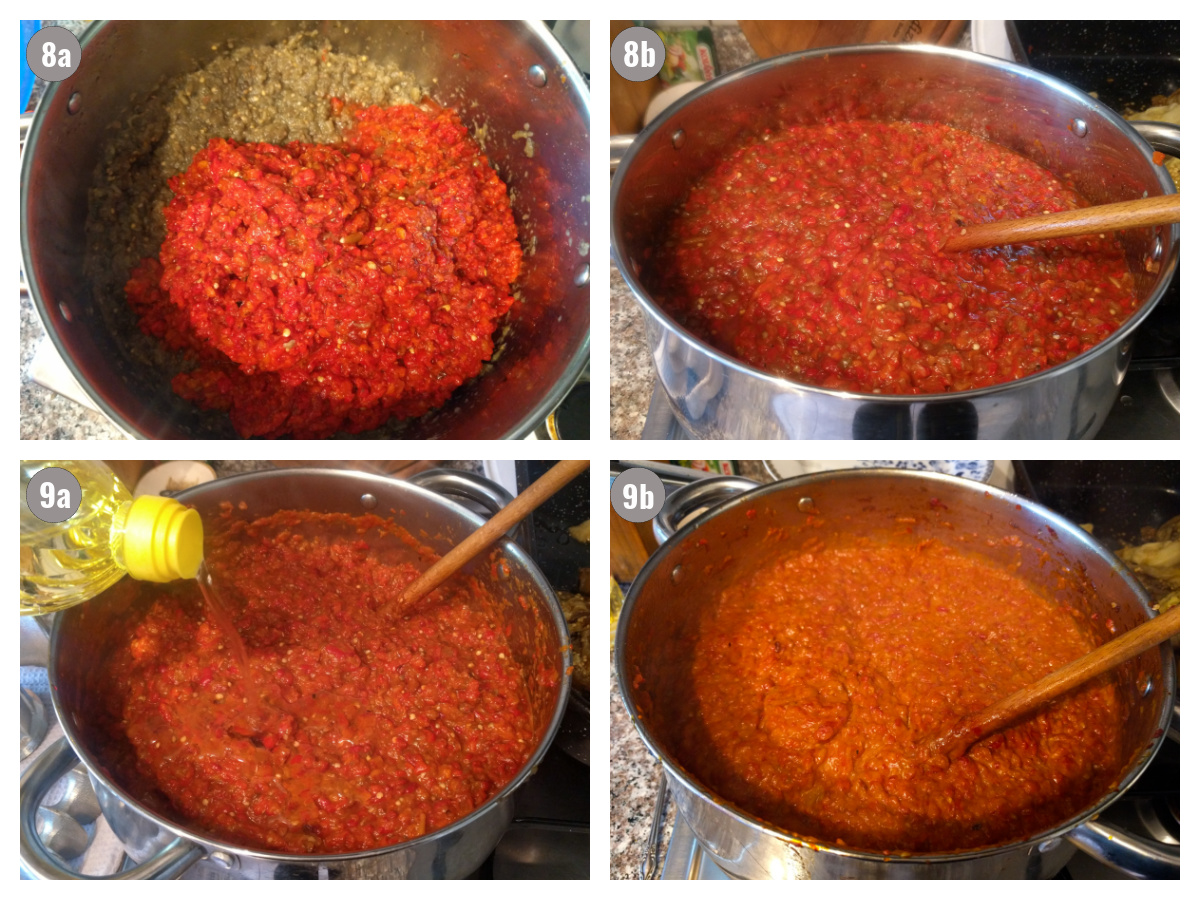
8. Bring the temperature down and add peppers and pepper liquid to the pot. stir
9. Add a little bit of oil every 15 minutes. Stir continuously.
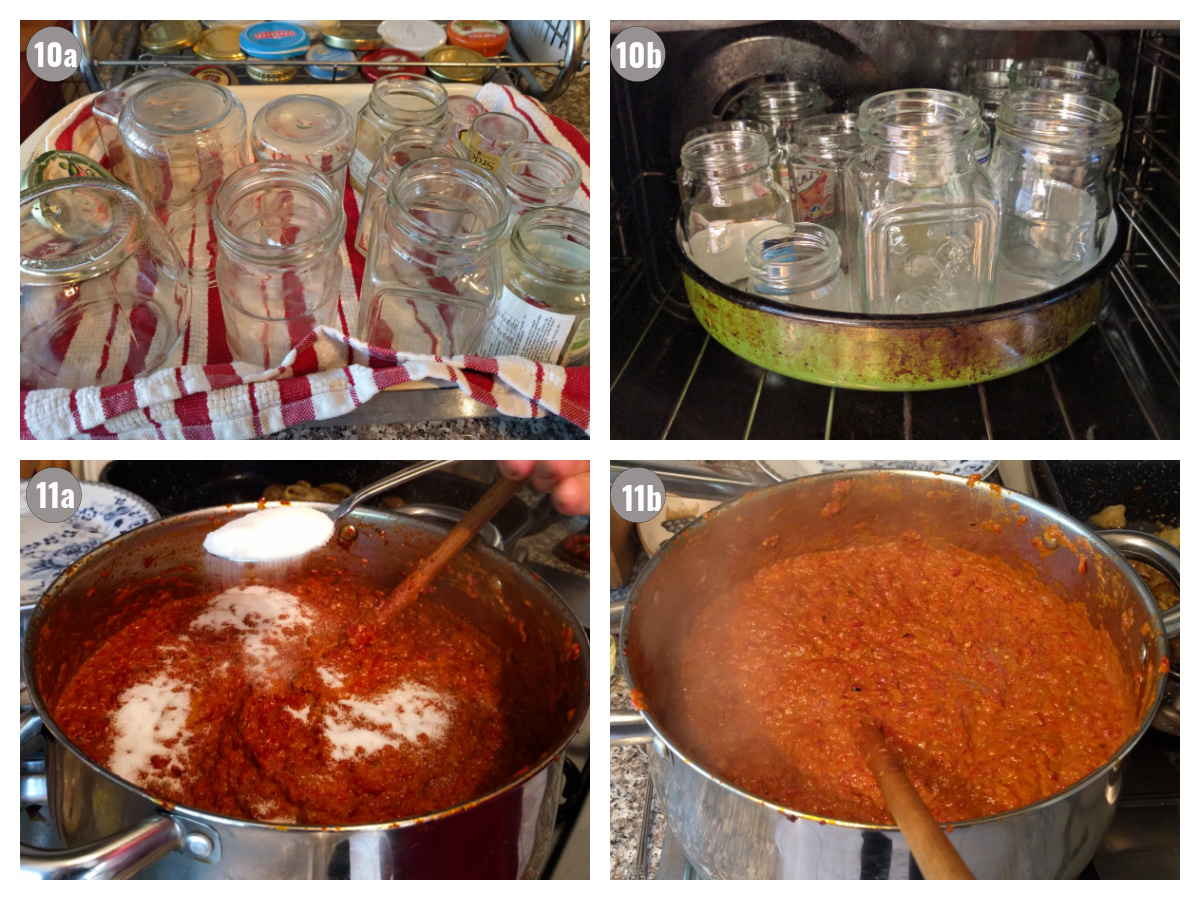
10. Sterilize jars.
11. Add sugar after 3:30-4 hours of cooking. Stir continuously. add salt. Stir. Turn off ajvar.
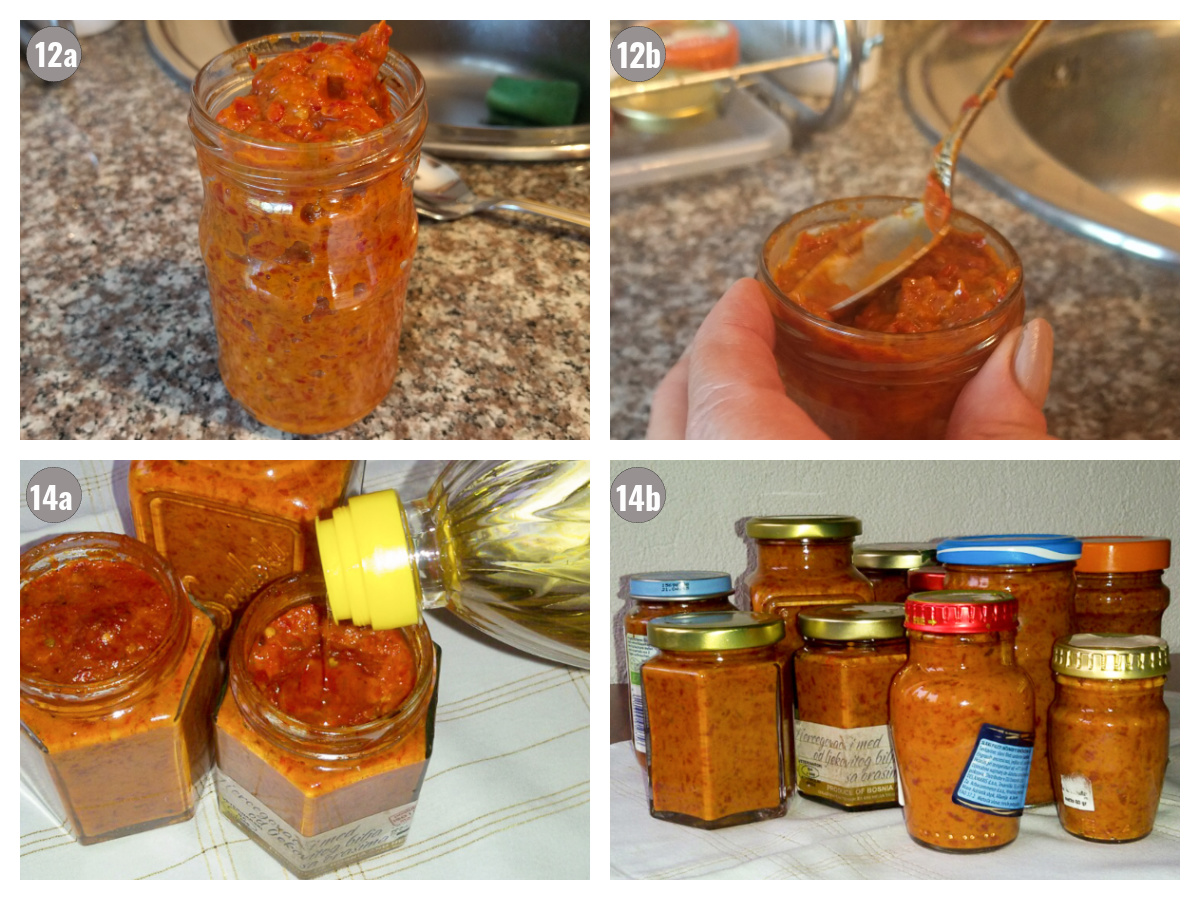
12. Wear mittens (we didn’t) and use a ladle to transfer ajvar to jars slowly. Push all the air bubbles out with a spoon.
13. (Not pictured): Place all jars on a baking tray and return to the turned-off oven. Leave overnight until crusts form on top of each ajvar jar.
14. Pour a spoonful or two of oil on top of the crusts and close the lids tightly.
Handling
Handling: Keep unopened ajvar in a dark, cool place for up to 4 months. Once you open an ajvar jar, keep it in the fridge for 7-10 days. If you see whiteish or green spots on top, discard the jar.
Serving: When ready to eat, open the jar, empty the oil on top, give the ajvar a good stir with a spoon, then serve. If you're a garlic fan, add it in when you serve your ajvar, otherwise, your ajvar will last a shorter period of time.

Recipe FAQs
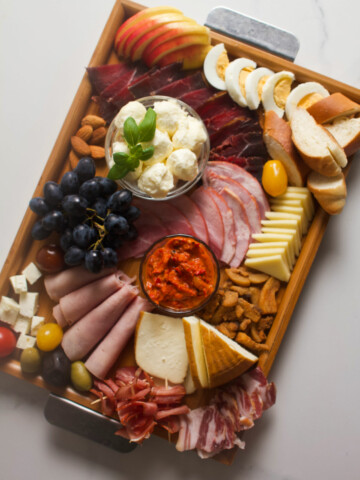
Anything and everything! Ajvar goes great over bread, crackers, and pastries, it's a fantastic dip for your veggies, it can be your side or a salad dressing, a perfect addition to your meza, and it's often a base for different sauces. (In fact, there aren't many things you cannot eat ajvar with!)
Usually cold, or room temperature. However, there are dishes that use ajvar as a base, and in this case, you'd eat it warm.
Store unopened ajvar in a dark and cool place. Once you open a jar of ajvar keep it in the fridge for 7-10 days.
Unopened ajvar in a jar can last for up to about 4 months. Once the jar is opened, it needs to be refrigerated and consumed within 7-10 days. If you notice green or whiteish spots on top of ajvar, discard it.
No. Some people add vinegar to ajvar to give it a touch of sour, however, ajvar should never be bitter.
Similar but not the same. It varies greatly from region to region. Pindjur generally has tomatoes, while lutenitsa (lutenica) is a sort of really hot ajvar.
Our family has been sterilizing jars in the oven for preserves and ajvar for decades. We've never had any problems! However, we don't take any responsibility for your actions! If you're unsure what to do, follow the FDA guidance.
When it absorbs the oil and becomes creamy but thicker indicating what needed to evaporate has evaporated and the vegetables have combined perfectly. The color is going to be deeper orange to red (watch that it doesn't go too much toward brown, this means it's burning). Also, when you taste it, you'll know it's done.
Pepper Recipes
Thoughts?
If you made Ajvar and liked it, please consider giving it a ⭐️⭐️⭐️⭐️⭐️ (5-star) rating. This helps others find the recipe more easily!
Also, feel free to leave a comment (I read each one!), and don't forget to tag a photo #balkanlunchbox, or us @balkanlunchbox, on IG.
Prijatno and bon appetit!
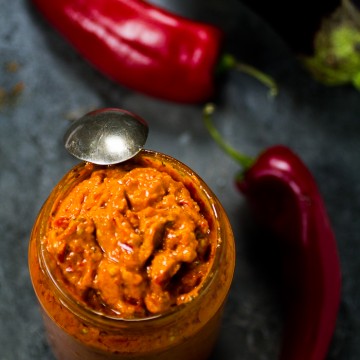
Ajvar
Equipment
- Stove (old-school wood stove works best, an electric range stove is the second best option, while a gas range stove is our least favorite but it'll work);
- Foil (to cover the oven)
- Vintage meat or sausage grinder (or food processor, or a sharp knife plus extra time);
- Large cooking pot (16-quart or 20-quart, short and wide work best, or two or more smaller pots);
- Several plastic bags
- Several large bowls
- Glass jars (approximately 5-7, 28-ounce (or 750-gram) jars, however, any sized glass jars will work as long as they have a wide brim, and a lid);
- (Optional) Protective plastic sheet (to protect the working area)
- (Optional) Few pairs of latex gloves (to protect fingers from turning red)
- (Optional) Oven Mittens (to protect fingers from hot jars)
Ingredients
Ajvar:
- 23-25 pounds red bull’s horn peppers or red bell peppers
- 8-9 pounds eggplants medium to large
- 3 to 4 cups vegetable or sunflower oil about one 1 liter
- 1 tablespoon sugar
- 2 tablespoons salt
Jarring:
- 1-2 cups vegetable or sunflower oil
Instructions
- Oven and Vegetable Preparation: cover oven racks (or a rack and oven bottom) with foil. Heat the oven to 480°F (250°C). Then thoroughly wash, and pat dry eggplants and peppers.*
- Roasting the Peppers: lower the temperature to 400-440°F (200-220°C). Roast the first batch of peppers by lining as many as you can on the racks (and/or oven bottom) covered with foil, and leave some space between them. Roast for 25-30 minutes (check them once or twice), and then turn each one over using tongs, so they roast equally. (Depending on the size of your oven, you'll probably have to roast all peppers in a few batches.) After turning them over, roast peppers for an additional 20-25 minutes. Check frequently, and roast all sides as necessary. Peppers should be fully roasted at approximately 50-55 minutes total. (Finished peppers are soft, they'll exert some of their fluid, and will have an occasional black patch on the skin which will be coming off in places.) Place roasted peppers in bowls, and then put each bowl into a plastic bag. Seal the bags really well. Leave to cool overnight. Repeat this for all pepper batches.*
- Roasting the Eggplants: roast eggplants the exact same way. (Depending on your oven, they may need less time.) Finished eggplants also have occasional black patches, and the skin will be coming up in places. (However, eggplant skin will be harder than the pepper skin.) Like peppers, place roasted eggplants in bowls, and then place bowls into plastic bags. Seal well. Leave to cool overnight. Repeat this step for all eggplant batches.
- STOP! After you're done roasting the vegetables and sealing them in bags, stop for the day.
- Protecting the Working Area: the next day, start by first protecting your working area (table, floor, counter, etc.) with plastic covering (optional but smart). Then, set up a trash bag or two nearby (or a compost bin if you use them). Also, put your latex gloves on, if you'll be using those. Fill one or two bowls up with water ⅓ of the way (for deseeding). Finally, set out a few bowls for peeled veggies.
- NOW GO GET YOUR TEAM!
- Peeling the Peppers: peel each pepper by first removing the stem and discarding it. Then cut the pepper open, and flatten it out so you can see its insides. With a dull side of a knife remove as many seeds as you can from the pepper. Follow up with peeling of the pepper skin (with fingers or the knife), and then use the knife to scrape off black patches that formed while the pepper roasted. (This here is the tricky part. You may lose some of the pepper meat, and even whole peppers due to lower quality and/ or thinness. Save whatever you can.) Now quickly dip the peeled pepper in the water bowl to get rid of any remaining seeds. (By quick, we mean super quick!) Once each pepper is peeled and deseeded, transfer it to a dry bowl. Repeat this process until your peel all your peppers.*
- Peeling the Eggplant: take an eggplant, cut off its stem, and discard it. Then use a knife to take off its skin. Keep as much meat and seeds intact as possible. (Unlike the peppers, you should keep eggplant seeds for ajvar.) After it's peeled, transfer each eggplant to a dry bowl. (Don't mix eggplant and peppers at this point!) Repeat this process until you peel all your eggplants.
- Grinding the Vegetables: Grind the vegetables using your preferred method. Keep all the juices. If using a food processor, keep the vegetables chunkier. (At this point still keep eggplants separate from peppers.)
- WARNING! This is the time to get little children, elderly, clumsy family members, or anyone who could get hurt, out of the kitchen! The ingredients are essentially boiling the entire time and could cause major burns if handled incorrectly.
- Cooking Ajvar (adding oil and eggplant): Fill your pot up with oil the thickness of one finger. If able, place the pot on the range closest to the wall. Heat it up on high until the oil produces light smoke. Stir in eggplant really well. Simmer for 15-20 minutes stirring very frequently.*
- Cooking Ajvar (adding peppers and more oil): bring the temperature down to low. Stir the peppers in slowly until they integrate with the eggplant. Stir well. Ajvar will be cooking for the next three hours or a little longer. As the ingredients will be boiling most of the time, the air bubbles will be coming out. It’s imperative to continue stirring ajvar throughout the entire cooking time (EVERY COUPLE OF MINUTES!), to allow the air to evaporate, and to prevent burning. (If there are too many bubbles, this means you need to stir it more.) Approximately every 15 minutes stir in about ½ cup of oil, or a little more, for a total of 3-4 cups during the entire cooking process.
- Cooking Ajvar (adding salt and sugar): approximately 45 min before the end of cooking, stir in sugar and salt.
- Sterilizing Jars: approximately 30 minutes before ajvar is finished, heat the oven to 230°F (110°C). Wash your jars and lids in hot, soapy water and rinse well. Dry really well. Put jars on a baking sheet and place in the oven for 15-20 minutes. By the time jars are sterilized, ajvar will be cooked.
- Transferring Ajvar to Jars: once the jars are sterilized, turn ajvar off. Being very careful of your fingers, transfer ajvar to jars with a ladle or a spoon. This step is where oven mittens come in handy, but it's best to wear them only on the hand you'll be touching the jars with, as you need to be precise with the other. Fill each jar up almost to the top, leaving about a centimeter (½ inch) free.
- Releasing the Air from Jars: as you fill each jar up with ajvar, take a spoon and press ajvar all the way down into the jar. Push it down as much as you can, releasing any air bubbles left in the jar. Do this step meticulously, and do it for every jar. (Air is what makes ajvar go bad, so you want to release any pockets of it that may have gotten trapped inside.)
- Forming the Crust: place jars on a baking sheet and return them to the warm, turned-off oven. (Keep the lids off.) Leave them inside the oven overnight, or at least for several hours. A thin, hard crust will form on the top of ajvar in each jar.
- Closing the Lids: the following day (or several hours later) pour a few tablespoons of oil on top of the crust in each jar (remember that 1cm we left free?) and screw the lids on tightly.
- Handling and Serving Ajvar: Keep ajvar in a dark and cool place. Ajvar in jars can last about 4 months. As you open each jar, pour the oil out, give ajvar a stir, then serve. Open jars need to be stored in the fridge and can last up to 7-10 days.
Video
Notes
- Time Notes:
- We purposely left the total time needed to make ajvar empty. You'll need an extensive amount of time for all the steps. We're talking several hours, preferably spread over 2 days. However, you can shorten it considerably by having more people help you.
- The actual cooking process takes about 3-4 hours. As the time depends on several factors (thickness of your cooking pot, vegetable water content, whether you're cooking on gas, electric, or wood stove, etc.), your best bet is to look at outward signs that it is finished.
- Knowing when the ajvar is ready: check with a spoon to see that it is creamy. In some instances, like with jam, you can draw a line with a wooden spatula on the bottom of the pan, and see how well it separates. Its color will be deep orange. Finally, you can taste it, but be very careful because it's extremely hot. The rule is that the longer it cooks, the better and smoother it is.
- Overcooking is not good either: If you overcook it though, it'll turn brown and/or burn. So don't cook for 5-6 hours.
- Equipment Notes:
- Ingredient Notes:
- Instruction Notes:
Step 2: our roasting temperature is only a suggestion; roast them at whatever temperature works for your oven. Total roasting time depends on your oven. ALWAYS go by your oven and visible signs that the vegetables are done, rather than an exact time. All batches after the first batch usually take less time. Re: bags, placing the peppers in the bags will allow for the steam to raise the skin off the peppers, and will make peeling infinitely easier. Step 6: you don't necessarily need anyone to help you with roasting. Although long, that part is easy. (If you have someone who is willing to roast some of the veggies at their own house, and bring it over, even better!) Peeling vegetables, however, is the time to get everyone else involved. Trust us, do not attempt to do this by yourself! Step 7: peeling is the first reason why we always get more ingredients than necessary. You'll lose a small volume of peppers almost every time. Another important thing to remember is to remove as many seeds as you can. Also, some ajvar recipes call for placing vegetables in a colander or a strainer after peeling them, so they're drier for grinding and cooking. However, we find that the extra juices really add to that perfect ajvar flavor.
- Expert Tips:

Ginger Smith says
I really liked your story and the history of Ajvar. I made it for the first time last week using a recipe from Mediterranean Cooking by Paula Wolfert. In her recipe she used green Italian peppers and a hot green pepper with the eggplant. I was surprised to see this because when I heard people talking about it they used red bell peppers and a poblano pepper (an adapted recipe of Paula Wolfert). I realize that every household or town probably has its own method of making ajvar. It is one of the trademarks of centuries of passing down traditions and recipes, I will keep your recipe on hand and on a fall day when I am feeling in the mood to spend it all cooking, I will make your ajvar. Thank you.
Aida says
Ginger,
How lovely! You're right about traditions - even within one family people make the same dish differently. Let me know how your ajvar turns out if you use the recipe.
Sam says
I made this last week with some bull horn peppers, it tastes exactly like the pepper spread we ate in Janche, Macedonia! It’s perfect and well worth the effort, also we pressure canned some of it and the taste was not affected.
Aida says
Nice! What else have you canned before?
David says
can't these be hot-water bath canned?
this preservation process is a bit different (unconventional?)
-just checking..
Aida says
It's not at all unconventional, it's just that hot-water bath canning is more popular around your parts. Yes, you can do it your way though.
Lili says
I love Ajvar. I was born in Kazakhstan and Ajvar is very popular there too. My mom uses it in lots of her dishes, kind of like a seasoning. We always by a ready Ajvar at our local Russian store. So I am very excited to find this recipe to make it myself.
Aida says
Lili that is so exciting to hear! (And not only because I've been wanting to go to Kazakhstan for years, it looks magical.) It takes a while to make, but you do end up with a huge batch which is a plus. Welcome to the blog! 🙂
Tomislav says
I am planning on making this as soon as it cools off a little more here. what store did you find Red Bull horn peppers in the US? I am in Arizona btw.
Aida says
Tomislav,
It's hard to find them. We once ran across them at a farmer's market in PA.
When in the US we often use red bell peppers to make ajvar.
Not the same taste - similar - and the closest you can get to in North America.
My honest recommendation is if you have a large garden or a backyard to order the seeds online and plant them yourself.
A.