• Skip to primary navigation
  • Skip to main content
  • Skip to primary sidebar
  • Balkan Recipes
  • About BLB
  • Nav Social Menu

    • Facebook
    • Instagram
    • Pinterest
    • RSS
menu icon
go to homepage
subscribe
search icon
Homepage link
  • Recipe Index
  • About
    • Facebook
    • Instagram
    • Pinterest
    • RSS
    • YouTube
  • ×
    Balkan Lunch Box > Blog

    Bajadera: Balkan Nougat Pralines [No Bake, 40 Minutes, Dessert Bars]

    Jan 17, 2018 · 13 Comments

    Bajadera on a table.

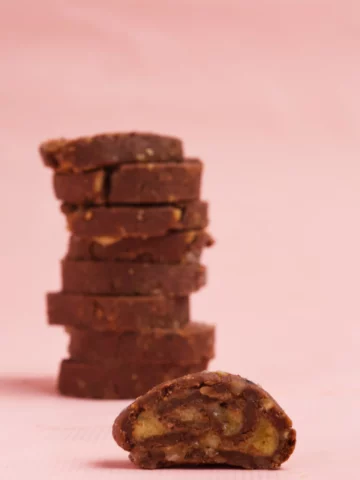
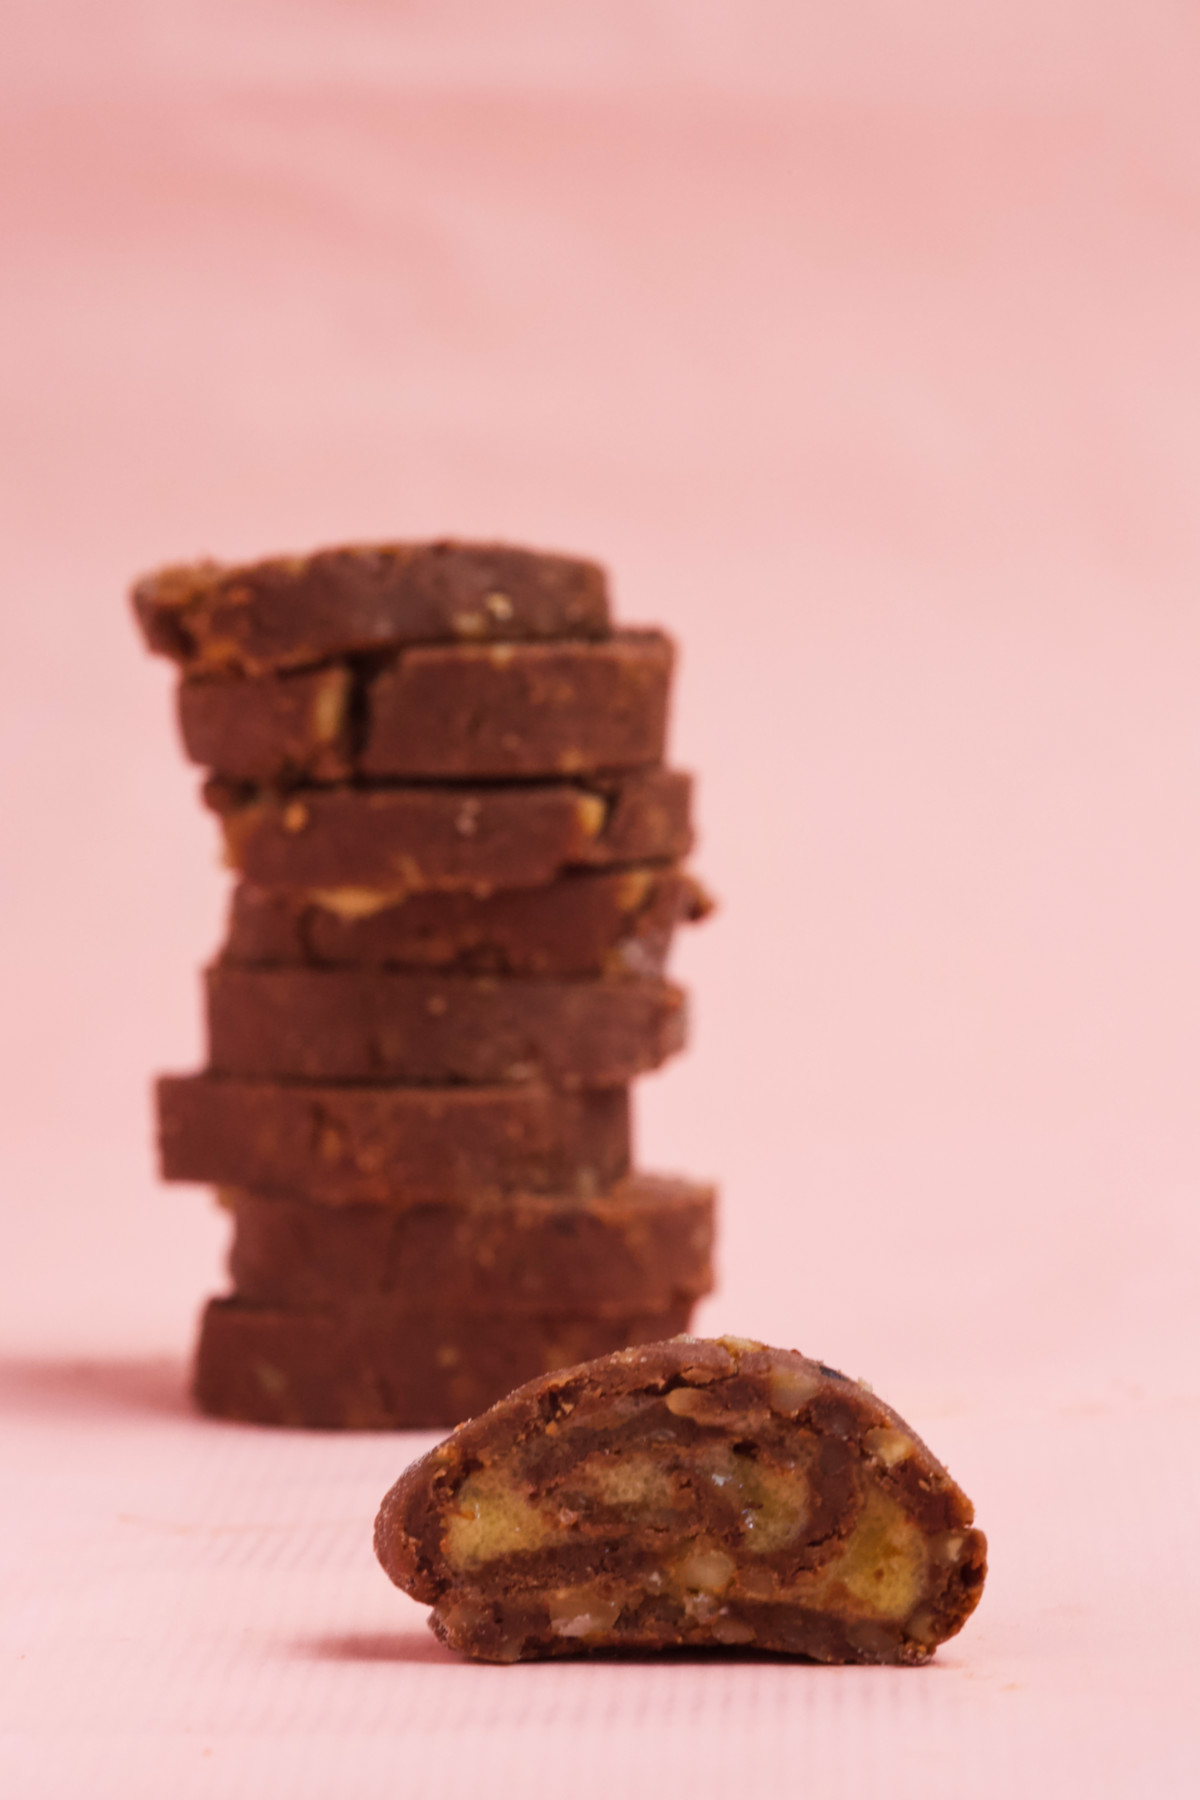
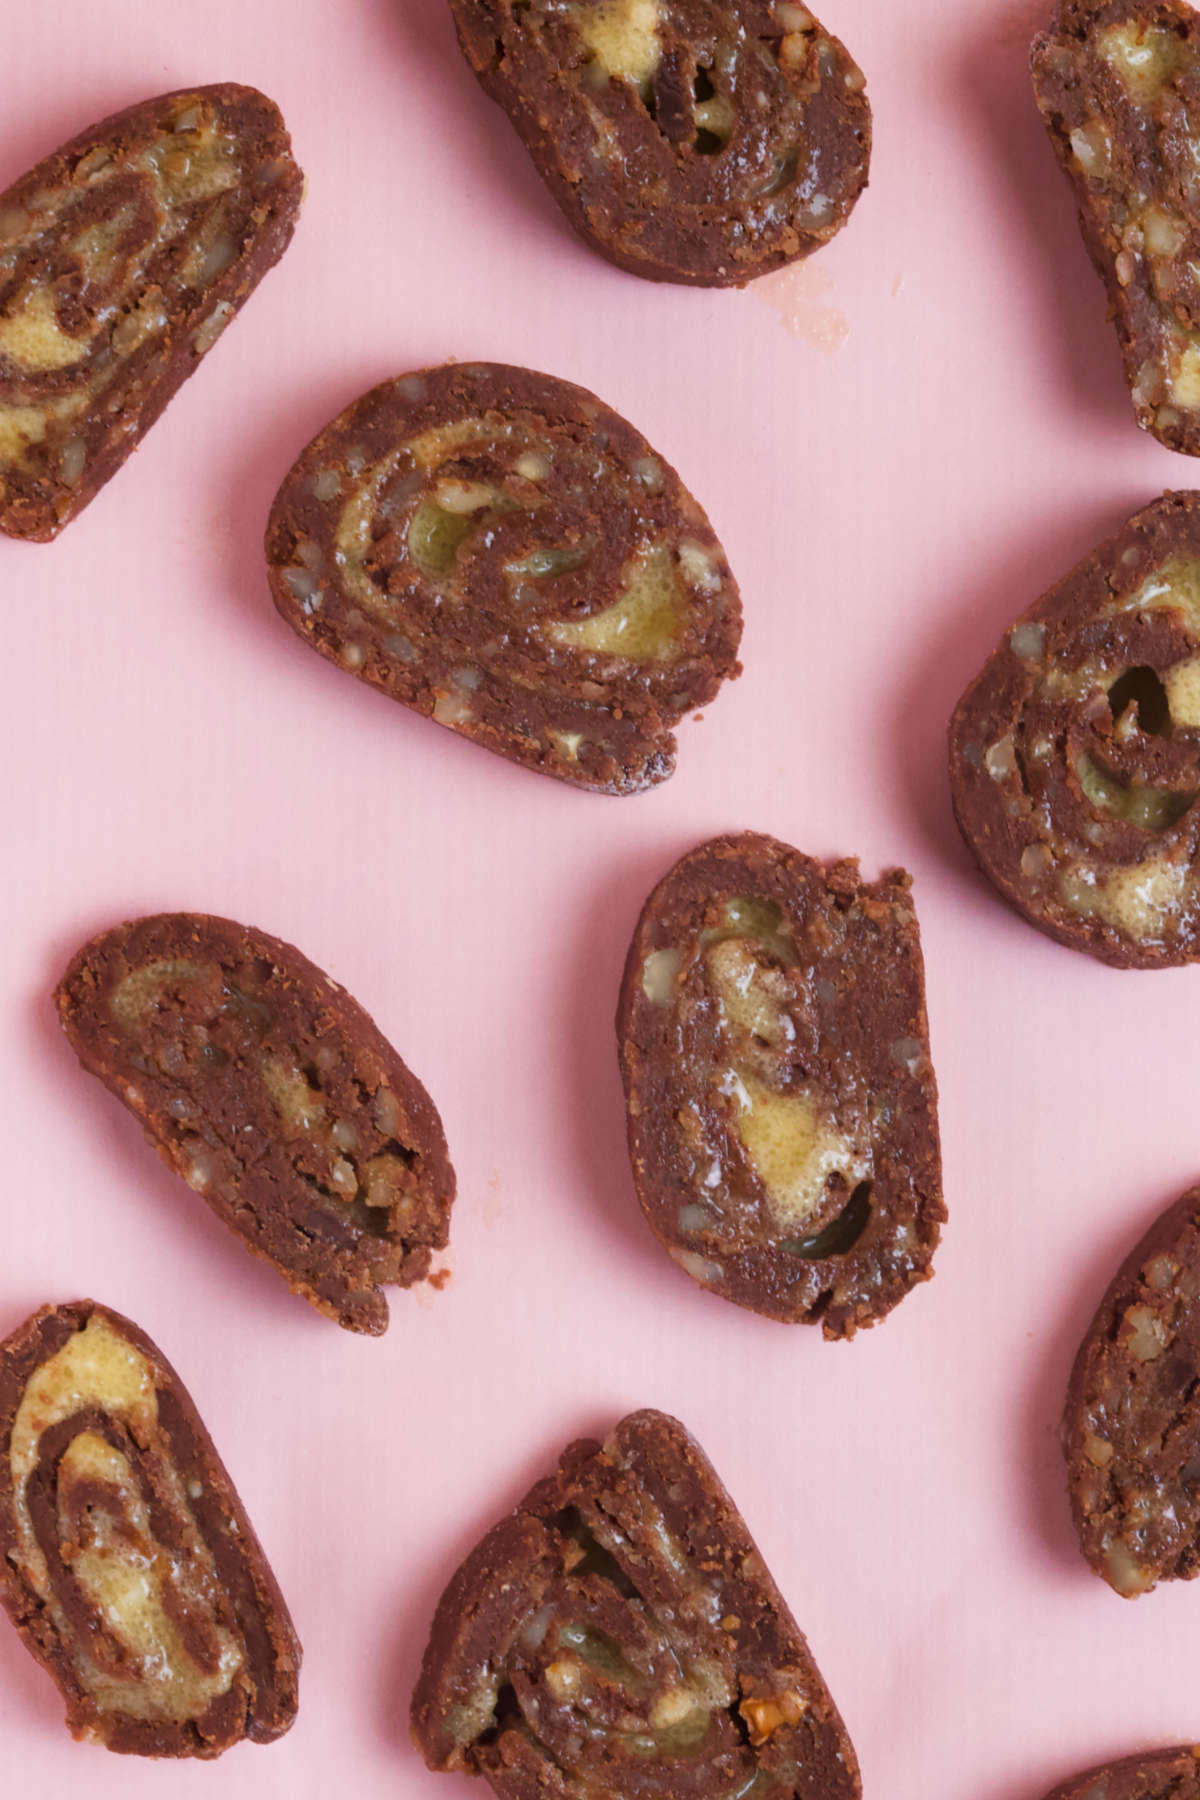
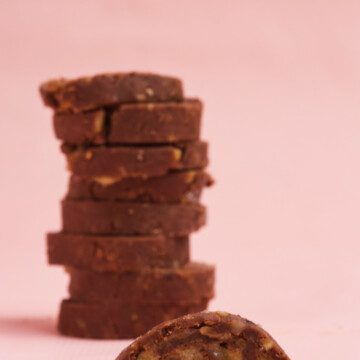
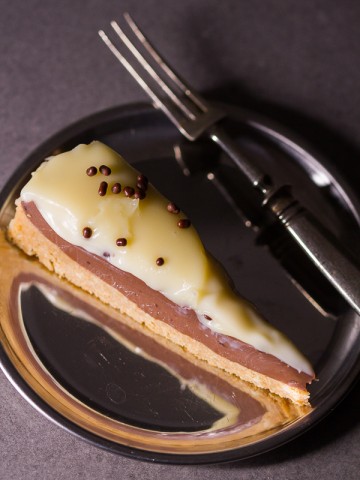
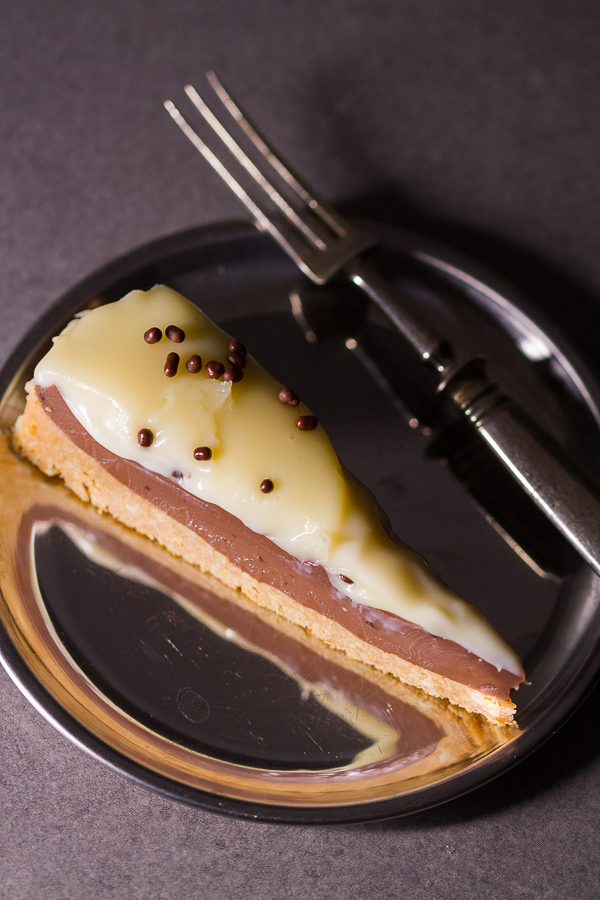
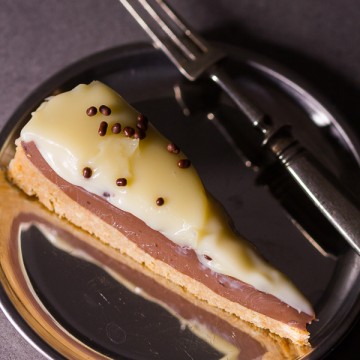
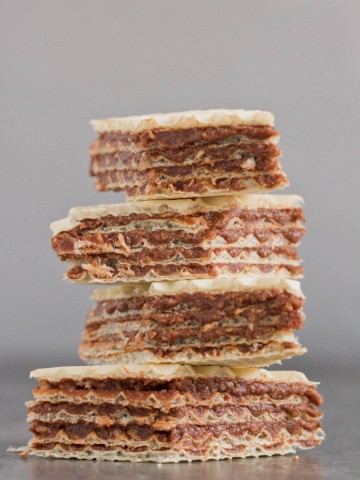
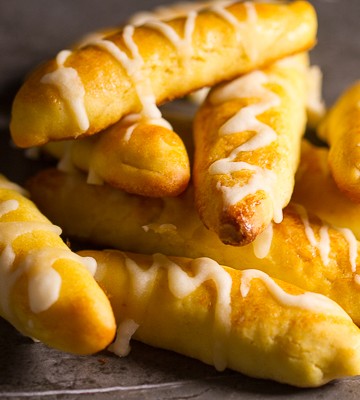
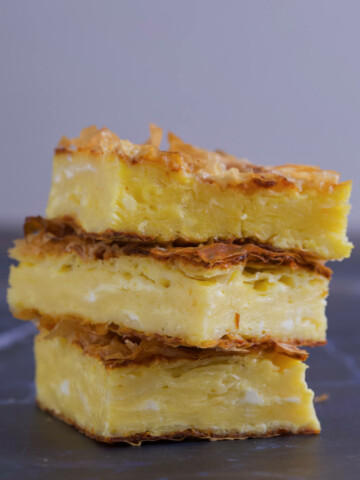
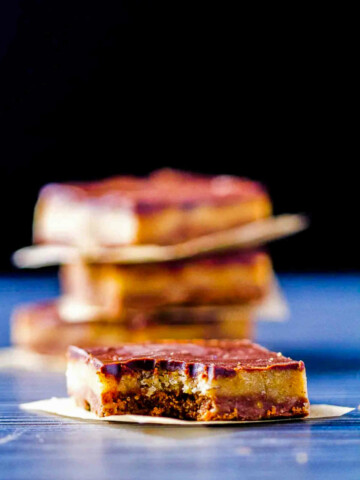
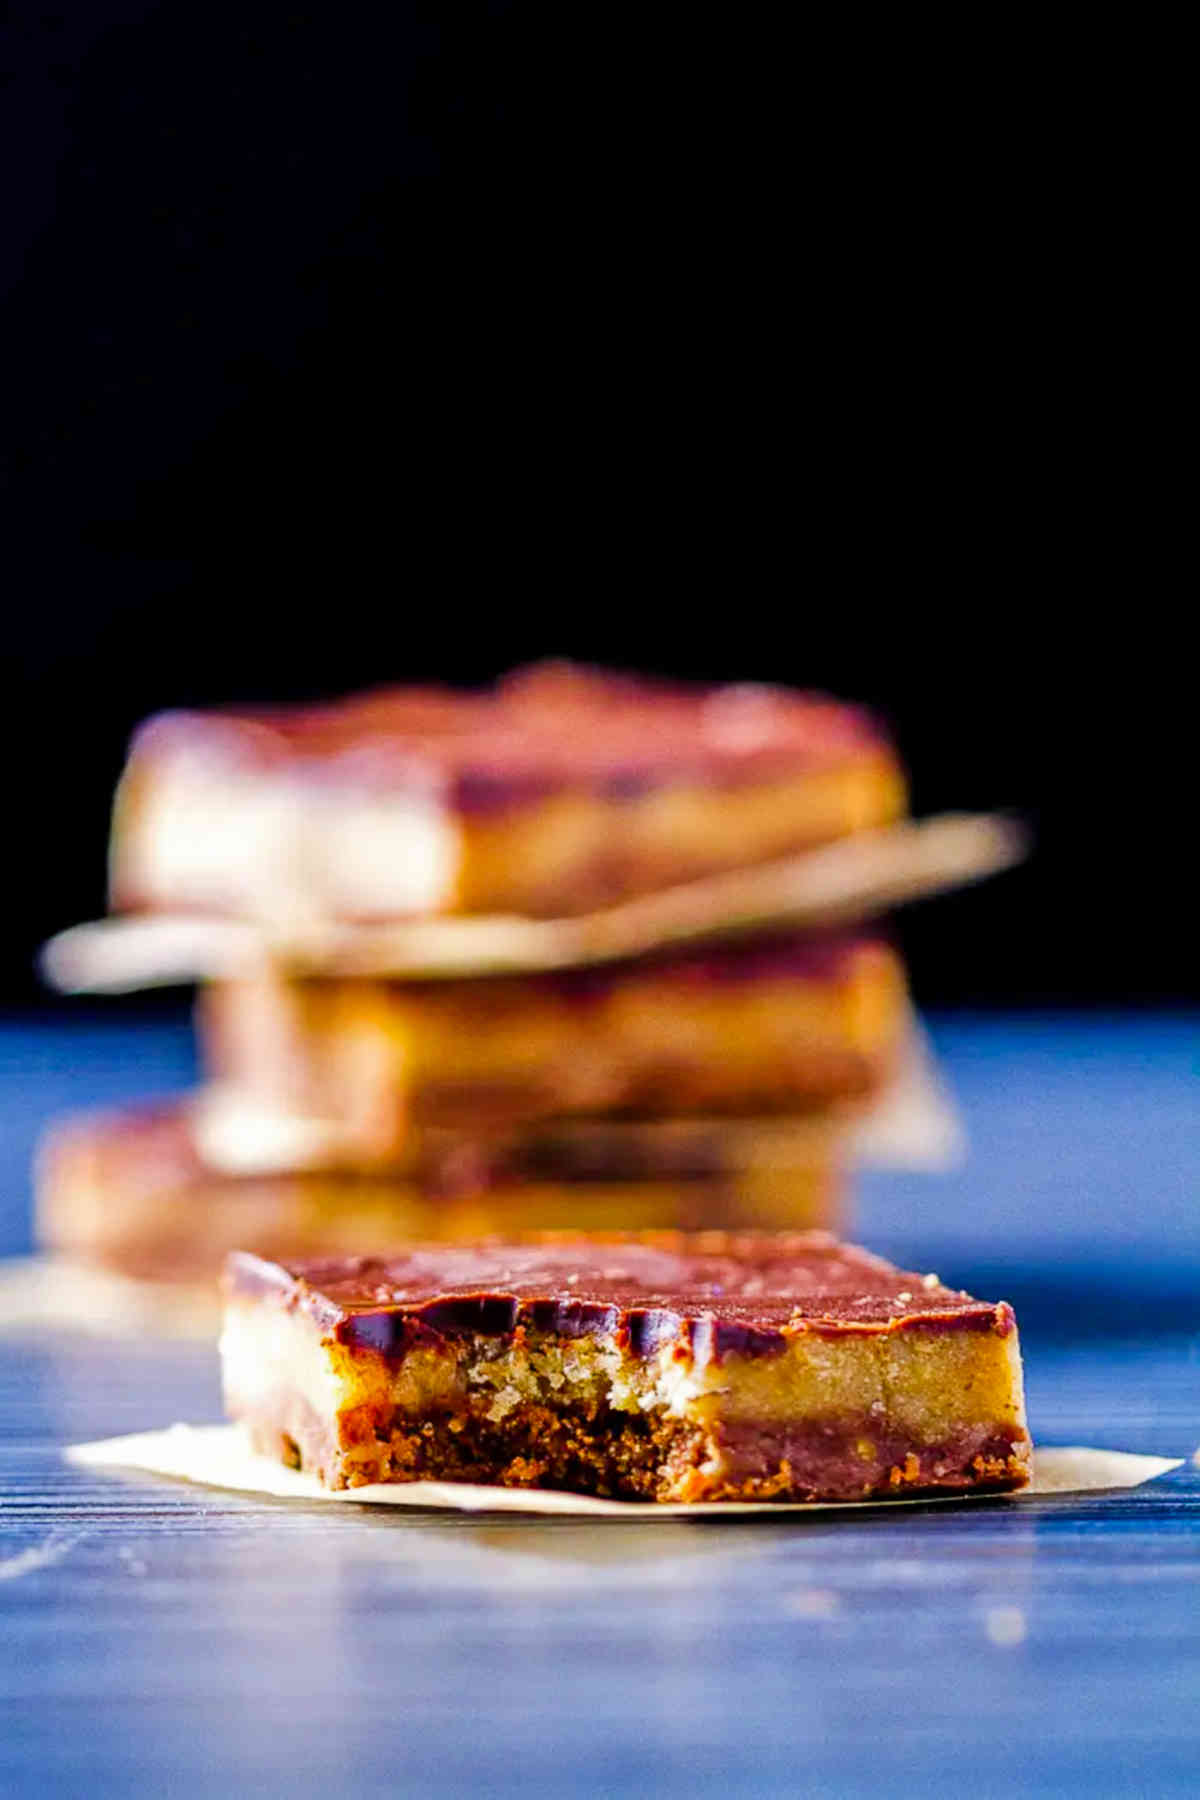
    Bajadera, Balkan nougat pralines, are no-bake dessert bars made from layers of ground nuts, and buttery biscuit crumbs. Topped with a chocolate glaze, these incredible treats are a holiday favorite. Shall we?

    Bajadera on a table.
    [feast_advanced_jump_to]

    Background

    Bajadera is a cherished dessert across the Balkans.

    Made by the famous Croatian Kraš candy factory, this praline is recognizable by its rich nougat taste and elegant gold and striped packaging. Once you see a bajadera, and taste a bajadera, you'll remember it forever.

    But while store-bought Bajadera is treasured, many people love to recreate it at home. Despite the challenge of achieving an exact replica, we believe our recipe to be one of the best homemade bajaderas out there.

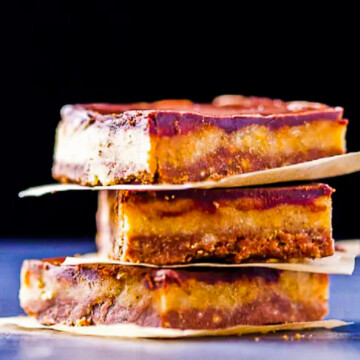
    This recipe results in praline-style dessert bars made with layers of chocolate mixed with ground nuts, biscuit crumbs, plus a chocolate glaze. The taste is beautifully balanced—nutty and sweet with a hint of dark chocolate's subtle bitterness.

    Why You'll Love Bajadera

    1. Irresistible flavor: Bajadera has a smooth, nutty, and perfectly balanced with a touch of chocolatey richness.
    2. No-bake and under an hour: Bajadera bars come together quickly, with no baking required, ideal for busy days.
    3. Perfectly balanced indulgence: Not too sweet and with a melt-in-your-mouth texture that’s hard to resist, that's what bajadera is all about!

    Ingredients

    Here's what you'll need for bajadera:

    Overhead photograph of ingredients on a table: sugar, almonds, hazelnuts, baking chocolate, cookie crumbs, butter, water, rum.
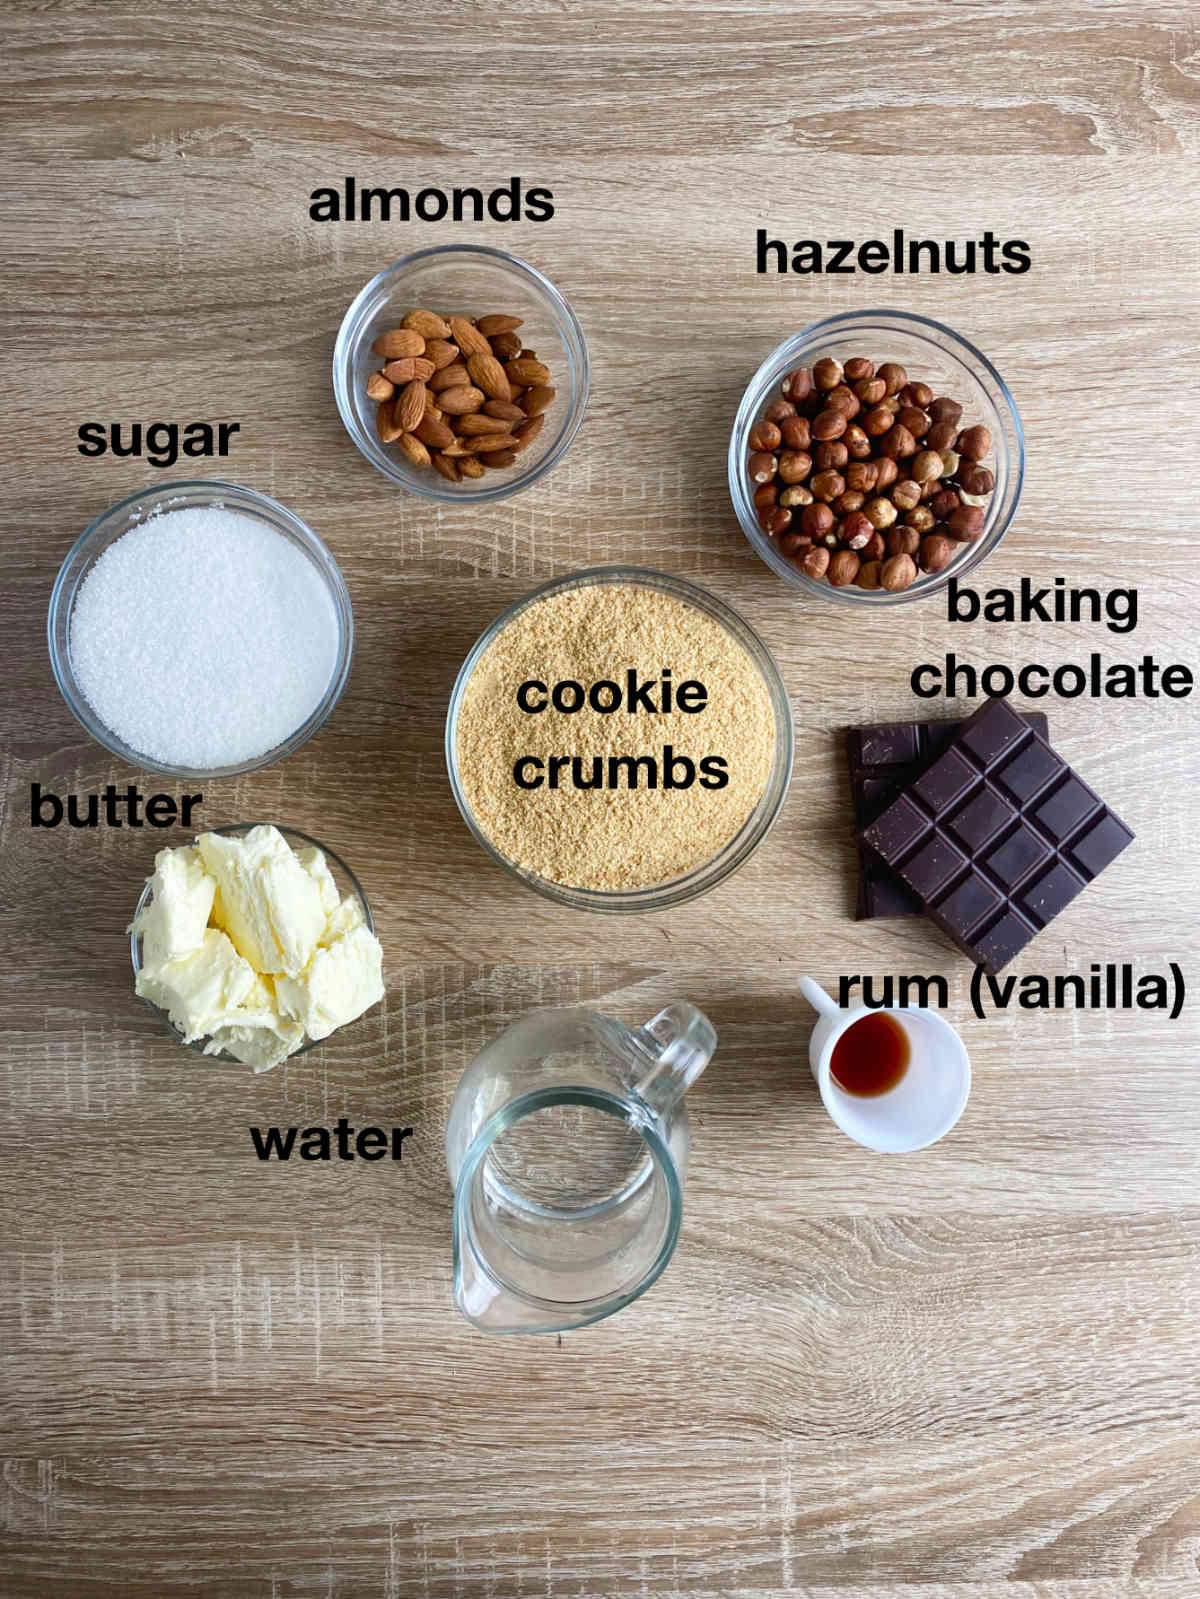
    • Baking Chocolate. While dark, baking chocolate is preferred, you can play around here to your taste. Milk chocolate will work also, as will chocolate chips. Avoid chocolates that have a filling.
    • Butter. Regular, room-temperature butter is best. Substitute with cocoa butter.
    • Sugar. Granulated sugar is preferred for bajadera. (If you use powdered - or other - sugar, let us know in the comment.)
    • Nuts. The original formula uses hazelnuts and almonds at a 3:1 ratio. You can use only almonds, hazelnuts, walnuts, or a combination. The trick is to find what works best for you. (We prefer to either use only walnuts, or the original hazelnut to almond ratio.)
    • Ground Biscuits (Cookie Crumbs): Also known as digestive biscuits these are cookies like Graham Crackers, Vanilla Wafers, Plazma biscuits, or Petit Beurre ground to the consistency of flour.
    • Rum Extract: Purely optional, but for that slight kick it's great to drop in a little bit of cooking rum into the batter.

    Instructions

    Here are the easy no-bake instructions for how to make bajadera bars at home.

    Eight photos, two by four of the preparation steps for the recipe.

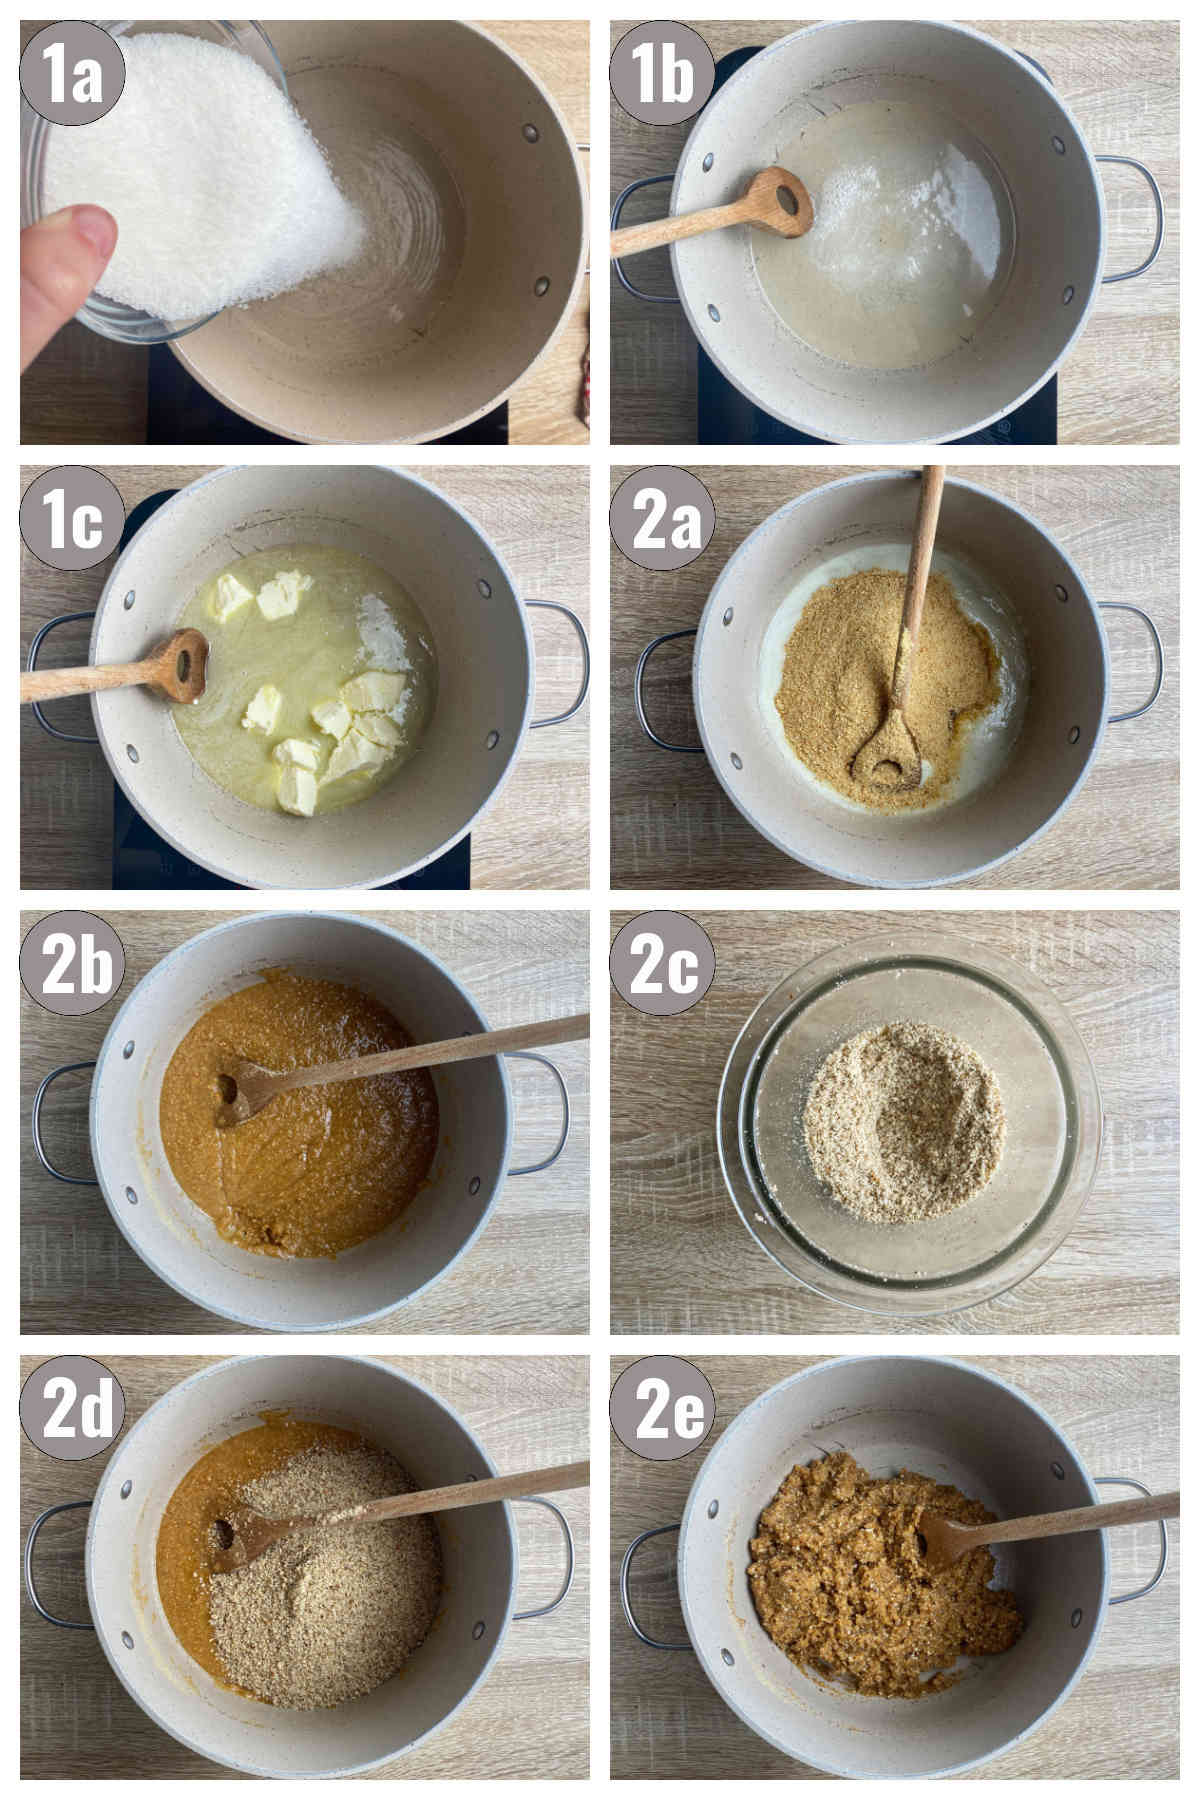
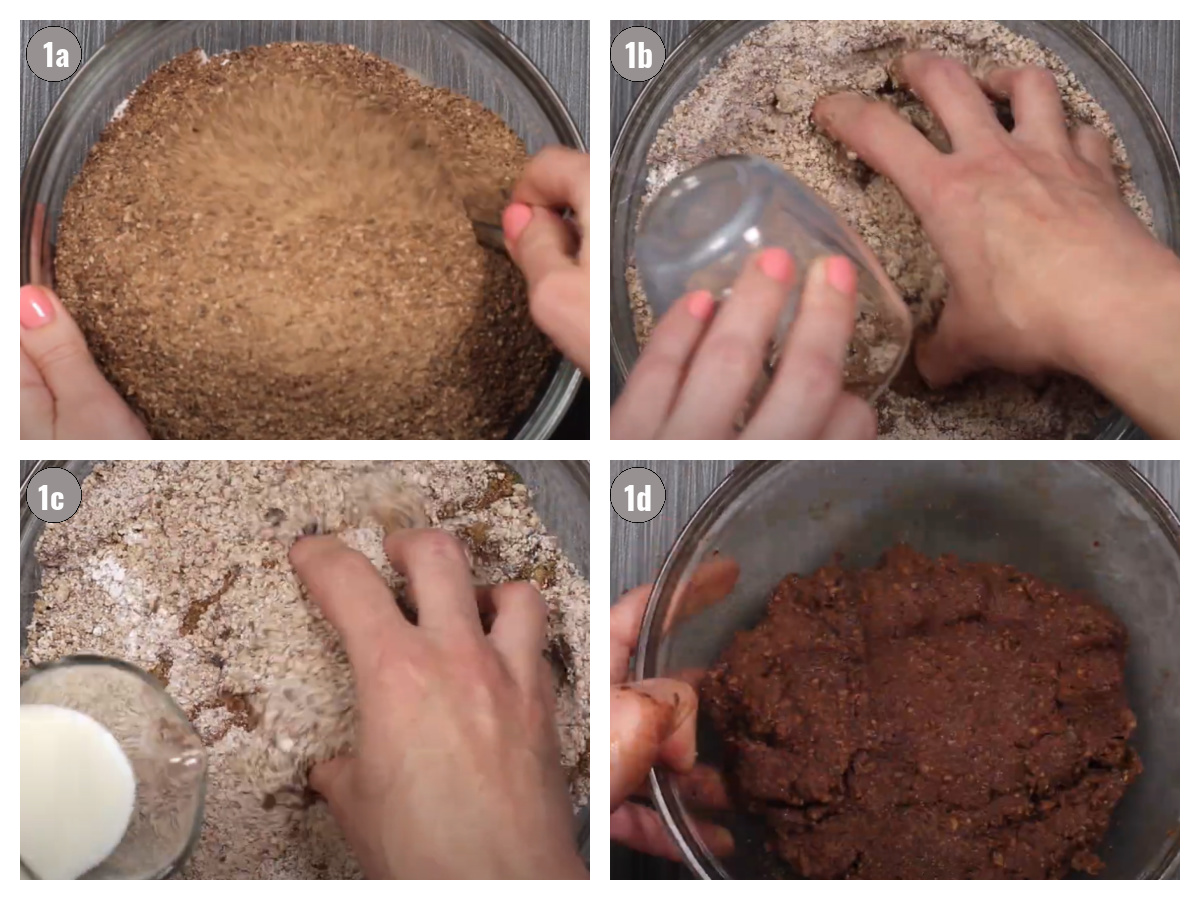
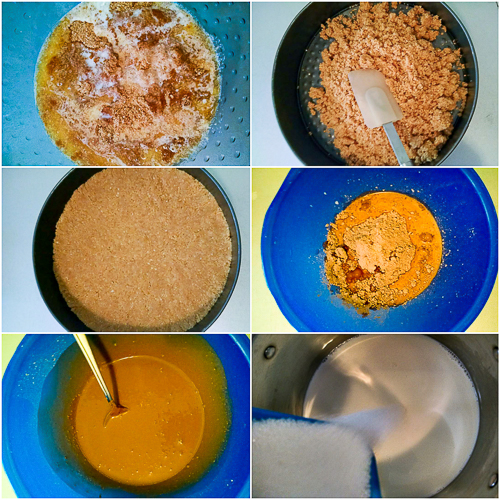
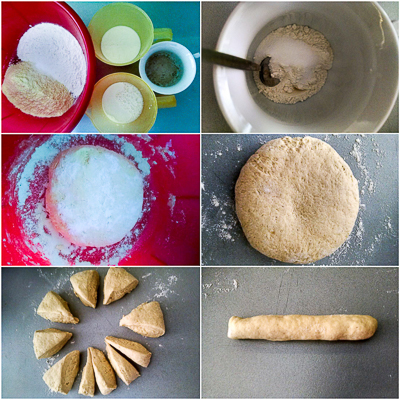
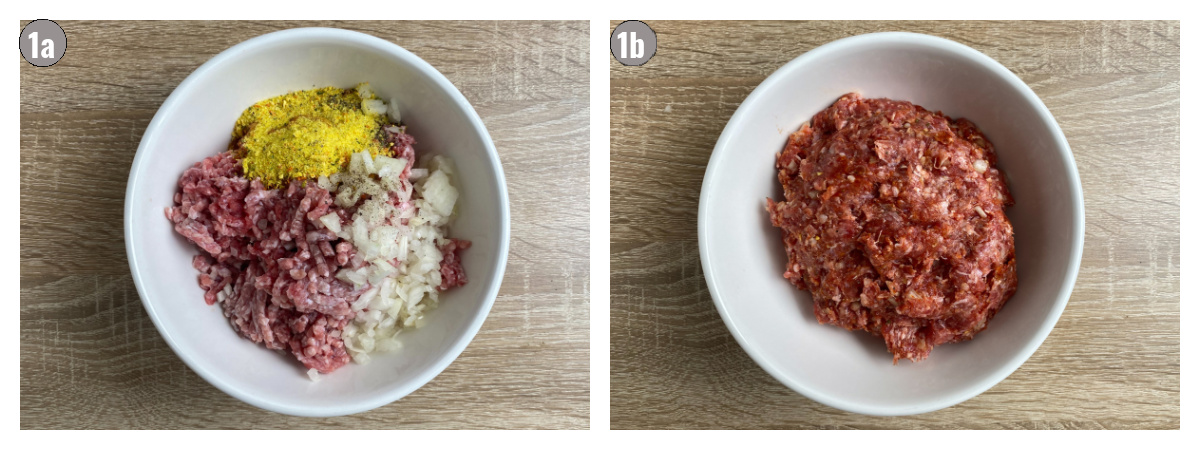
    Step 1. Dissolve sugar in water. Add butter. Remove from heat.
    Step 2. Add ground biscuits (cookie crumbs). Add nuts. Mix well until integrated. Separate in two bowls.

    Four photos, two by two, of making bajadera, melting chocolate.

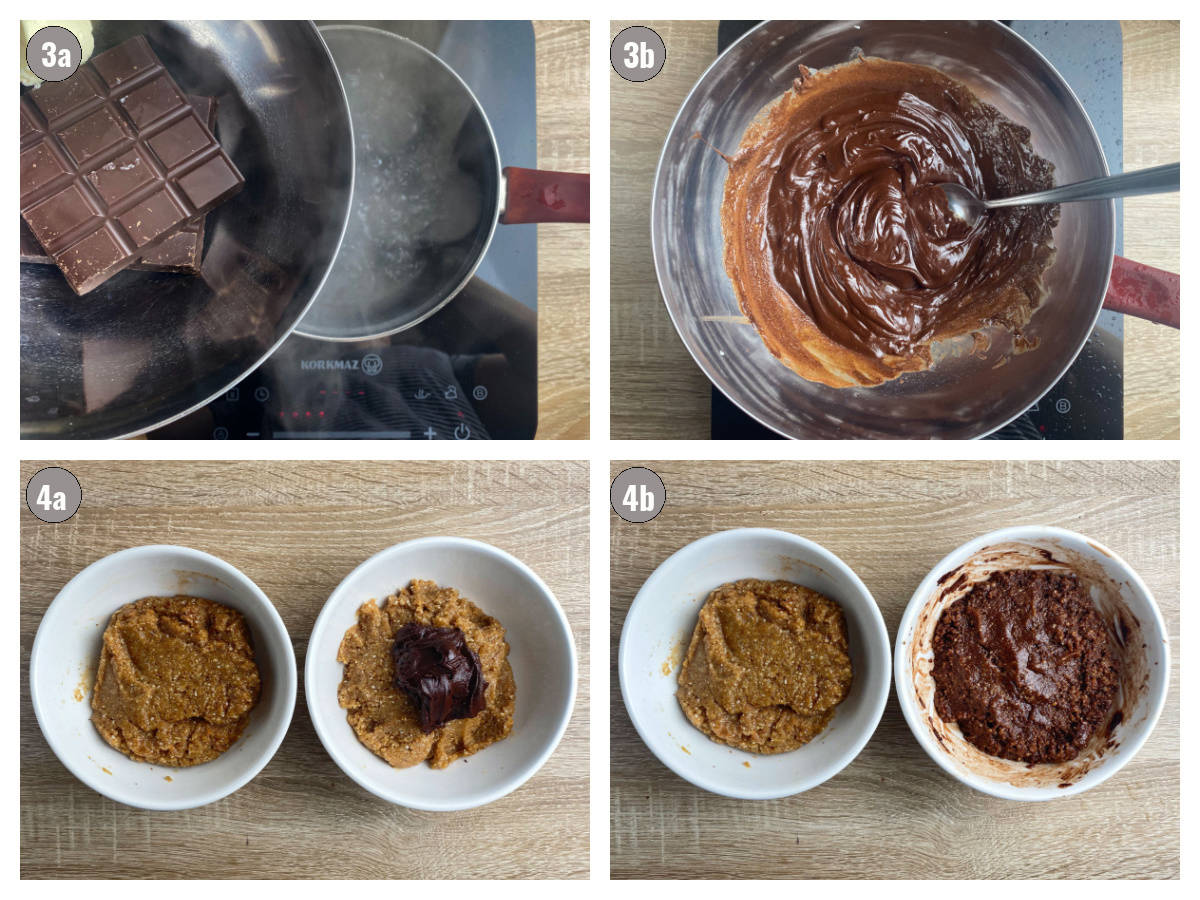
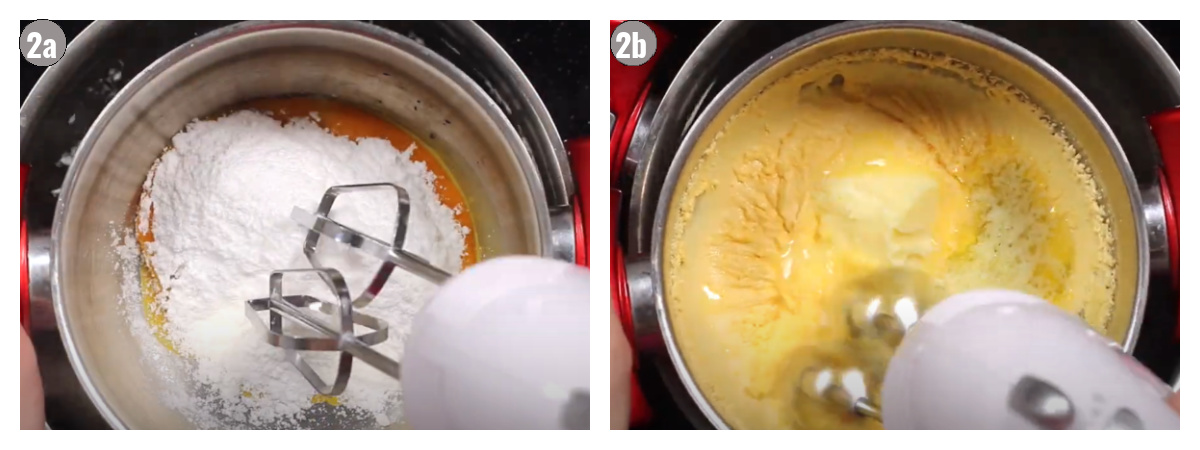
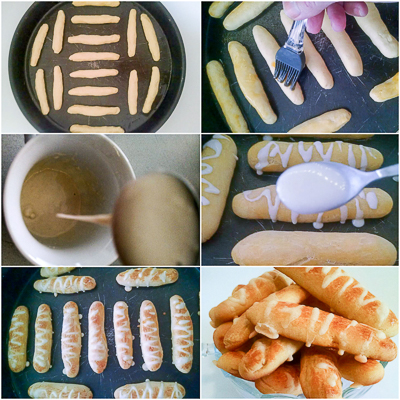
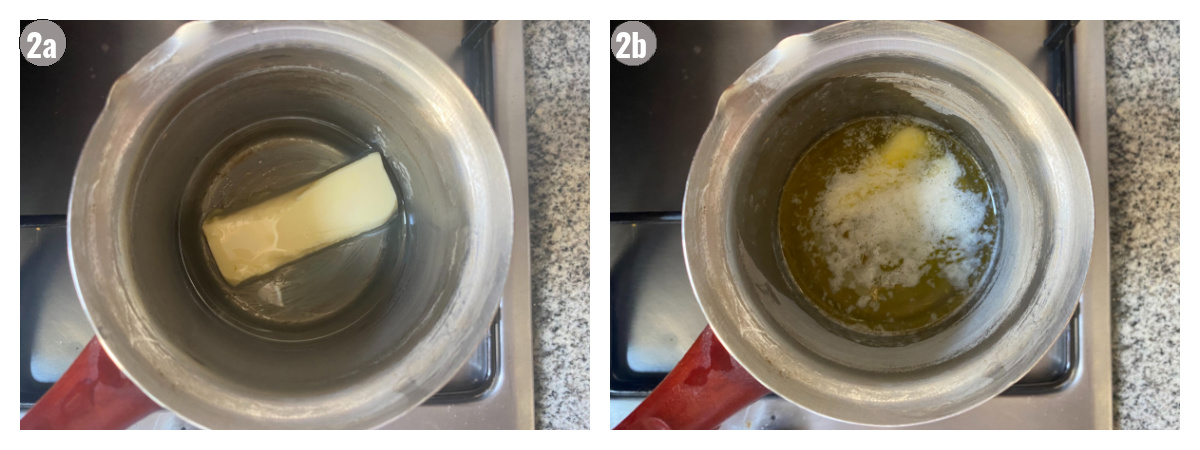
    Step 3. Melt chocolate and butter over a water boiler.
    Step 4. Add chocolate to one-half of the batter. Add rum (vanilla) to the other. Mix each well.

    Six photos, two by three, of making bajadera layers.

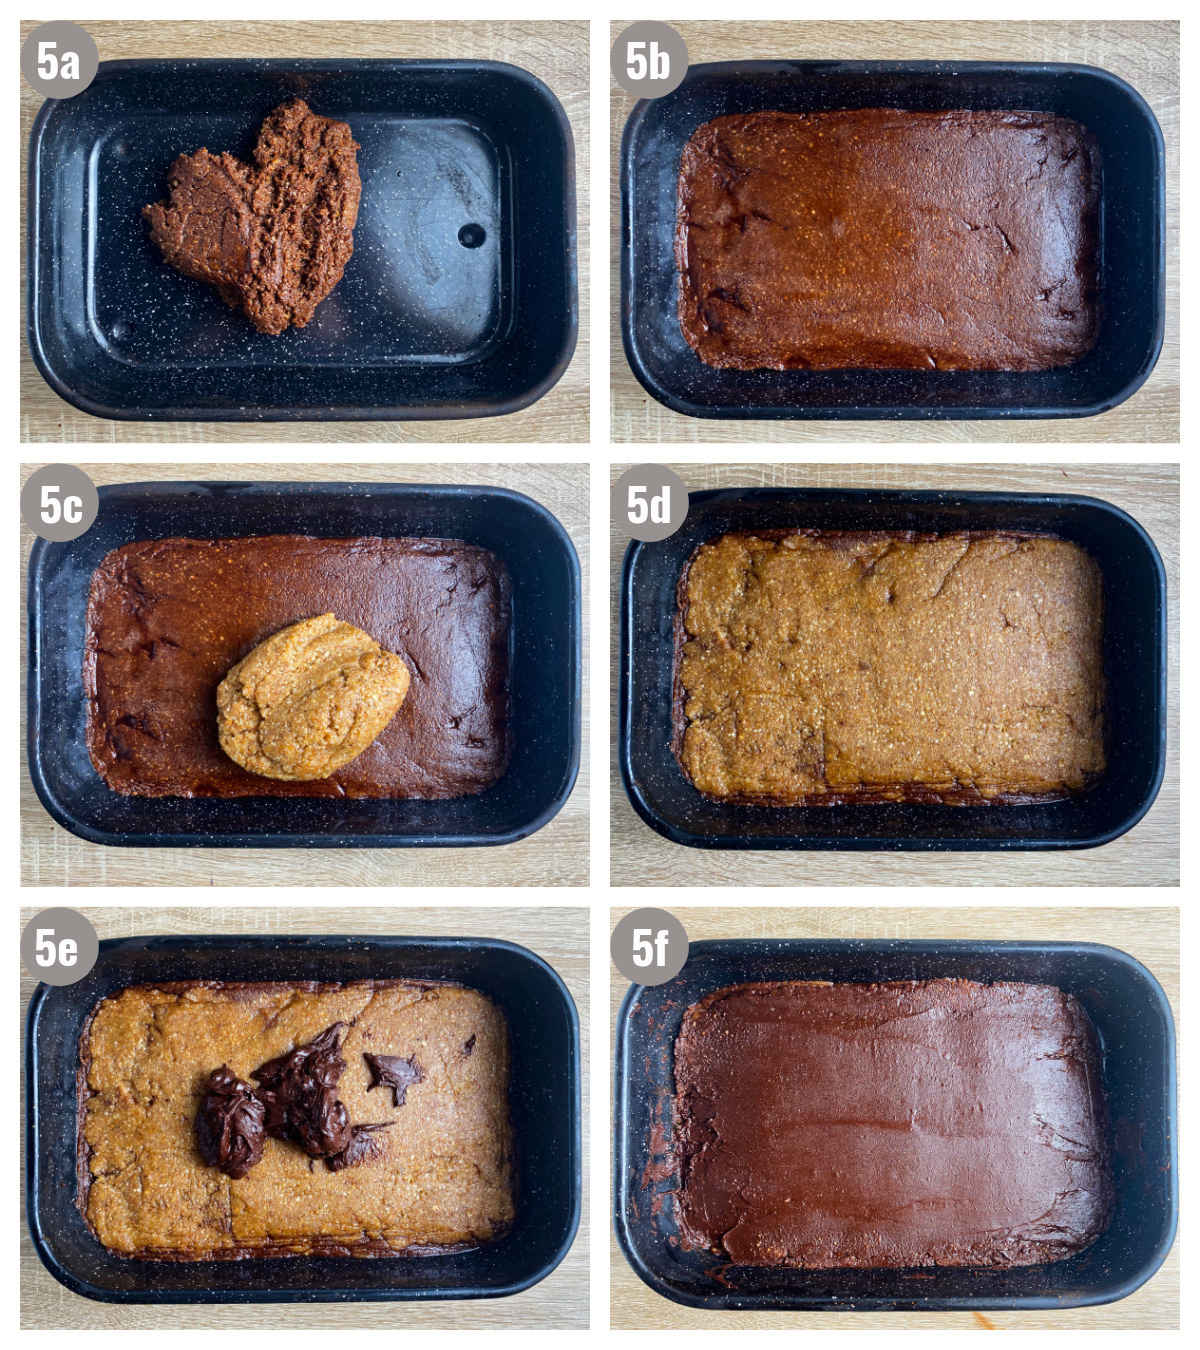
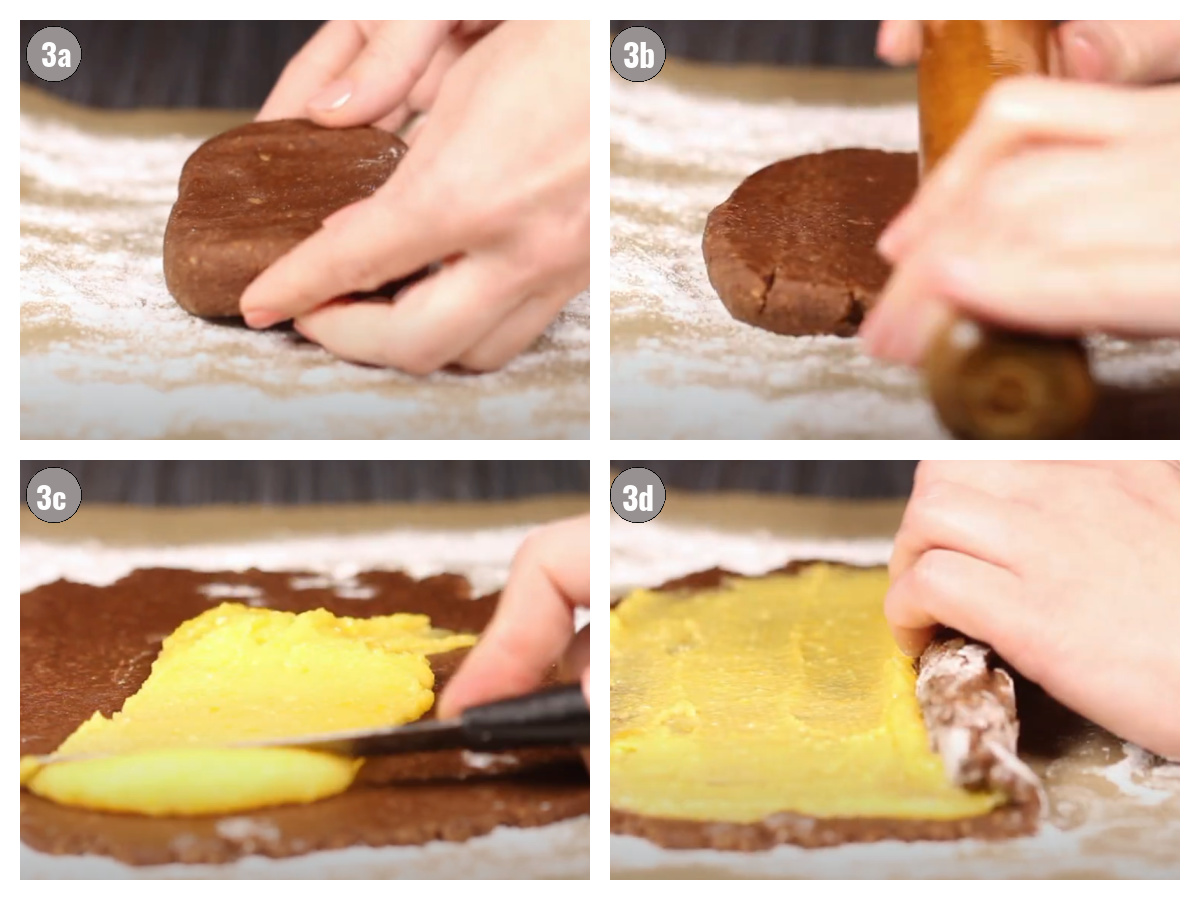
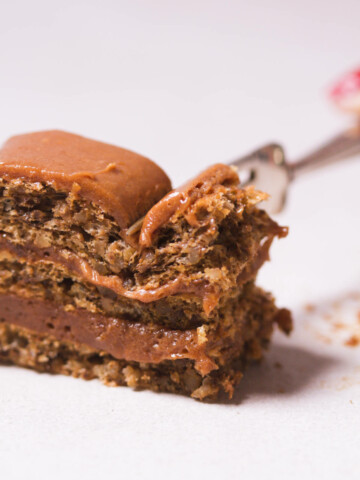
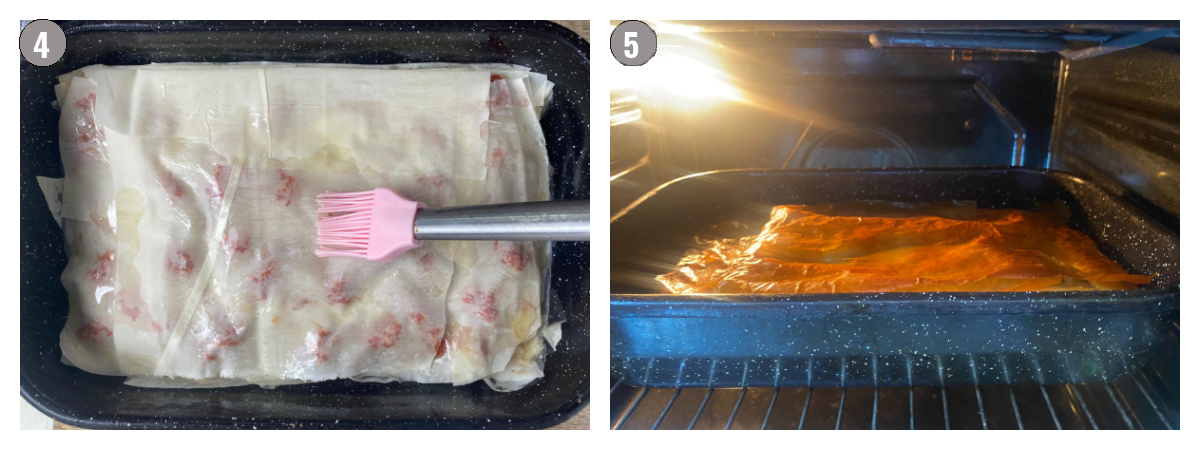
    Step 5. Grease baking pan. Spread chocolate batter on the bottom. Spread rum (vanilla) batter in the middle. Spread ½ of melted chocolate on top.
    Step 6. (Not pictured). Cover bajadera with foil and transfer it to the fridge for an hour. Cut and serve.

    Handling

    Here are some handling suggestions for bajadera praline nougat dessert bars.

    • Serving - Serve 1-3 of the bajadera bars (squares) along with some coffee, elderberry juice, or a drink of choice. For the best taste and easier cutting, take bajadera out of the fridge 15-20 minutes before serving.
    • Storing - Store in an airtight box (or foil) in the fridge or a cool, dark place for up to 5-7 days.
    • Freezing - If you're planning to freeze bajadera, do so after it cools down, but before you cut it into bars. Wrap it in freezer foil or freezer bags, getting out as much air as possible to prevent freezer burn. Once you plan to eat it, take it out and let it thaw until it's almost room temperature. Cut it into bars and serve.

    Recipe FAQs

    Three bajaderas on top of each other.
    Where is bajadera chocolate from?

    Bajadera chocolate is made by Kraš candy factory in Croatia. This praline nougat chocolate is popular in the Balkans and beyond.

    Is bajadera vegan?

    Although certified as Vegan, factory-made bajadera can contain traces of milk. Homemade bajadera is made with regular butter so it's not vegan unless you substitute it with cocoa butter.
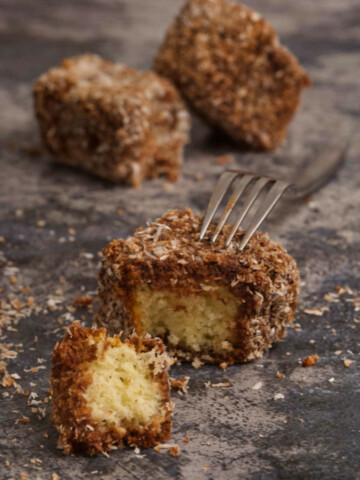
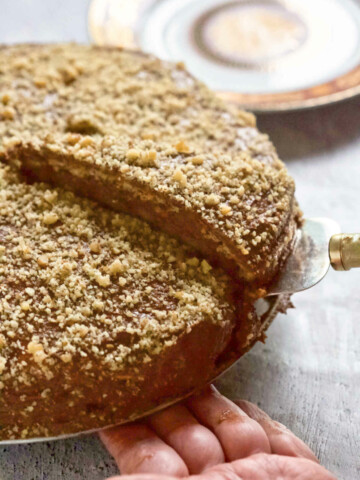
    Desserts We 💙

    Loved bajadera? Here are more desserts you won't be able to say no to!

    • Three biscuits on a gray background, one being halved with a fork.
      Čupavci: Balkan Lamingtons [One Hour]
    • Rapidly fast walnut bites (cookies).
      Walnut Cookies (Orašnice)
    • A bowl with rice pudding on a table.
      Sutlijaš: Balkan Rice Pudding (Sutlija, Riža na Mlijeku)
    • Cake being cut and a hand holding it on the bottom.
      Mama's Walnut Cake with Chocolate (Čokoladna Orah Torta) [Classic, European, Old Fashioned Torte Cake]

    Thoughts?

    If you made bajadera, the Balkan nougat pralines, and liked them, please consider giving it a ⭐️⭐️⭐️⭐️⭐️ (5-star) rating. This helps others find the recipe more easily!

    Also, feel free to leave a comment (I read each one!), and don't forget to tag a photo #balkanlunchbox, or us @balkanlunchbox, on IG.

    Prijatno, Dobar Tek, and Bon Appetit!

    Three bajaderas on top of each other.

    Bajadera: Balkan Nougat Pralines

    Aida
    Homemade version of the classic Croatian nougat pralines. No-bake dessert bars filled with nuts, chocolate, and cookie crumbs (ground biscuits).
    5 from 1 vote
    Print Recipe Pin Recipe
    Prep Time 40 minutes mins
    Total Time 40 minutes mins
    Course Dessert
    Cuisine Croatian
    Servings 15
    Calories 366 kcal

    Equipment

    • 1 baking pan that's 9x12 inches (22x30cm), or smaller

    Ingredients


    • 9 tablespoons water
    • 7 ounces granulated sugar
    • 5.6 ounces walnuts ground; or hazelnut to almond ratio (3:1), only one type of nut or a combination
    • 9 ounces ground biscuits* Graham Crackers, Vanilla Wafers, Plazma, Petit Beurre or similar
    • 7 ounces butter, divided
    • 7 ounces baking chocolate
    • ¼ teaspoon vanilla or rum extract

    Instructions
     

    • In a medium pot, dissolve 6 ounces (170g) of sugar in water over medium heat. Add butter. Stir frequently and remove off heat once the butter dissolves.
    • Add ground biscuits to the mixture and stir well until integrated. Grind your nuts to flour consistency and add to the batter. (Alternatively, if you bought them ground, add them to the batter right away.) Mix well until you get a thick, even, sticky mixture. Divide the batter in two and place into separate bowls.
    • Make a water boiler by filling a medium-sized pot ⅓ with water and bringing it to a boil on high. Bring the temperature down to low. In a medium-sized bowl (or a smaller pot) that fits snuggly in the pot with water, put chocolate and 1 ounce (30 grams) of butter. Stir well while chocolate and butter melt. As soon as they do, remove them from heat.
    • Pour ½ of the melted chocolate into one of the bowls with the batter and mix well until integrated. Add rum (vanilla) to the other half of the batter. Mix well until integrated.
    • In a greased pan, spread the batter portion with chocolate on the bottom. Use your fingers and/ or a spatula to distribute it evenly in the pan. Place the batter portion with rum (vanilla) on the top of the first. Spread it out over the first layer the best you can with your fingers, and then flatten it with a spatula. (Work fast as it'll be sticky.) Finally, top everything with the other half of the melted chocolate. Use a spatula to even it out and flatten the top.
    • For best taste, cover with foil and transfer to the fridge for an hour. After this time you can cut the entire bajadera into bars right away, or keep it in the pan and cut before serving.
    • Serve 1-3 bars along with some coffee, elderberry juice, or a drink of choice. For the best taste and easier cutting, take bajadera out of the fridge 15-20 minutes before serving.
      Store in an airtight box (or foil) in the fridge or a cool, dark place for up to 5-7 days.
      Freeze - if planning to freeze bajadera, do so after it cools down, but before you cut it into bars. Wrap it in freezer foil or freezer bags, getting out as much air as possible to prevent freezer burn. Once you plan to eat it, take it out and let it thaw until it's almost room temperature. Cut it into bars and serve.

    Video

    Notes

    • Nutrition 
    Please note that the nutrition information is a loose estimate based on using Vanilla Wafers and walnuts. It's calculated based on 1 out of 15-ish servings, or about 2-3 bars. 
    • Serving Size
    This recipe yields 40-ish smaller squares (rectangles). The serving size is about 2-3 bars. You're welcome to cut them any size you'd like, however.
    • Cookie Crumbs
    To make cookie crumbs: 1. Place cookies in a zip lock bag. 2. Zip the bag. 3. Run a rolling pin over it several times. 
    • Pan Size 
    Pan size is only a recommendation. You can go with a smaller-sized one (not bigger though!). While they pack on quite a punch, the bars are ultimately thin, and if you use a smaller pan the layers will be thicker.  

    Nutrition

    Serving: 2barsCalories: 366kcalCarbohydrates: 30.5gProtein: 4.3gFat: 26.2g
    Tried this recipe?Let us know how it was!

    More Recipe 💙

    • Red pot with soup, a ladle and a soup bowl with soup on a gray background (spoon and kitchen towel also included).
      Beef Noodle Vegetable Soup [Instant Pot, Stovetop]
    • Stuffed cabbage on a spoon in a copper pot.
      Sarma: Best Traditional Balkan Stuffed Sour Cabbage Rolls
    • Coffee pot pouring coffee into a small cup on a silver tray.
      How to Make Bosnian Coffee (Bosanska Kafa, Kahva, Kava)
    • Black pan with two eggs and ground beef around which is a kitchen towel, all on a wooden table.
      Poached Eggs with Ground Meat (Čimbur)

    Chocolate Cake Rolls

    Jan 10, 2018 · 5 Comments

    Chocolate cake rolls on a pink background.

    Chocolate cake rolls are a no-bake dessert that’s easy to put together. Think deep chocolate and cream flavors, mixed with walnuts for a slight crunch. Effortless yet impressive! Shall we?

    Chocolate cake rolls on a pink background.
    [feast_advanced_jump_to]

    Background

    Today's delicious no-bake chocolate cake rolls are deeply flavorful. In taste, they're kind of like a mix between mama's chocolate cake and meringue cake.

    Our chocolate cake rolls consist of two layers. The outer layer mostly consists of ground walnuts and baking chocolate. When combined, these ingredients are the perfect canvas for the inside filling layer made of buttery egg yolk cream.

    Once formed, the rolls stay in the fridge (or freezer) until serving. They're sliced just before consumption to help keep their beautifully marbled texture and satisfying taste.

    Chocolate cake rolls go great with coffee, tea, or local refreshing drinks like elderberry cordial or juniper berry juice.

    Why This Recipe Works

    • No-Bake! Enough said!
    • Make-Ahead Friendly! Ideal for any and every situation! Keeps great in the freezer too.
    • Aesthetically pleasing! Go ahead, torture that annoying baker neighbor with your effortless but perfect chocolate rolls.

    Ingredients

    Here are the ingredients for today's chocolate cake rolls:

    • Walnuts. Ground walnuts work best. Substitute with almonds or hazelnuts for a lighter taste.
    • Chocolate. Baking chocolate, shredded chocolate chips, dark chocolate, milk chocolate all work. If using a type other than baking chocolate, adjust the sugar volume. Avoid chocolates with a filling.
    • Confectioner's sugar. Powdered sugar. Exchange half with granulated sugar. If you use another type, let us know in the comments.
    • Milk. Regular milk. Substitute with almond or soy milk.
    • Vanilla. Any type of vanilla extract works, however liquid is best. Substitute with liqueurs like sour cherry liqueur or raspberry liqueur.
    • Egg Yolks. No substitutes.
    • Butter. No substitutes.

    Instructions

    Here are the instructions for our chocolate cake rolls:

    Four photographs, side by side, of ingredients in a bowl worked on with a hand.

    Step 1. Make the outside chocolate layer. Whisk together dry ingredients in a bowl. Add wet ingredients and work into a sticky, consistent dough. Divide into 4 parts.

    Two photographs, side by side, of mixing cream in a pot.

    Step 2. Make the inside filling layer. Make a water boiler. Work egg yolks and confectioner's sugar with a mixer. Add butter and mix again.

    Four photographs, two by two, of cake rolls being put together.

    Step 3. Combine the outside and inside layers. On parchment paper roll out one chocolate part, and top with ¼ of the filling. Roll. Repeat for all ingredients.

    Step 4. Chill then cut. Roll chocolate roulades into the parchment paper. Leave in the fridge or freezer. Unwrap and cut before serving.

    Handling

    Overhead chocolate cake rolls on a table.

    Here's how to best store and serve chocolate cake rolls.

    Serve. Take out of the refrigerator and cut just before serving. Enjoy chocolate cake rolls with a beverage of choice.

    Store. Keep chocolate cake rolls in an airtight container in the fridge for 3-4 days.

    Freeze. Chocolate cake rolls are great for freezing. Keep them in an airtight bag or container for up to 2 weeks in the freezer. Transfer to the fridge a couple of hours before you plan to consume them.

    Recipe FAQs

    Can I use something else instead of walnuts?

    Yes! Almonds or hazelnuts work great. Most other nuts with a high fat content will work.

    Can I use a biscuit (ground cookies) instead of walnuts?

    No. Biscuits (ground cookies) are too dry, while nuts have a high fat content.

    There is a high chance your roll will crumble if you use cookies as a base for this particular dessert.

    How do I prevent the roll from crumbling?

    Chocolate cake roll crumbling usually happens because the outer layer is not moist enough.

    Your mixture should be just the right moisture: not too dry and not too wet, with the structure of wet sand. Add a little bit more milk if it feels dry.

    Excessive crumbling during cutting can be a sign that the rolls have been kept for too long and it's time to discard them.

    Thoughts?

    If you make today's chocolate cake rolls and like them, please consider leaving a ⭐️⭐️⭐️⭐️⭐️ (5-star) rating. This will help others find the recipe more easily!

    You can also leave a comment, I read EVERY one! Finally, if IG is more your thing, consider tagging us @balkanlunchbox.  

    Prijatno, dobar tek, and bon appetit!

    Chocolate cake rolls on a pink background.

    Chocolate Cake Rolls

    Aida
    Rich chocolate cake rolls are an easy yet impressive dessert for any occasion!
    5 from 2 votes
    Print Recipe Pin Recipe
    Prep Time 40 minutes mins
    Cook Time 20 minutes mins
    Resting Time (Fridge) 4 hours hrs
    Total Time 5 hours hrs
    Course Dessert
    Cuisine Bosnian, Croatian, Serbian
    Servings 16
    Calories 276 kcal

    Equipment

    • 4 squars of parchment paper (approximately 14-inches (about 36 cm) per side)

    Ingredients


    Inside Layer

    • 10.5 ounces ground walnuts substitute with hazelnuts or almonds
    • 10.5 ounces baking chocolate finely grated
    • 10.5 ounces confectioner's sugar
    • 6 tablespoons milk
    • .5-1 teaspoon rum or vanilla extract adjust to taste, or avoid, substitute with sweet liqueurs

    Inside Layer

    • 4 egg yolks
    • 7 ounces confectioner's sugar, plus a little more
    • 1-2 tablespoons butter

    Instructions
     

    Outside Layer

    • In a large bowl, combine walnuts, chocolate, and confectioner's sugar. Whisk until integrated. Add vanilla extract and milk. Take over with your hands, and knead vigorously for 3-4 minutes, or until you get a congealed, semi-hard, thick mixture resembling wet sand in texture.
    • Divide into four equal parts. Work each into a smaller rectangle, the thickness of 2-3 fingers. Set aside.

    Outside Layer

    • Make a water boiler by filling a smaller pot ⅔ with water and bringing it to a rolling boil. Reduce temperature to low, or medium. Place a stainless steel bowl (or a smaller pot) into the large one making sure it's halfway in.
    • Add yolks and sugar to the smaller pot, and mix with a hand mixer until egg yolks become light yellow, or about 5 minutes. Hold the pot with the other hand the best you can, making sure: 1. you're mixing everything, and 2. you're being careful not to flip the pots over and burn yourself. (This part is crucial as you're processing the egg yolks.)
    • Add butter to the pot, and continue mixing. Once the mixture is completely smooth (3-4 minutes), remove off heat.

    Combine

    • Take one sheet of parchment paper onto your working area, and sprinkle it with confectioner's sugar. Then take one chocolate layer and spread it out into a rectangle with a rolling pin until it's the thickness of a finger (approximately). Take ¼ of the yellow layer and spread over the top evenly. Roll the cake in starting with the longer end.
    • Cover in baking paper and leave in the fridge or freezer depending on when you plan to consume it. (Let it stiffen for at least 3-4 hours before serving, preferably overnight.) Repeat the steps for the remaining 3 rolls.

    Handling

    • Serve: Take out of the fridge then cut into 1-inch pieces just before serving. Enjoy chocolate cake rolls with a beverage of choice.
      Store: Keep chocolate cake rolls in an airtight container in the fridge for 3-4 days.
      Freeze: Chocolate cake rolls are great for freezing. Keep them in an airtight bag or container for up to 2 weeks in the freezer. Transfer to the fridge a couple of hours before you plan to consume them.

    Video

    Notes

    • Nutritional Information
    Nutritional information was calculated for ¼ of one chocolate roll, or a few pieces. 

    Nutrition

    Calories: 276kcalCarbohydrates: 36.8gProtein: 3.67gFat: 13.06gSaturated Fat: 7.483gPolyunsaturated Fat: 0.951gMonounsaturated Fat: 3.987gCholesterol: 51mgSodium: 21mgPotassium: 172mgFiber: 3.1gSugar: 30.86gVitamin A: 115IUCalcium: 32mgIron: 3.4mg
    Tried this recipe?Let us know how it was!

    Recipe 💙

    • Santa’s sugar cookies: classic butter and sugar dough that can be used for several different cookies. Make the dough the night before. The day off, roll the dough out, and shape and bake. Done in 15 minutes.
      Santa's Sugar Cookies
    • Stewed apple in a clear bowl, on the table.
      Stewed Stuffed Apples in Syrup (Tufahije)
    • A piece of cake cut with a fork on a white background.
      Chocolate Hazelnut Cake (Šamponeze Torta)
    • Cake being cut and a hand holding it on the bottom.
      Mama's Walnut Cake with Chocolate (Čokoladna Orah Torta) [Classic, European, Old Fashioned Torte Cake]

    No Bake Chocolate Pudding Biscuit Cake

    Dec 23, 2017 · 8 Comments

    Chocolate pudding biscuit cake: three tier no bake dessert made from ingredients you already have in your kitchen (pudding, biscuit, butter, heavy cream, sugar and milk). Because, sometimes, simple really is the best. 

    Chocolate pudding biscuit cake: three tier no bake dessert made from ingredients you already have in your kitchen (pudding, biscuit, butter, heavy cream, sugar and milk). Because, sometimes, simple really is the best. 

    Chocolate pudding biscuit cake: three tier no bake dessert made from ingredients you already have in your kitchen (pudding, biscuit, butter, heavy cream, sugar and milk). Because, sometimes, simple really is the best. 

    A few weeks ago during a brainstorming session, Aleksandra and I decided you needed a super simple dessert. Pudding + biscuit kind of dessert. The kind that's sweet and tasty, and not complicated. The one when people ask you what it is you can say "I had some pudding, and some biscuits and I whipped up a quick cake."

    Or you could just smile and make them think it took you forever to make.

    Chocolate pudding biscuit cake: three tier no bake dessert made from ingredients you already have in your kitchen (pudding, biscuit, butter, heavy cream, sugar and milk). Because, sometimes, simple really is the best. 

    Chocolate Pudding Biscuit Cake

    Aida
    No ratings yet
    Print Recipe Pin Recipe
    Course Dessert

    Ingredients
      

    Tier 1:

    • 10.5 ounces ground biscuits Plazma, Petit Beurre or similar
    • 3.5 ounces milk
    • 3.5 ounces butter melted
    • ¼ teaspoon vanilla extract

    Tier 2:

    • 4.5 ounces chocolate pudding mix powder
    • 3.5 cups milk 27 ounces
    • 7 ounces sugar

    Tier 3:

    • 3.5 ounces sugar
    • 1.7 ounces butter
    • 13 ounces whipped cream 1.7 cups
    • 7 ounces white chocolate broken into pieces

    Instructions
     

    • Tier 1: Combine tier 1 ingredients in a mixing bowl and integrate well. Transfer to a cake mold (pan) and push down, spreading evenly. Set aside.
    • Tier 2: In a medium bowl, combine pudding mix with 20 tablespoons of milk and stir until integrated. Pour the remaining milk into a medium pot and combine with sugar. Stir and bring to boil on medium. Bring temperature to low, pour in the pudding mixture and continue stirring while you cook. Cook a few minutes until it achieves a thick, creamy consistency (a bit thicker than regular pudding).
    • Pour pudding mix over Tier 1. Spread evenly and leave in fridge to cool.
    • Tier 3: In a pan, melt sugar and butter together on low for 5 minutes, or until the mixture starts bubbling up. Remove from heat and add 7 ounces of whipped cream. Place back on the stove, and add chocolate. Let it melt and stir occasionally. After chocolate melts, add the remaining whipped cream. Stir well. Remove off heat and let cool.
    • Take the first cake 2 tiers out of the cake mold and place onto a larger plate. Spread tier 3 over it evenly. Before consuming, return to fridge for an hour or two.

    Notes

    By biscuit cookies it is meant the European-type biscuit cookies like Plazma or Petit Beurre, not to be confused with US breakfast biscuits.
    Tried this recipe?Let us know how it was!

    Easy Ham and Bean Soup Recipe (Pasulj or Grah)

    Nov 14, 2017 · 35 Comments

    Bowl filled with ham and bean soup on a honeycomb plate.

    Who doesn't like a good ham and bean soup recipe? Tasty, buttery beans, rich and savory ham, and an easy roux combine to make this classic Balkan stew also known as pasulj or grah. Shall we?

    Cup bowl with bean soup.
    [feast_advanced_jump_to]

    Background

    Today's well-known Balkan bean soup goes by pasulj or grah. It's a really tasty stew! If stuffed sour cabbage is the queen of winter, pasulj is the king of fall!

    The best thing about this soup is that you can adjust the ingredients freely and it'll still taste unbelivably good.

    Most types of dried beans, and almost any (non-poultry) meat work! We like it the best with dried beef or ham, and that's exactly what we'll be doing today.

    If you haven't made dried beans before, here's the perfect opportunity to try. Made the right way (soaked and then cooked) dried beans have a soft, chestnut-like consistency, and a great flavor.

    We'll also show you an easy roux that you can later use to thicken any stew or soup.

    Our ham and bean soup recipe goes perfectly with fermented salads, and our fried dough balls. And it tastes even better the next day!

    Ingredients

    Ham and bean soup recipe ingredients:

    Stew ingredients (seasonings, meat, beans, etc) on a gray background.
    • Dry beans you can use for this ham and bean soup recipe include cannellini, navy, great northern, canary beans, kidney beans, black beans, cranberry beans, pinto beans, and black-eyed peas.  Avoid chickpeas, soybeans, and canned beans.
      • Yes, the beans must be dry. No worries though! Take a look at the recipe FAQ for our super simple soaking directions.
    • Meat you can use include ham (glazed, smoked, city, country, fresh, and wet-cured - your pick!), bacon, dried or smoked beef, ham hock, ribs, ham bones, beef bones and sausage (beef, pork, mild or spicy). Avoid poultry. 
    • Spices and Seasonings: parsley, bay leaves, bouillon cube (or stock powder), and pepper (or peppercorn), and paprika. Substitute with your own spice mix.
    • Water can be exchanged with beef or pork broth, however it's not necessary. The meat provides plenty of flavor. If you still go for broth adjust for saltiness by adding less of the seasonings, or by mixing broth with water.

    Roux or no roux?

    This is up to you, but we love to add it. It thickens the soup in just the right way,

    Roux for the ham and bean soup recipe ingredients:

    Oil, flour, paprika in ceramic containers on a gray background.
    • All you need for the roux are vegetable oil (coconut and sunflower are ok too), flour (avoid substitutes), and paprika (smokey, hot or sweet, your choice!).

    Instructions

    Instructions for ham and bean soup recipe:

    Ham soup preparation in six photos, ingredients in pot.

    Step 1. Soak the beans by placing them in a large bowl and covering them with water. Leave for 7-8 hours, or overnight.
    Step 2. Simmer onion, garlic, carrots, and meat.
    Step 3. Add beans, seasonings, and water. Cook for a few hours.

    Instructions for the easy roux (thickener):

    Oil, flour and paprika in a pan, roux preparation in four pictures.

    Step 4. Heat up oil. Whisk in flour. Whisk in paprika. Whisk roux into the soup.

    Handling

    • Serving: serve warm. It goes great with homemade bread and a fresh cabbage salad.
    • Storing: store in the fridge (or in a really cool place, like a terrace or the porch in the winter) for up to 3 days.
    • Freezing: let the soup cool down to room temp and portion it out into freezer-ware. Freeze for up to 3 months.
    • Reheating: when ready to eat the soup after storing in the fridge, take it out and reheat using your preferred method. When ready to eat after freezing, transfer to the countertop a few hours before you intend to eat it, or to the fridge the night before. Reheat just before eating using your preferred method. If the soup is too thick, add a little bit of water, or broth.

    Recipe FAQs

    How to soak beans?

    Place the beans in a bowl and cover with water. Let them soak on a countertop for several hours, or overnight. When ready to use, strain the water and wash the beans, then transfer them to your cooking pot.

    The length of soaking will depend on the age of your beans. Younger beans take about 4 hours to soak and older beans 8-12 hours (overnight).

    Can you soak beans for too long?

    Yes. Anything longer than 12-14 hours is too long. Look for signs of wrinkling (shriveling).

    Ultimately, beans are OK to soak for up to 24hrs. However, there is really no need to soak them this long. Also, after this amount of time they may sprout, and shrivel up too much.

    Should I soak them in the refrigerator?

    No. The countertop is fine.

    Why do you discard bean soaking water?

    The point of soaking beans is to get rid of elements that cause bloating and indigestion, as well as to shorten the cooking time. The water they've been soaking in absorbs everything you're trying to eliminate. It's best to discard it.

    What spices go in ham and bean soup?

    The best spice for this particular soup is paprika (hot or sweet). Paprika provides a smoky, deep dimension to the dish.

    Bay leaf is also great for this ham and bean soup recipe. However it can be strong, so we usually take it out at the end of cooking.

    However, feel free to experiment with spices and seasonings.

    What kind of beans do you put in ham soup?

    You can use almost any type of dry beans for this ham soup. Some great choices are white beans like cannellini, navy, or great northern, then canary beans, and also kidney beans, black beans, cranberry beans, pinto beans, and black-eyed peas.

    Look for younger dried beans. This means beans that have been dried recently as opposed to a couple of years ago. Younger beans take a shorter time to make and they soak for a shorter amount of time as well. Finally, they taste better and have a chestnut, soft, consistency when made.

    Avoid lentils (soy) and chickpeas (garbanzo) beans as they have a different consistency when cooked.

    How do you thicken ham and bean soup?

    A simple roux will thicken this ham and bean soup recipe. A roux is a quick and easy sauce you make with fat and flour. It takes minutes to make and then you pour it into the dish to thicken it.

    Spoonful of bean soup.

    Bean Ideas

    Sold on the beans, but want something a little bit different? Here you go!

    • Sausage Bean Stew
    • Prebranac: Balkan Baked Beans
    • Quick Macedonian Tavče Gravče
    • Baked Romano Beans
    • Romano Bean Veal Stew

    Thoughts?

    If you make today's Balkan ham and bean soup (pasulj or grah), and like it, please consider leaving a ⭐️⭐️⭐️⭐️⭐️ (5-star) rating. This will help others find the recipe more easily!

    You can also leave a comment, I read EVERY one! Finally, if IG is more your thing, consider tagging us @balkanlunchbox.

    Prijatno and bon appetit!

    Bowl filled with ham and bean soup on a honeycomb plate.

    Easy Ham and Bean Soup Recipe (Pasulj or Grah)

    Aida
    This delicious old-fashioned ham and bean soup is a Balkan classic. Known as grah or pasulj, the dish is so versatile you can use almost any type of meat or dry beans to make it.
    5 from 4 votes
    Print Recipe Pin Recipe
    Course Main Course
    Cuisine Bosnian, Croatian, Kosovo, Macedonian, Montenegro, Serbian, Slovenian
    Servings 4
    Calories 698 kcal

    Ingredients


    Soup (stew):

    • 12-14 ounces dry beans (kidney, white northern or canary, etc) look in the notes for more dry bean options
    • 3 tablespoons vegetable oil or coconut or sunflower oil
    • 1 onion large, peeled, minced
    • 2-3 garlic cloves peeled, minced
    • 2 carrots medium, peeled, diced
    • 3-4 ounces ham, bacon, or dried beef diced, look in the notes for more meat options
    • Salt and pepper to taste
    • (Optional) 1 tablespoon stock powder, Vegeta, or a bouillon cube
    • 1 bay leaf

    Roux:

    • 5-6 tablespoons vegetable oil
    • 1.5 tablespoon flour
    • 1 tablespoon paprika

    Garnish:

    • 1 tablespoon parsley minced

    Instructions
     

    • Soaking: In a large bowl (or pot) cover beans with water, and leave to soak for 7-8 hours (or overnight).* The following day strain the beans and discard the water. Then wash them again, strain them, and set the beans aside. 
    • Soup: In a deep pot, heat oil over high and add onion and garlic. Lower to medium and simmer until translucent (2-3 minutes). Add carrots and meat. Simmer for an additional 5-10 minutes occasionally stirring.
    • Add the seasonings and beans in, and cover with 6-7 cups of water. Mix ingredients well, cover with a lid, and raise the temperature to high until the liquid boils (about 15 minutes). Add the bay leaf in.
    • Bring the temperature down to low, and continue cooking until the beans are tender, but not falling apart.*   (Think about 2.5 hours.) If you lose a lot of liquid, add another cup of water during cooking.
    • Roux: A few minutes before the beans are done, heat the oil up in a small pan over high temperature. Lower the temperature, add flour and stir vigorously for 30 seconds to 1 minute ensuring the mixture doesn't clump. Add paprika in and continue stirring for 1-2 minutes more.
    • Whisk the roux into the soup. Cook soup for an additional 5 minutes and remove off heat. (Optional: discard the bay leaf, and garnish the soup with parsley.)
    • Serve warm.* Store in the fridge for up to 3 days. Reheat using your preferred method. If freezing, let cool down to room temp, place in freezer-ware, and freeze for up to 3 months.

    Video

    Notes

    • Video: 
    The video shows a variation of today's bean soup with a base of smoked beef (suho meso) instead of ham. The preparation process is exactly the same for both.
    • Cooking time:
    The length of cooking time varies depending on the type of bean, age of bean, stove, and whether you're using a pressure cooker/Instant Pot or a regular pot. Younger beans will take a shorter period of time. 
    • Ingredients:
    Beans you can use for this ham and bean soup recipe are: cannellini, navy, great northern, canary beans, kidney beans, black beans, cranberry beans, pinto beans, and black-eyed peas. Avoid chickpeas, soybeans and canned beans. 
    Meat you can use: ham, bacon, dried or smoked beef, ham hock, ribs, ham bones, beef bones and sausage. Avoid poultry. 
    • Serving:
    Grah is best when served along a fresh cabbage salad. 
     

    Nutrition

    Serving: 1of 4Calories: 698kcalCarbohydrates: 72.4gProtein: 28.4gFat: 34.2gSaturated Fat: 7gCholesterol: 16mgSodium: 423mgPotassium: 1607mgFiber: 17.3gSugar: 5.3gCalcium: 116mgIron: 21mg
    Tried this recipe?Let us know how it was!

    More Recipes to ❤️

    • ajvar, chutney, pepper chutney, eggplant chutney, balkan spread, balkan dip ajvar, red pepper and eggplant dip, pepper dip | balkanlunchbox.com
      Ajvar
    • Quarter of a burek pie on a plate on gray background.
      Burek
    • White bowl with pasta and tomato on a gray background together with two tomatoes cheese, fork and a pitcher with more tomato sauce.
      Šalša: Croatian (Dalmatian) Tomato Sauce [Few Ingredients, Stovetop]
    • Closeup of four wafers.
      Balkan No Bake Wafer Cake (Oblatne, Oblande)

    Slanci: Balkan Breadsticks

    Nov 6, 2017 · 8 Comments

    Golden bread sticks, painted with salt with just the right amount of crunch. You'll never try other bread sticks again. 

    Golden breadsticks, painted with salt, with just the right amount of crunch. 

    Golden bread sticks, painted with salt with just the right amount of crunch. You'll never try other bread sticks again. 

    The fall has descended upon Sarajevo. A nice reprieve from the scorching summer. The clock moved, the temperatures fell. The sun, bright but farther, is lighting up the sky that the wind previously cleared so well, for a moment it may trick you to go outside without a jacket. But you shouldn't because it is fall, and it will snap back at you quickly.

    There are moments during the day, like the early mornings, when the pink and purple is exchanged by a curtain of heavy fog. Or smog. Or both. For a moment it disorients you, you may feel like you're in Shanghai. But then you see shadows of a tree. It is Sarajevo. It could be no fortress to such futuristic thinking, nor hold the population.

    Turn of the seasons always feels like a gift you've been waiting for. Except once you've had it for a while, you yearn for another one. The original has been seen. And played with. And now you want a different toy. Hold your horses though, for the long seven or eight months of this has just started. It will only get worse.

    My time of initiation back into Sarajevo life has ended. (Although one could easily say Sarajevo provides enough initiations to last for decades.) I'm in. I feel, as they say here, "in my own, on my own." The disbelief of how the new BiH functions had reached unprecedented heights, and then subsided. Except during war, I haven't experienced the conundrums that have now become second nature (medical workers on strike so no doctors at governmental health institutions, water shortages during night and now during the day too, unrivaled incompetence everywhere, plus the most irritating, the sky high attitude with no evidence to allow for it).

    The glue holding it together is humor.

    Even with all these, I don't miss my old life. It was fantastic, unusual, fulfilling, no doubt about it. And yet compared to the strength of this new life, it's as if everything before it was beta testing.

    The blog requires a lot of beta testing as well. Like these salty breadsticks. You'll run into them in every bakery in town. Today's recipe is similar, but with a few distinctions. Usually they're made with white flour (this recipe asks for a mix of corn and white flour), they're long (ours are shorter, but the length is your choice), and super soft (here's where the tables are really turned on you, these are way crunchier).

    These are the perfect appetizer.

    Ideal for those of you who like bread , but it is just not the main attraction on the table for you. Don't take this the wrong way, these are not lacking in taste. If anything, you'll want to eat one after another, after another. However, if you're controlling the amount of bread you consume, these breadsticks are your friend.

    And they're just the right amount of comfort.

    Golden bread sticks, painted with salt with just the right amount of crunch. You'll never try other bread sticks again. 
    Golden bread sticks, painted with salt with just the right amount of crunch. You'll never try other bread sticks again. 
    Golden bread sticks, painted with salt with just the right amount of crunch. You'll never try other bread sticks again. 
    Golden bread sticks, painted with salt with just the right amount of crunch. You'll never try other bread sticks again. 
    Golden bread sticks, painted with salt with just the right amount of crunch. You'll never try other bread sticks again. 

    Slanci: Balkan Bread Sticks

    Aida
    5 from 1 vote
    Print Recipe Pin Recipe
    Prep Time 1 hour hr
    Cook Time 20 minutes mins
    Total Time 1 hour hr 20 minutes mins
    Course Bread
    Servings 5

    Ingredients
      

    Dough:

    • 5.5 ounces white flour
    • 3.5 ounces corn flour
    • ½ teaspoon salt
    • 3.5 ounces yogurt plain Greek, smooth*
    • 1 ounce milk
    • ½ packet of active dry yeast
    • ½ teaspoon sugar
    • 2 teaspoons water

    Topping:

    • 1 egg yolk
    • 1 teaspoon oil
    • 1 tablespoon white flour
    • ½ teaspoon salt
    • 2 tablespoons water

    Instructions
     

    • In a cup dissolve sugar and yeast in water, and leave for 10 minutes.
    • In a large bowl combine white and corn flours with the yeast mixture and mix until integrated. Continue by adding yogurt and then milk, while you work the ingredients into a smooth dough ball (about 5 to 7 minutes). Set aside for 15 or so minutes.
    • Transfer the dough onto a lightly floured working area (if you can get away with no flour even better), and roll it out into a pizza like round the thickness of 2-3 fingers. Slice into 10-14 pieces. Roll each piece out into a stick.
    • Transfer sticks onto an oiled baking pan. (For the pull-apart effect place them close to each other. Otherwise, leave space between each.) Leave for 30 minutes.
    • Heat oven to 395°F. Before placing the pan in the oven, mix oil and egg yolk and paint each stick. Bake breadsticks for 10 minutes.
    • While breadsticks are in the oven, in a small bowl combine flour, salt and water until completely smooth and of the pancake thickness.
    • Take the breadsticks out of the oven, and decorate with a zig-zag line of salt mixture. Return to the oven and bake another 10 minutes.
    • Take out and wrap in a kitchen towel. Leave to rest at least 30 minutes.

    Notes

    * Use European type yogurt, or plain Greek yogurt (mix it until it is smooth and runny, add a little water if necessary).
    Prep time includes time needed to wait for the dough to rest and rise.
    Recipe yields about 10-14 sticks. Serving size is about 2-3 per person.
    Tried this recipe?Let us know how it was!

    Balkan Baked Romano Beans Casserole

    Oct 26, 2017 · 7 Comments

    Serving spoon holding bean casserole.

    Baked Romano beans are a flavorful side showcasing buttery, soft, flat beans in a creamy, garlicky sauce. This 30-minute velvety side pairs well with just about anything. Shall we?

    Serving spoon holding bean casserole.
    [feast_advanced_jump_to]

    Background

    Romano beans (boranija or mahune), also known as Italian flat beans, are versatile and tasty vegetables often used in Mediterranean and Balkan cuisines. (Remember the delicious Romano bean stew?)

    These beans are lush, long, wide, velvety, and soft. They have a unique, tender texture, and mild, buttery flavor. And our baked Romano beans casserole brings these flavors out in the best way!

    This aromatic, savory side is perfectly balanced between luxurious and light. It pairs well with most main courses, from roasted meats to salads! The best part? It's 30 minutes from start to finish!

    Why You'll Love This Recipe

    Indulgent, Restaurant-worthy Side! A quick, simple way to elevate a humble bean into a side you'd get at a high-scale restaurant.

    Simple and Fast! Perfectly easy to make, but packed with flavors using staples you have in your pantry.

    Beautiful Pairing! There is almost nothing that this baked Roman bean casserole doesn't go well with. We dare you to try and find something!

    Ingredients

    You’ll need these ingredients to make baked Romano beans.

    Overhead photo of garlic, sour cream, salt, heavy cream, butter and Romano beans on a white table.
    • Romano beans
    • Butter
    • Salt
    • Garlic
    • Sour Cream
    • Heavy Cream

    Instructions

    Let’s get cooking! Follow these simple steps to make baked Romano beans:

    Six photographs, two by three, of Romano beans being prepared.
    • Step 1. Boil Romano beans in salt water until tender. Strain. Heat oven.
    • Step 2. Combine garlic, heavy cream, and sour cream. Mix well.
    • Step 3. Grease pan with butter.
    • Step 4. Add beans. Top with cream mix. Mix well until integrated.
    • Step 5. (Not pictured) Bake for 20-25 minutes.

    Variations of the Dish

    • Flavors galore! For a dash of heat, add a sprinkle of hot paprika on top. Alternatively, grate some Parm or feta for a tangy feel.
    • Crispy! Let them stay in the oven a few minutes more for the extra crunch on top. You can even sprinkle a few breadcrumbs.
    • Lighter Fare! Substitute heavy cream with Greek yogurt for a lighter version.

    Handling

    Here's how to serve, and keep baked Romano beans.

    • Serve. Serve warm, as a side, with a slice of bread.
    • Store. Store in an airtight container in the fridge for up to 2 days.
    • Reheat. Reheat using your preferred method. Add a splash of water if needed.
    • Freeze. Freeze blanched Romano beans right after straining, but before adding any other ingredients. Place in a freezer bag for up to 1 month. When ready to use, thaw, and continue the steps.

    Recipe FAQs

    How do you cook fresh Romano beans?

    Romano beans taste best either in a stew, or when cooked in salted water, and then baked, like in today's recipe.

    How do you clean Romano beans?

    To clean Romano beans, first remove leaves, branches, and debris from your batch. Proceed to cut off about an inch from the ends, and discard. Finally, cut the remaining beans in half, or quarters.

    To wash, soak in a mix of water and baking soda for 10 minutes, then rinse with regular water.

    How do you eat Romano beans?

    Romano beans are extremely versatile. They taste great in almost any variation, except raw.

    Romano beans go great in stews or casseroles. You can grill, blanch, cook, or bake them alone or with other ingredients.

    Thoughts?

    If you make today's baked Romano beans casserole and like it, please consider leaving a ⭐️⭐️⭐️⭐️⭐️ (5-star) rating. This will help others find the recipe more easily!

    You can also leave a comment, I read EVERY one! Finally, if IG is more your thing, consider tagging us @balkanlunchbox.

    Prijatno, Dobar Tek, and Bon Appetit!

    Serving spoon holding bean casserole.

    Baked Romano Beans Casserole

    Aida
    Tender Romano beans baked in a rich, garlicky cream sauce for a comforting and flavorful side dish.
    5 from 1 vote
    Print Recipe Pin Recipe
    Prep Time 20 minutes mins
    Cook Time 25 minutes mins
    Total Time 45 minutes mins
    Course Side Dish
    Cuisine Bosnian, Croatian, Kosovo, Montenegro, Serbian
    Servings 6
    Calories 353 kcal

    Equipment

    • 1 9-inch (23cm) baking pan or glass bakeware

    Ingredients


    • 1 pound Romano beans cut ends off and discard, and then cut pods into 2-3 inch pieces; look for them early in the season, before thick strings develop
    • 3 teaspoons salt divided
    • 2 tablespoons butter diced
    • 2 garlic cloves peeled, minced
    • 1.3 cups sour cream
    • 1.3 cups heavy cream

    Instructions
     

    • In a large pot combine 4-5 cups (1 liter) of water, Romano beans, and 2 teaspoons of salt. Bring to a boil. Lower to medium and cook for 10-15 minutes, or until Romano beans are fork-tender. Strain.
    • Heat oven to 485°F (250°C).
    • In a bowl, combine the remaining salt, garlic, sour cream, and heavy cream. Mix well until completely integrated.
    • In a baking pan (or glass bakeware), add butter, and top with Romano beans. Add the cream mixture and mix well until completely integrated.
    • Bake for 20 to 30 minutes. Cover with foil if necessary.
    • Serve warm, as a side, with a slice of bread.
      Store in an airtight container in the fridge for up to 2 days.
      Reheat using your preferred method. Add a splash of water if needed.
      Freeze blanched Romano beans right after straining, but before adding any other ingredients. Place in a freezer bag for up to 1 month. When ready to use, thaw, and continue the steps.

    Video

    Notes

    • Notes
    Baking time will greatly depend on the type of Romano beans you get. Older beans take a little longer to soften in water. 
    When looking for Romano beans, look for them earlier in the season. Older beans tend to take a longer time to cook, they can taste tough, and stringy. 
     

    Nutrition

    Serving: 1of 6Calories: 353kcalCarbohydrates: 10gProtein: 4.5gFat: 33gSaturated Fat: 20gCholesterol: 90mgSodium: 800mgPotassium: 250mgFiber: 3gSugar: 3gVitamin A: 2000IUVitamin C: 6mgCalcium: 130mgIron: 2mg
    Tried this recipe?Let us know how it was!

    More Recipe 💙

    • Bowl with soup, spoon, two cups of juice, bread and a kitchen towel on a dark background.
      Instant Pot Bean Soup with Sausage (Pasulj or Grah) [No Soak]
    • Quarter of a burek pie on a plate on gray background.
      Burek
    • Bajadera on a table.
      Bajadera: Balkan Nougat Pralines [No Bake, 40 Minutes, Dessert Bars]
    • Jam, spoon, and dough ball on gray background.
      Fried Dough Balls (Uštipci) [No Yeast]

    Sarma: Best Traditional Balkan Stuffed Sour Cabbage Rolls

    Oct 20, 2017 · 4 Comments

    Stuffed cabbage on a spoon in a copper pot.

    Sarma (traditional stuffed sour cabbage rolls), is possibly the best Balkan dish. Think tender, smoked, and ground meats mixed with rice and seasonings, lovingly wrapped in fermented cabbage, and then simmered for hours. The result is a flavorful, aromatic, and simply unforgettable dish. Let's do sarma together, shall we?

    Stuffed cabbage on a spoon in a copper pot.
    [feast_advanced_jump_to]

    Background

    Where Balkan food is concerned, sarma undisputably holds the “Queen of Winter” title. In this region, it’s not the cold that announces its arrival, but a pot full of soul-warming stuffed sour cabbage rolls on the dinner table.

    Stuffed cabbage is a delicacy made by stuffing cabbage leaves with a filling of meat, rice, and seasonings. Surrounded by pieces of smoked meat, the rolls are layered and simmered until aromas and flavors embrace.  

    I'll venture a guess that like many dishes, stuffed cabbage, or sarma, came over with the Ottomans.  In the Balkans, sarma is prepared across Bosnia and Herzegovina, Croatia, Serbia, North Macedonia, Kosovo, Montenegro, and Slovenia.

    (We’ll address slight sarma regional variations.)

    But then, you’ll also find stuffed cabbage in many other European cuisines. After Balkan sarma, Polish golumpki and German kohlrouladen come to mind as some of the best. 

    What takes Balkan stuffed cabbage rolls to the next level is one ingredient that's used not exclusively, but almost always: fermented (or pickled/ sour) cabbage leaves. As far as we're concerned, without sour cabbage, this dish might as well not exist.

    • IMPORTANT: We write recipes as succinctly as possible on BLB. However, some dishes require and deserve more! Sarma is one of them.

      If you're impatient (no judgment here!) jump straight to the recipe card for stuffed cabbage below. However, if you want the best tips and techniques for making sour stuffed cabbage, keep on reading.

    Ingredients

    Stuffing ingredients for sarma:

    Ingredients for stuffed cabbage placed on a dark blue background.

    Cabbage:

    • The best stuffed cabbage rolls are made with fermented (picked or sour) cabbage leaves. Sarma tanginess and specifically yummy taste come in great part from the acidity caused by fermentation.

      Not all fermented cabbage is the same!

      Some heads will be too salty, some not salty enough. Some will have tougher leaves (cook them longer!), while other leaves will fall apart (best to pick another head). If you find the brand you like, keep buying the same kind.

      As sarma is tastiest when it's small, you'll be cutting each leaf into two, or three pieces and then stuff them.

      If, by some stroke of bad luck, you get convinced into making stuffed cabbage rolls from fresh cabbage, blanch the leaves first.

    Meat:

    • The type of meat is where regional variations come into play. (What follows are generalizations! In the Balkans dishes are prepared differently within families, let alone towns, regions, and countries.)

      For example, stuffed cabbage rolls you'll eat in Bosnia will be either non-pork (ground beef, veal, on rare occasions lamb too, etc.) or pork rolls, as the population is a mix of Muslims, Catholics, and Orthodox Christians.

      On the other hand, in Serbia, with a mostly Orthodox Christian population, you're most likely to encounter cabbage rolls made with pork (usually bacon, ham, ham hock, and/ or ribs).

      Although not as prevalent, vegetarian sarma options are available. In this case, meat is exchanged with additional seasonings and grains.

      Best sarmas have meat in both, stuffing and stew. However, some people avoid putting meat in the stew as there is already enough meat in stuffed cabbage rolls themselves.

    Stuffing meat:

    • Ground beef, ground veal, and ground pork are the best choices (or a mix thereof). Although not as frequently used, ground lamb or ground mutton also work. Some add minced smoked beef, smoked ham, or bacon to the mix. Avoid: ground poultry as the meat is too dry, or mix it with meat with higher fat content.

    Stew meat: 

    • Choose from smoked beef, smoked ham, bacon, ham hock, and/or ribs.

    Roux ingredients for sarma:

    Roux ingredients (oil, tomato paste and white flour) on a dark blue background.
    • Tomato paste: any tomato paste works, but add more water. Sub with tomato sauce.
    • Flour: white flour is best.
    • Oil: sunflower, vegetable, coconut oil, as well as butter, ghee, and bacon grease all work. Avoid: olive oil.

    Remaining ingredients:

    • Rice: as rice has the role of softening the meat, round white rice is the best. Sub with cauliflower rice for the low-carb option. Avoid: long-grain, integral, or brown rice. 
    • Herbs: parsley. The dish is more than flavorful. Keep the herbs simple.  
    • Milk: optionally added to soften the meat.
    • Onions: very finely diced.
    • Garlic: minced. Sub with garlic powder.
    • Seasonings:  salt and pepper.
    • Water/ broth: liquids should, slowly, be replenished during simmering. Keep the stew level about the thickness (an inch) of a finger above the rolls.
    • (Optional) Sour cream: some like to add a dollop of sour cream on top of cabbage rolls when they're served. This lightens the taste.

    Instructions

    Here are the quick instructions for stuffed sour cabbage.

    Four photographs of sarma preparation with ingredients and a hand working them.

    Step 1. Combine all filling ingredients and mix well until integrated.
    Step 2. Separate cabbage leaves from the head, and dip each in water to wash off excess sourness.

    Four photographs of cabbage on a cutting board on dark blue background.

    Step 3. On a cutting board cut each cabbage leaf in half, cut out the "vein" and if the leaves are big, continue cutting into four pieces.

    Eight photographs of a hand with a cabbage leaf and stuffing (instructions how to stuffed cabbage).

    Step 4. Place one leaf piece in your hand, and one tablespoon of the filling in the middle toward the edge of the leaf. Fold the longer leaf end on one side, then roll everything up. Tuck the other side of the leaf in. You'll have a tiny "burrito-like" roll. Continue with the remaining ingredients.

    Two photographs side by side of cabbage veins on a cutting board.

    Step 6. Dice the cabbage leaf veins and set aside.

    Six photographs of roux making.

    Step 7. Heat oil, and whisk in the flour. After the roux is made add tomato paste (or sauce) and water. Whisk vigorously.

    Four photographs of a pot filled with stuffed cabbage.

    Step 8. Place one layer of rolls on the bottom. Follow with meat. Follow meat with diced cabbage. Repeat layers in that order until you run out of ingredients. Cover with water one inch above the last layer. Cook 3 hours.

    Handling

    Serving: Put several sarmas in a serving bowl, and top with one or two ladles of stew. How many sarmas to serve will depend on the eater. Some eat 1-2, some up to 7-8. Optionally, add a dollop of sour cream on top.

    Assembly: You can assemble sarma the night before and then cook them the following day. Keep assembled sarma in the fridge.

    Storing: Store in the fridge for up to 3 days.

    Reheating: The best way to reheat it is on the stovetop, on low, for at least 15 minutes, (or until it's hot). Add a little bit of water to the stew if it's too thick, or it's running low. Important: only reheat as many sour cabbage rolls as you plan on eating. Do not reheat the entire pot of sarma unless you'll eat everything! Otherwise, you'll have to throw it away, as sarma should never be reheated twice.

    Freezing:  It's a long process to make them, so it's understandable you may want to freeze some of your sour cabbage rolls. You have two options:

    1. Wait for cabbage rolls to cool down completely after they're cooked. Place in freezer ware. Freeze for up to 3 months. Transfer to the fridge the night before you plan to eat them. Add a little bit of water. Reheat by following the directions above.

    2. Place cabbage rolls into freezer ware right after you stuff them, but before cooking. Freeze for up to 3 months. Transfer to the fridge the night before you plan to cook them. Cook by following the recipe card directions.

    Personal tip: we almost always go with option 2.

    A pot filled with stuffed cabbage and a spoon.

    Expert Tips

    • Prep ahead! As it takes a long time to make, and it tastes amazing the following day, sarma is best when prepared the night ahead. Wait for it to cool down and reheat following the instructions above.
    • Layering: When layering sarma in the pot, you can also put one or two cabbage leaves on the bottom of the pan after you make the roux, but before layering sarma rolls.
    • Handle with care! Before stuffing, wash cabbage leaves slightly and fast. You want some of the sourness and salt to be washed off, but only a little bit. Fermented cabbage is the reason why these rolls are so incredibly tasty.
    • Size matters! The smaller the sarma cabbage rolls are, the tastier they are. Don't let anyone convince you differently! Cut each cabbage leaf into at least two pieces, sometimes three, and if the leaves are very big, even four. But find the balance! Don't go overboard! If you cut them too small you won't be able to stuff the pieces.
    • Use your hands! For the best taste, mix the stuffing with your hands so that the ingredients are mixed evenly and consistently.
    • But also, watch those hands! Latex gloves are your friend while stuffing the rolls due to the acidity. If you don't like gloves, have a bowl of water nearby where you can dip your hands every now and then as you're stuffing the rolls.
    Stuffed sour cabbage in a pot.

    Recipe FAQs

    What do you eat cabbage rolls with?

    Cabbage rolls go great with a side of homemade bread and mashed potatoes. Some serve it with a dollop of sour cream as well. You'll be very thirsty, so have a beverage near, preferably water.

    Where to buy sour cabbage leaves?

    If you're not from the Balkans chances are you don't have a barrel full of sour cabbage heads. No worries! Your choices are amazon, local European markets, or even your grocery store. Alternatively, you can ferment a cabbage head in just 5 days following Jasna's easy instructions here. Remember, you want whole sour (fermented/ pickled) leaves, not sauerkraut.

    Can I stuff fresh cabbage? 

    Sure. But why would you? Fresh stuffed cabbage is disgusting. If you still want to try it here's how: 1. Separate leaves from the cabbage head. 2. Blanch the leaves, then cool. 3. Follow the rest of our recipe. Oh, and never freeze these!

    More Recipes

    Check out our selection of other stuffed veggies recipes on the site:

    • Stuffed Zucchini
    • Baked Stuffed Peppers
    • Potato Stuffed Peppers
    • Baked Stuffed Eggplant
    • Dolma Collection: Stuffed Onion, Stuffed Swiss Chard, Stuffed Tomatoes

    Thoughts?

    If you made Sarma (sour stuffed cabbage) and liked it, please consider giving it a ⭐️⭐️⭐️⭐️⭐️ (5-star) rating. This helps others find the recipe more easily!

    Also, feel free to leave a comment (I read each one!), and don't forget to tag a photo #balkanlunchbox, or us @balkanlunchbox, on IG.

    Prijatno and bon appetit!

    Stuffed cabbage on a spoon in a copper pot.

    Sarma: Stuffed Sour Cabbage Rolls

    Aida
    Balkan sarma, or rolls, made with leaves from pickled cabbage is deservingly called "Queen of Winter."
    5 from 3 votes
    Print Recipe Pin Recipe
    Prep Time 45 minutes mins
    Cook Time 3 hours hrs
    Total Time 3 hours hrs 45 minutes mins
    Course Main Course
    Cuisine Bosnian, Croatian, Kosovan, Macedonian, Montenegrin, Serbian, Slovenian
    Calories 3092 kcal

    Ingredients


    Filling:

    • 16 ounces ground beef or veal, lamb, mutton, pork
    • 3-4 ounces bacon or smoked (dried) beef (suho meso) diced, or pastirma or cured ham
    • 7 ounces rice white round grain
    • 2 onions smaller, peeled, minced
    • 3 garlic clove peeled, minced
    • 1 tablespoon stock powder or Vegeta, bouillon stock
    • Salt and pepper to taste
    • (Optional) milk about 2 ounces for softening the filling

    Cabbage:

    • 1 larger or 2 smaller sour cabbage heads about 24 ounces

    Roux and sauce:

    • 3.5 ounces oil
    • 5.5 ounces tomato sauce or 2 tablespoons tomato paste
    • 1 tablespoon flour
    • remaining cabbage and leaf veins diced
    • 3-4 ounces bacon or smoked (dried) beef (suho meso) or pastirma, cured ham, ham hock, ribs
    • water or beef broth
    • (Optional) sour cream

    Instructions
     

    • In a larger bowl, combine all filling ingredients and mix thoroughly with your hands until integrated. Set aside.
    • In a big bowl add lukewarm water. Separate sour cabbage leaves from the cabbage head one by one. Stop when you have about ¼ to ⅓ of the cabbage head left. (Keep the remaining cabbage head(s).) Dip each leaf into the bowl with water, quickly take it out, and set it aside on a plate. (This is to wash the extra saltiness off.) You can try a piece to see whether it's still too salty to your taste. If it is, you can dip it in the water again.
    • Place cabbage leaves on a cutting board (one by one), and cut out the thick middle vein from each leaf. (Set veins aside with the remaining cabbage head.) Proceed to cut each leaf in half. If the leaves are large, cut them into three, even four pieces.
    • Take one leaf piece into your palm. Place about one tablespoon of the filling in the middle toward the edge of the leaf. Fold the longer leaf end on one side of the filling toward the filling, and roll everything away from you, squeezing lightly as you roll. Once rolled, tuck the other side of the leaf in with your finger. (You'll essentially end up with a tiny burrito-like roll.) Set your sour cabbage roll aside.
    • Repeat until you run out of ingredients. (You should have about 25-35 rolls with this amount of ingredients, depending on how large you make your rolls. The best rolls are about 1.5x2.5 inches.)
    • Combine leaf veins with the remaining cabbage head and dice them.
    • In a large pot, heat oil on medium. When it heats up, whisk in the flour until you get a roux (2-3 minutes). Add in the tomato sauce and 1 cup of hot water. (If using tomato paste, add 1.5 cups of hot more.)
    • Place the first layer of rolls on the bottom of the pot. Follow up with a handful of meat, and diced cabbage. Repeat layering until you run out of ingredients. Cover with water (or broth) at the evel about the thickness (an inch) of a finger above the rolls.
    • Cook on low for 3 hours. Do not stir. Keep replenishing the stew levels so they're at the same level throughout cooking. You'll add about 5 cups of water in total, although this is just an approximation.
    • Serve anywhere from 2-6 rolls per person, and cover with 1-2 ladles of stew. The best sides are the bread and mashed potatoes. (Optional) Add a dollop of sour cream. Store in the fridge for up to 3 days. Reheating and freezing directions are in the notes.

    Video

    Notes

    *Please note that nutrition information is a VERY rough estimate. Not all ingredients were available on the list (sour cabbage, dried beef, etc.). Kimchi information was used instead of sour cabbage, as the closest.  Also, the calculation will greatly depend on the kind of meat you're using. Furthermore, some people eat 2-4 rolls, while others will eat 6-8 sour cabbage rolls. 
    Assembly: You can assemble sarma the night before and then cook them the following day. Keep assembled sarma in the fridge.
    Size matters! The smaller the sarma cabbage rolls are, the tastier they are. So cut each cabbage leaf into at least two pieces, sometimes three, and if the leaf is very big four. However, don't go overboard! If you cut them too small you won't be able to stuff the pieces.
    Reheating: The best way to reheat it is on the stovetop, on low, for at least 15 minutes, (or until it's hot). Add a little bit of water to the stew if it's too thick, or running low. Important: only reheat as many cabbage rolls as you plan to eat. Do not reheat the entire pot of sarma unless you'll eat everything! Otherwise, you'll have to throw it away as sarma should never be reheated twice.
    Freezing:  It's a long process to make them, so it's understandable you may want to freeze some of your sour cabbage rolls. You have two options:
    1. Wait for cabbage rolls to cool down completely after they're cooked. Place in freezer ware. Freeze for up to 3 months. Transfer to the fridge the night before you plan to eat them. Add a little bit of water. Reheat by following the directions above.
    2. Place cabbage rolls into freezer ware right after you stuff them, but before cooking. Freeze for up to 3 months. Transfer to the fridge the night before you plan to cook them. Cook by following the recipe card directions. (We prefer option 2.)
    Layering: when layering in the pot, some like to first place one or two cabbage leaves on the bottom after the roux before layering sarma rolls. Up to you.
    Size: make them as small as possible. They taste better this way. 
    Hands: protect your hands while stuffing the cabbage by either wearing latex gloves or washing them in between stuffing. 
    Ingredients: Detailed ingredient notes are in the article. 

    Nutrition

    Serving: 6rollsCalories: 3092kcalCarbohydrates: 200gProtein: 132gFat: 194gSaturated Fat: 43gPolyunsaturated Fat: 31gMonounsaturated Fat: 104gTrans Fat: 6gCholesterol: 402mgSodium: 4081mgPotassium: 2691mgFiber: 9gSugar: 16gVitamin A: 680IUVitamin C: 89mgCalcium: 245mgIron: 18mg
    Tried this recipe?Let us know how it was!
    • Woman holding halved pogacha.
      Pogacha (Pogača): Traditional Balkan Bread Without Yeast
    • Sour cabbage head on a blue plate, a pitcher of kraut juice and a white plate with sauerkraut leaves on it, on a marble background.
      Fermented Cabbage Heads (Homemade Sauerkraut Heads, Kiseli Kupus) [Balkan Recipe, Three Ingredients]
    • Russian Salad or Salad Olivier
    • Two glasses of elderflower cordial on a lime background.
      Elderflower Cordial (Zova, Bazga) [4 ingredients]

    Layered Burek (Slagani Burek)

    Oct 18, 2017 · 8 Comments

    Ground beef phyllo pie. Ground beef (or veal) layered in phyllo sheets softened with butter, then baked until golden. Much pie. Not much fuss. 

    Layered burek (slagani burek) is a comforting Balkan classic famous for its no-fuss preparation, and familiar cozy taste. This pie is all about flaky dough and juicy meat. Shall we?

    Ground beef phyllo pie. Ground beef (or veal) layered in phyllo sheets softened with butter, then baked until golden. Much pie. Not much fuss. 
    [feast_advanced_jump_to]

    Background

    Pies are a fundamental part of Balkan cuisine. They trace their roots back to the Ottoman Empire, which introduced them to the region. Over the centuries, Balkan cooks perfected their own versions.

    Burek meat pie tends to stand out for its rich filling and crispy-and-soft phyllo. It takes a while to perfect burek from scratch, so we often opt for today's quick, layered, and equally delicious kind.

    Today's layered burek was inspired by the type of pie you get for breakfast or lunch at a local bakery. It consists of phyllo dough sheets stuffed with a filling and then baked until - we say this often because it's true 😂 - golden perfection.

    Why You'll Love Layered Burek

    • Simplest Burek Yet! No need for complicated dough karate. Phyllo + filling on repeat = you got yourself a pie!
    • Quick! Less than an hour from start to finish.
    • Versatile! Add or subtract from the filling - potatoes, cheese, zucchini, squash, spinach, different types of meat, etc. - and still end up with an amazing, flavorful bite!
    • Crispy but Tender! Buttery phyllo layers and juicy meat are perfect companions.

    Ingredients

    To make layered burek, get yourself some:

    Ingredients on wooden table: phyllo, ground beef, onion, butter, seasonings.
    • Phyllo Dough. Look for flat phyllo sheets. Avoid phyllo that's pre-shaped (cups, et al.).
    • Ground Beef. If possible, look for beef with a lower fat content. Substitute with ground pork, lamb, or a combination of.
    • Mineral Water. (Not pictured.) Any non-flavored carbonated water will do.
    • Butter.
    • (Optional) Oil. Most oils will do, but cooking spray oil is the easiest to use. Avoid olive oil.
    • Onion. Red, yellow, or white onion. Avoid spring onions or scallions.
    • (Optional) Carrots or other veggies to add to the beef.
    • Seasonings. Salt and pepper.
    • (Optional) Vegeta, seasoned salt, paprika, bouillon powder, bouillon cube.

    Instructions

    Just follow these quick steps to have this dreamy ground beef pie on your table in no time.

    Two photos in one showing preparation of burek filling in bowls.

    Step 1. Make the filling.

    Two photos in one showing preparation of burek topping butter melted in soda water.

    Step 2. Melt butter and mineral water together.

    Four photographs in one of a pan greased, then phyllo layered, and finally the filling.

    Step 3. Layer the pie. Grease the pan, place 2-3 sheets of phyllo and grease them also (trim phyllo if needed). Top with two handfuls of filling. Repeat until you're out of ingredients.

    Two photos of burek preparation.

    Step 4. Top with the final 2-3 sheets of phyllo, and grease them too.

    Step 5. Bake.

    Step 6. (Not pictured.) Top with more butter and let rest.

    Handling

    A few tips on handling layered burek.

    Serving. Let the pie cool for at least 15 minutes. Serve with yogurt, kefir, or a local beverage like elderflower juice. A simple salad like shopska, or shredded cabbage also taste great with this layered burek.

    Storing. If planning to store burek, it's best to keep the remaining pie in one piece rather than cutting it up.

    Storing it for a day? Cover the pan with a kitchen towel and keep it in the turned-off oven or a bread box. Keeping it longer than a day? Place it into a container with a lid and transfer to the fridge.

    Reheating. Reheat using your preferred method. We find that reheating pies in the oven at 300°F (150°C) for a few minutes produces the best results. However, some people skip reheating and eat the layered burek cold.

    Expert Tips

    Here are a few expert tips that will make this layered burek recipe even easier than it is.

    Phyllo. Wrap up leftover phyllo in a plastic wrap and keep in the fridge up to a week.

    Baking. Every oven is different. If the top of your layered burek browns too quickly, cover it loosely with foil for the rest of the baking.

    Variations. Play around with fillings until you find the one you like the best.

    More Phyllo Pie Dishes

    Here are a few more phyllo + filling ideas for you:

    • Three pieces of pie on top of each other.
      Phyllo Cheese Pie (Pita Sirnica or Cheese Burek)
    • Plum Pie Recipe
    • Three pieces of spinach pie.
      EASY Feta and Ricotta Cheese and Spinach Pie With Phyllo Dough
    • A brown plate with pie on it in the front, and a pan with pie and a knife in the background, all on a marble gray background.
      Zucchini Pie With Phyllo Dough and Cheese Filling

    Thoughts

    If you make today’s layered burek (slagani burek) and love it, please consider leaving a ⭐️⭐️⭐️⭐️⭐️ (5-star) rating—it helps others find the recipe more easily!

    You can also leave a comment; I read every single one! And if Instagram is more your thing, tag us @balkanlunchbox—we’d love to see your creations.

    Prijatno, Dobar Tek, and Bon Appétit!

    Ground beef phyllo pie. Ground beef (or veal) layered in phyllo sheets softened with butter, then baked until golden. Much pie. Not much fuss. 

    Layered Burek (Slagani Burek)

    Aida
    Juicy meat filling layered in buttery, crispy layers.
    5 from 2 votes
    Print Recipe Pin Recipe
    Prep Time 20 minutes mins
    Cook Time 30 minutes mins
    Total Time 50 minutes mins
    Course Main Course
    Cuisine Bosnian, Croatian, Serbian
    Servings 4
    Calories 787 kcal

    Equipment

    • 1 12-inch (30cm) pan

    Ingredients


    • 16 ounces ground beef substitute with veal, pork, lamb, or a combination
    • 1 onion small, minced
    • salt and pepper to taste
    • 1 teaspoon oil
    • 16 ounce phyllo dough about 16-18 sheets or so
    • 1 ounce butter
    • 3.5 ounces mineral water non-flavored
    • (Optional) Additional seasonings like Vegeta, bouillon, paprika, garlic, etc.
    • (Optional) 1 Carrot or 1 potato minced

    Instructions
     

    • In a large bowl, combine the meat, seasonings, onion, and a tablespoon of oil. Mix well until integrated.
    • In a small pot, combine butter and mineral water. Heat on low until butter melts.
    • Grease the pan, and layer two or three sheets of phyllo on the bottom, greasing each lightly with butter and oil mixture. If your phyllo sheets are larger than the pan, cut them to fit the pan. (You can 'play Tetris' with the dough here a bit. One phyllo sheet may end up being more than one layer.) Heat oven to 480°F (250°C).
    • Take two, three handfuls of the filling and spread it over the top phyllo sheet in small chunks. Add another one to two layers of phyllo on top of the filling, again greasing each with butter and oil. Then add another couple of handfuls of the filling on top of the phyllo. Repeat until you are out of ingredients. (Reserve 2-3 layers of phyllo for the top.)
    • Layer the final layers, greasing each with butter and oil. If you can, make the top layer be in one piece. (For example, you can put a whole phyllo sheet on top and tuck the ends in on the sides.)
    • Bake for 5-10 minutes, or until the pie blushes. Lower to 390°F(200°), and bake 20-30 minutes. Rotate the pan once or twice during baking, and cover with foil or baking paper if it's blushing too much.
    • Turn the oven off, and spray the top of the pie with melted butter. Leave in the warm oven for a few more minutes. (If the phyllo blushed too much during baking, you can remove the top phyllo layer and discard, and then spray with butter)
    • Serving. Let the pie cool for at least 15 minutes. Serve with yogurt and a salad.
      Storing. If planning to store burek, it's best to keep the remaining pie in one piece rather than cutting it up. Store it in the oven for up to a day or in the fridge for up to 3.
      Reheating. Reheat using your preferred method, or eat cold if you prefer.

    Notes

    • Serving Size
    Please note that the serving size is generous. You're welcome to divide the pie into 5 or 6 servings. 
    • Nutritional Information
    Nutritional information was calculated with a potato added in.
     

    Nutrition

    Serving: 1of 4Calories: 787kcalCarbohydrates: 84.44gProtein: 44.38gFat: 28.69g
    Tried this recipe?Let us know how it was!

    More Recipe 💙

    • Plate with meatballs and rice, glass of juice and bread on a gray background.
      Bosnian Meatballs in Sauce (Ćufte)
    • A hand holding a bottle and pouring liqueur into a shot glass on a gray background.
      Homemade Sour Cherry Liqueur (Cherry Brandy, Višnjevača, Višnja, Višnjevac) [Three Ingredients]
    • A bowl with potato and carrot soup, a spoon, bread, salt and pepper on a gray background.
      Simple Potato Soup Recipe [Stovetop, Few Ingredients]
    • A piece of integral bread with marmalade and a jar of marmalade with a wooden spoon on top, on a gray background.
      Orange Jam (Orange Marmalade) [No Pectin, Stovetop, 1-hour, 3-ingredients]

    • « Go to Previous Page
    • Page 1
    • Interim pages omitted …
    • Page 7
    • Page 8
    • Page 9
    • Page 10
    • Page 11
    • Interim pages omitted …
    • Page 16
    • Go to Next Page »

    Primary Sidebar

    Aida and Aleksandra of Balkan Lunch Box, standing together.

    Welcome! I'm Aida, creator of Balkan Lunch Box, food blog about traditional and contemporary Balkan cuisine. My sister Aleksandra helps me.

    Learn more about me →

    As seen on

    Popular

    • Three biscuits on a gray background, one being halved with a fork.
      Čupavci: Balkan Lamingtons [One Hour]
    • Closeup of four wafers.
      Balkan No Bake Wafer Cake (Oblatne, Oblande)
    • Old Fashioned Goulash with Beef and Mushrooms
    • Stewed apple in a clear bowl, on the table.
      Stewed Stuffed Apples in Syrup (Tufahije)
    • Soup in a silver bowl with a lid, a kitchen cloth, two slices of bread, a lemon wedge and a spoon.
      Okra Soup: Creamy Chicken Soup with Okra (Bosnian Bey's Soup, Begova Čorba)
    • ajvar, chutney, pepper chutney, eggplant chutney, balkan spread, balkan dip ajvar, red pepper and eggplant dip, pepper dip | balkanlunchbox.com
      Ajvar
    • Moussaka in a pan.
      EASY Serbian Ground Beef Potato Moussaka Casserole
    • Closeup of a stuffed pepper.
      Best Classic Baked Stuffed Peppers with Ground Beef and Rice (Punjene Paprike)
    • Quarter of a burek pie on a plate on gray background.
      Burek
    • Rice and chicken in a sheet pan, overhead.
      Easy Baked Chicken Over Rice Casserole (Chicken Thighs and Drumsticks) [4 Ingredients, 1 Pan]

    Favorite Salads

    • Bowl with carrots and apple, and carrot and apple and a spoon on a table.
      Grated Apple and Carrot Salad [Two Ingredients, Ten Minutes]
    • A bowl of carrot and beet salad, a beet, carrots and fork on the side.
      Grated Beet and Carrot Salad [Five Ingredients, Ten Minutes]
    • Shopska Salad

    Latest & Greatest

    • A ladle holding bean soup above the blue bowl, on an orange background.
      High Protein Balkan Bean Soup (Visokoproteinski Grah/ Visokoproteinski Pasulj)
    • A glass bowl full of stuffed peppers.
      21+ Pepper Recipes
    • A hand holdling a fork with scallion salad above a black bowl filled with salad on an orange background.
      Scallion Salad with Sour Cream (Lukmira) [2 Ingredients, 5 minutes]
    • Four photographs of different stews in one pin.
      14+ Best Stew Recipes


    Footer

    ↑ back to top

    About

    • Privacy Policy
    • Accessibility Statement

    Newsletter

    • Sign Up! for emails and updates

    Contact

    • Contact

    Copyright © 2014 - 2025 Balkan Lunch Box

    Rate This Recipe

    Your vote:


    A rating is required
    A name is required
    An email is required